26 english
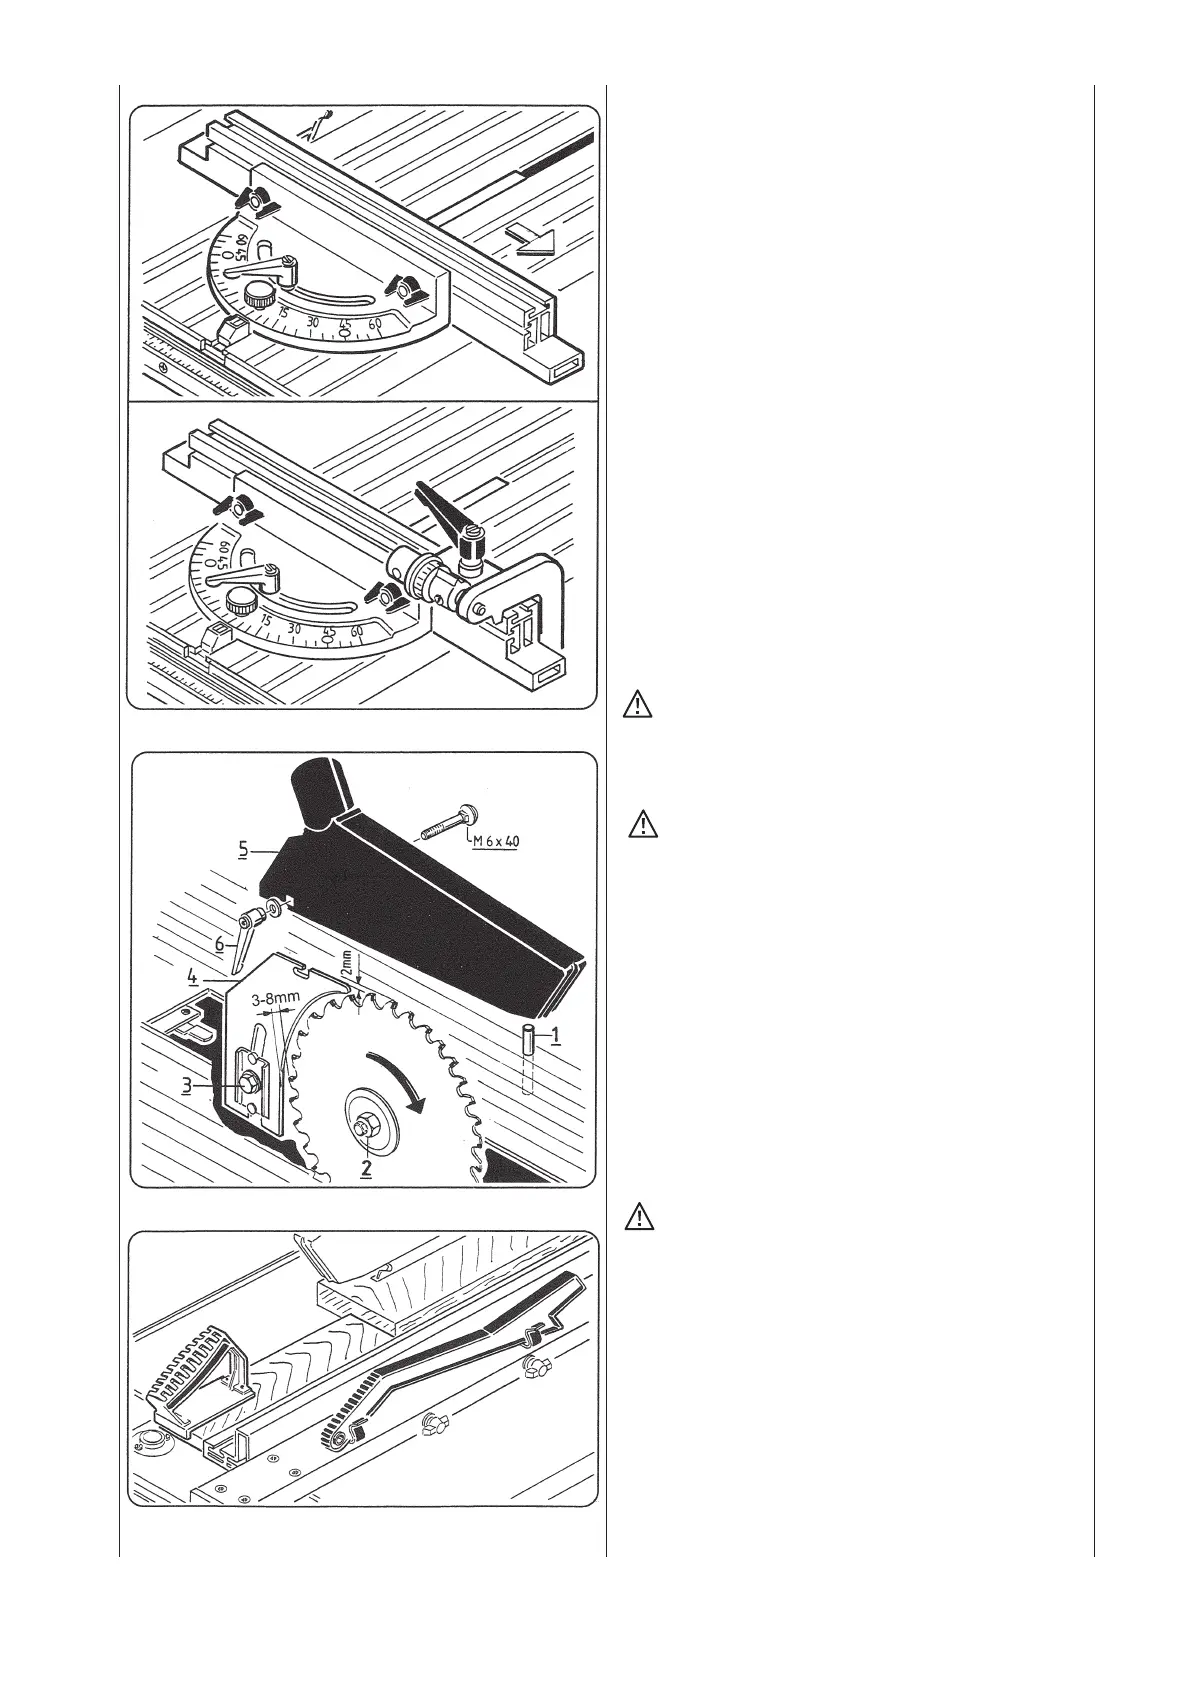
Crosscut / mitre gauge
Fig. "R"
Thecrosscut/mitregaugecanbettedtotheleftortothe
right of the sawblade.
The infinitely adjustable turning Zone is 0-60° on both sides
andisxedwithatommyscrew.
Fixthesettingat0° and 45° with the socket pin and tighten up
the tommy screw.
Folcling stop
(accessory)
Thefoldingstopwhichisttedontothestoprail,isanideal
supplementtothecrosscut/mitregauge.
Theneadjustmentontheendstopenablesexactsettingsvia
the knurled screw.
Changing the sawblades
Fig. "S"
IMPORTANT!
Only use sharp, tear-free, unde- formed ,,Original
scheppach sawblades“.
If the saw blade slot becomec worn out replace the table inlay.
CAUTION!
When changing the sawblade take out the mains plug!
1 Holding mandre
2 Left-handed hex. nut M 20
•Takeoutthelefthandtableinlay.
• Insert the holding mandrel (1) into the saw spindle through
the bore in the right-hand side of the table.
Forreleasingortighteningupthehex.nutM20 (2) the saw
spindle is locked with the holding mandrel.
• Make note of the running direction of the sawblade.
Push-stick and push-grip
Fig. "T"
•Forcuttingnarrowworkpieceswithadistancebetweenthe
sawblade and the stop rail of less than 120 mm, it is
essential to use the push-stick.
• For pushing narrow specially shaped workpieces use the
push-grip. The respective push-blocks can be prepared by
theUserandattachedtothepushgrip.
Fig."R"
Fig."S"
Fig."T"