SERVICE TRAINING
Service Manual
7
Rock Valve
M
E
M
B
E
R
A
M
E
R
I
C
A
N
C
O
N
C
R
E
T
E
P
U
M
P
I
N
G
A
S
S
O
C
I
A
T
I
O
N
S
t
a
y
c
l
e
a
r
.
C
o
n
t
a
c
t
w
i
ll
r
e
s
u
lt
in
d
e
a
t
h
o
r
s
e
r
io
u
s
i
n
j
u
r
y
i
f
t
h
e
u
n
i
t
b
e
c
o
m
e
s
e
l
e
c
t
r
i
c
a
l
ly
c
h
a
rg
e
d
.
T
h
i
s
m
a
c
h
i
n
e i
s
r
e
m
o
t
e
c
o
n
t
r
o
l
le
d
a
n
d
m
ay
s
t
a
r
t
a
t
a
n
y
t
im
e
.
S
t
op
e
n
g
i
n
e
b
e
f
o
r
e
s
e
r
vi
c
in
g
u
n
it
.
K
e
e
p
h
a
n
d
s
o
u
t
o
f
h
o
p
p
e
r
an
d
va
l
v
e
a
s
s
e
m
b
l
y
.
S
e
e
o
p
e
r
a
t
i
o
n
m
a
n
u
al
if
a
c
c
es
s
is
re
q
u
i
r
e
d
.
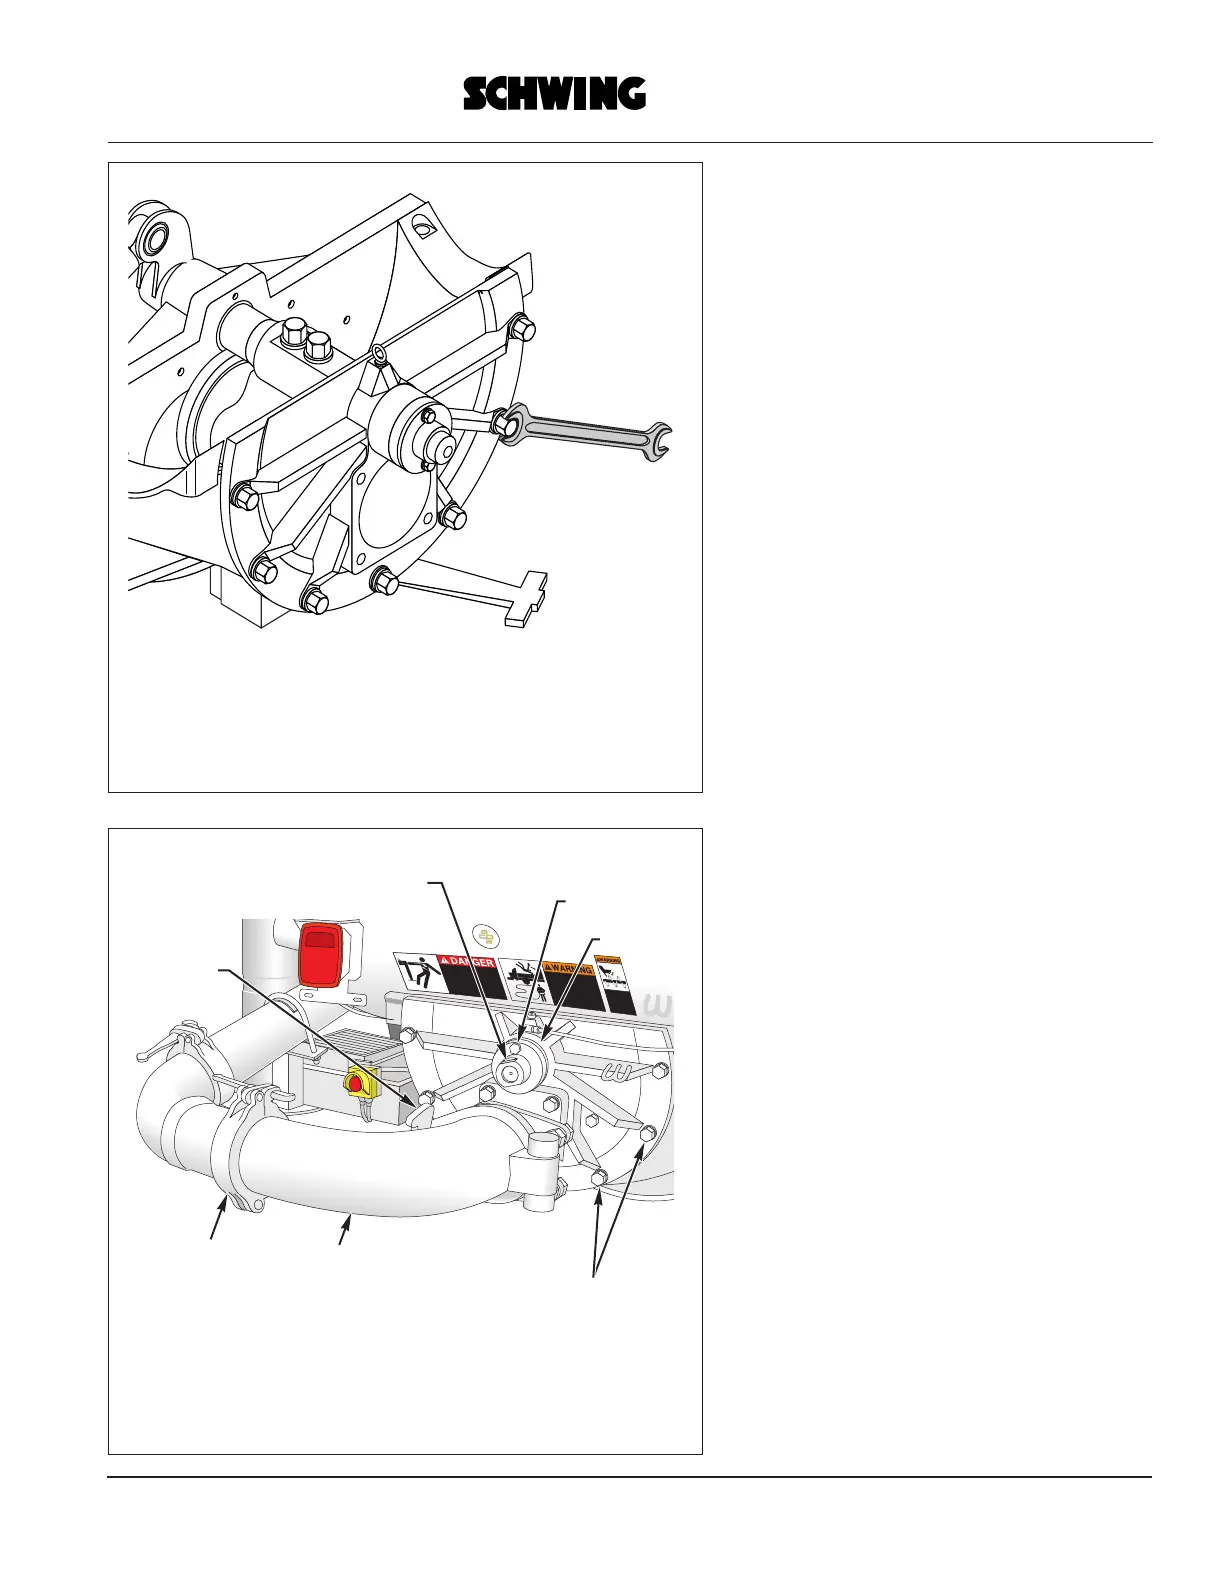
Tapered bend
Cover bolts
Spacer
Keeper Bolt
Tension Nut w/Wrench flats
Wedge
6 inch clamp
10. Be sure there is no debris between the back
cover and the rock valve housing. If there is,
clean it out. Tighten the cover bolts just
enough to bring the back plate up against the
rock housing. Then tighten each bolt equally,
using a torque wrench. Alternate which bolts
you tighten, as you would when tightening a
wheel on a car. The torque specification for
these bolts (M24 x 60, 8.8 hardness) is 485
ft./lb. Replace the bolts once per year.
11. Position the hopper grate over the hopper.
Bolt it into place.
12. Tighten the tension nut. Tighten the keeper
bolt.
13. Push the tapered bend closed and install the
wedge. Remember to install the hairpin.
14. Install the 6-inch clamps and the hairpin.