7
ASSEMBLY INSTRUCTIONS
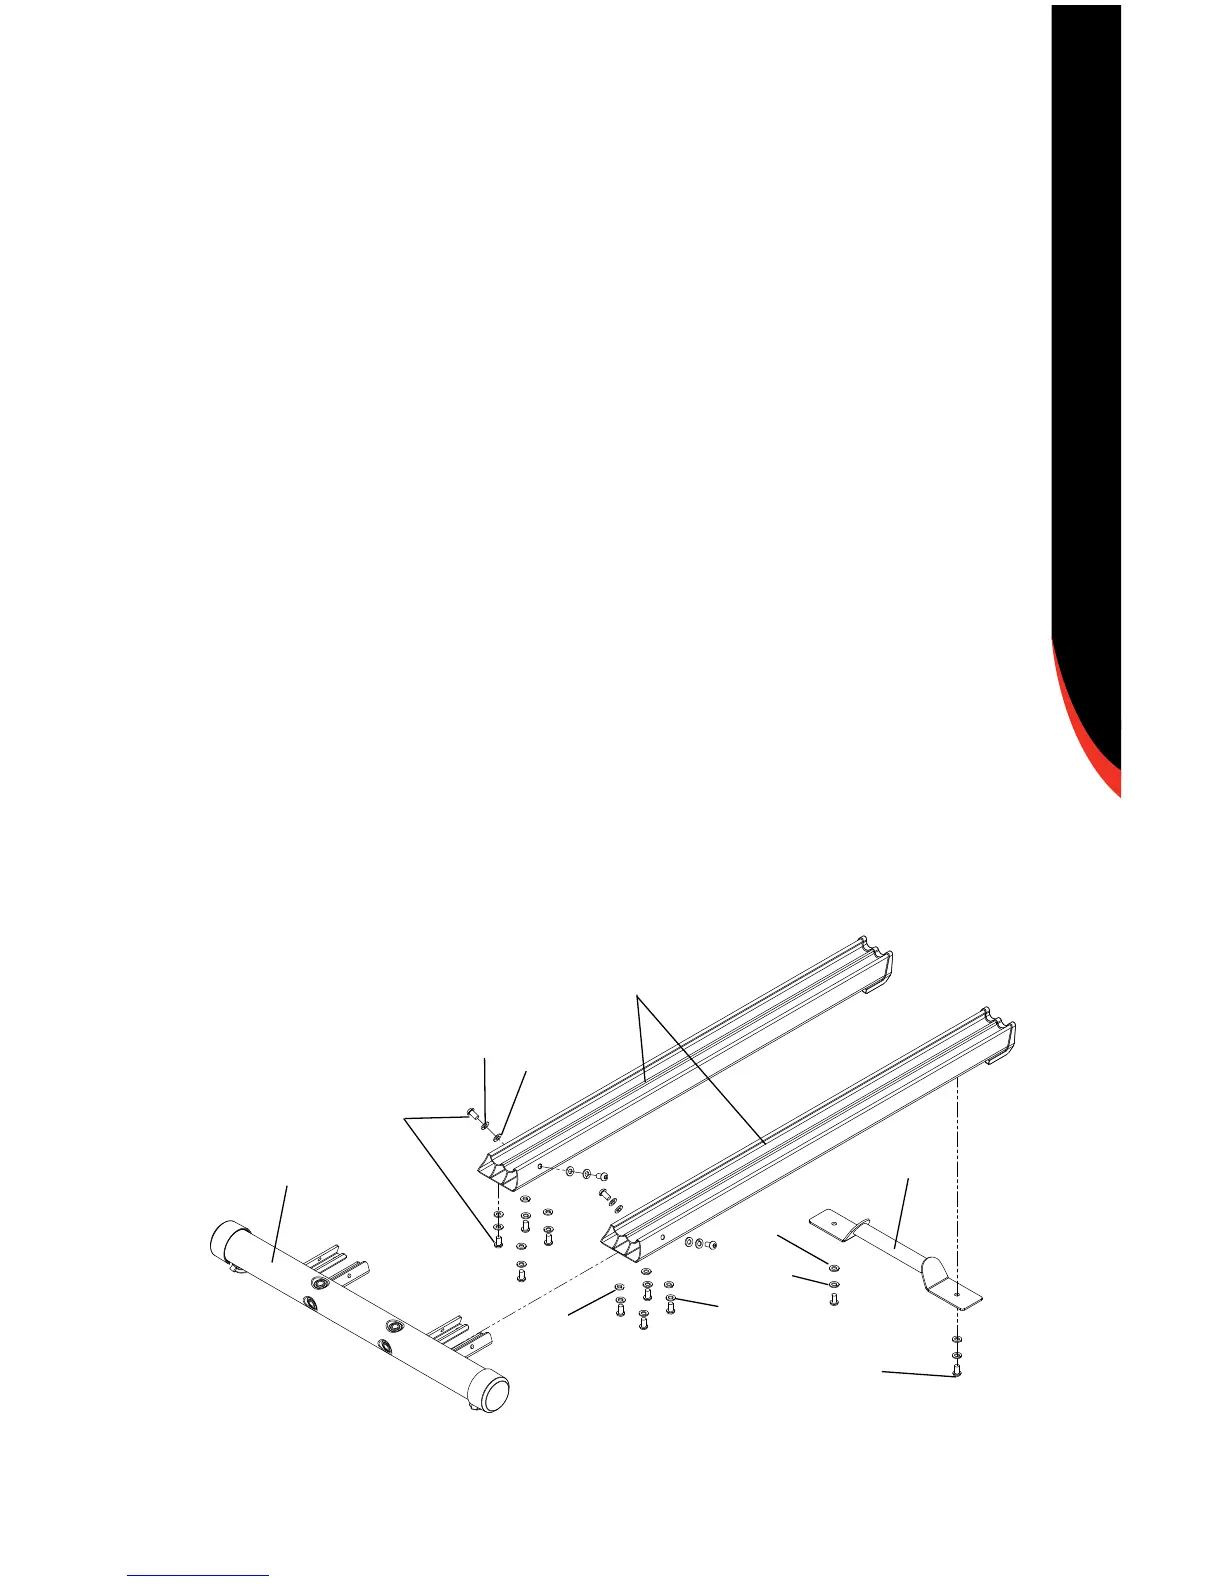
Step 1 Install Rear Stabilizer and Extrusion Handlebar
Parts:
• Two Extrusion Assemblies (Ref. H)
• Rear Stabilizer (Ref. G )
•ExtrusionHandlebarAssembly(Ref.I)
Tools:
•SuppliedAllenWrench
1-1 Attach,butdonottighten,theExtrusionAssemblies(RefH)
totheRearStabilizerAssembly(RefG)usingtwelve
M8x15Lbuttonhead(Ref1)twelveM8washerslocking
(Ref5)andtwelveM8washersregular(Ref3).
1-2 AttachtheExtrusionHandlebarAssembly(RefI)totheExtrusion
AssembliesusingtwoM8x15Lbuttonhead(Ref1),
twoM8washerslocking(Ref5)andtwoM8washersregular
(Ref 3).
1-3CompletelytightenalloftheHardware.
H
G
I
1
3
3
3
1
5
5
5