13
8. Final Inspection
Inspect your machine to ensure that all hardware is tight and components are properly assembled.
Be sure to record the serial number in the field provided at the front of this manual.
Do not use or put the machine into service until the machine has been fully assembled and inspected for
correct performance in accordance with the Owner’s Manual.
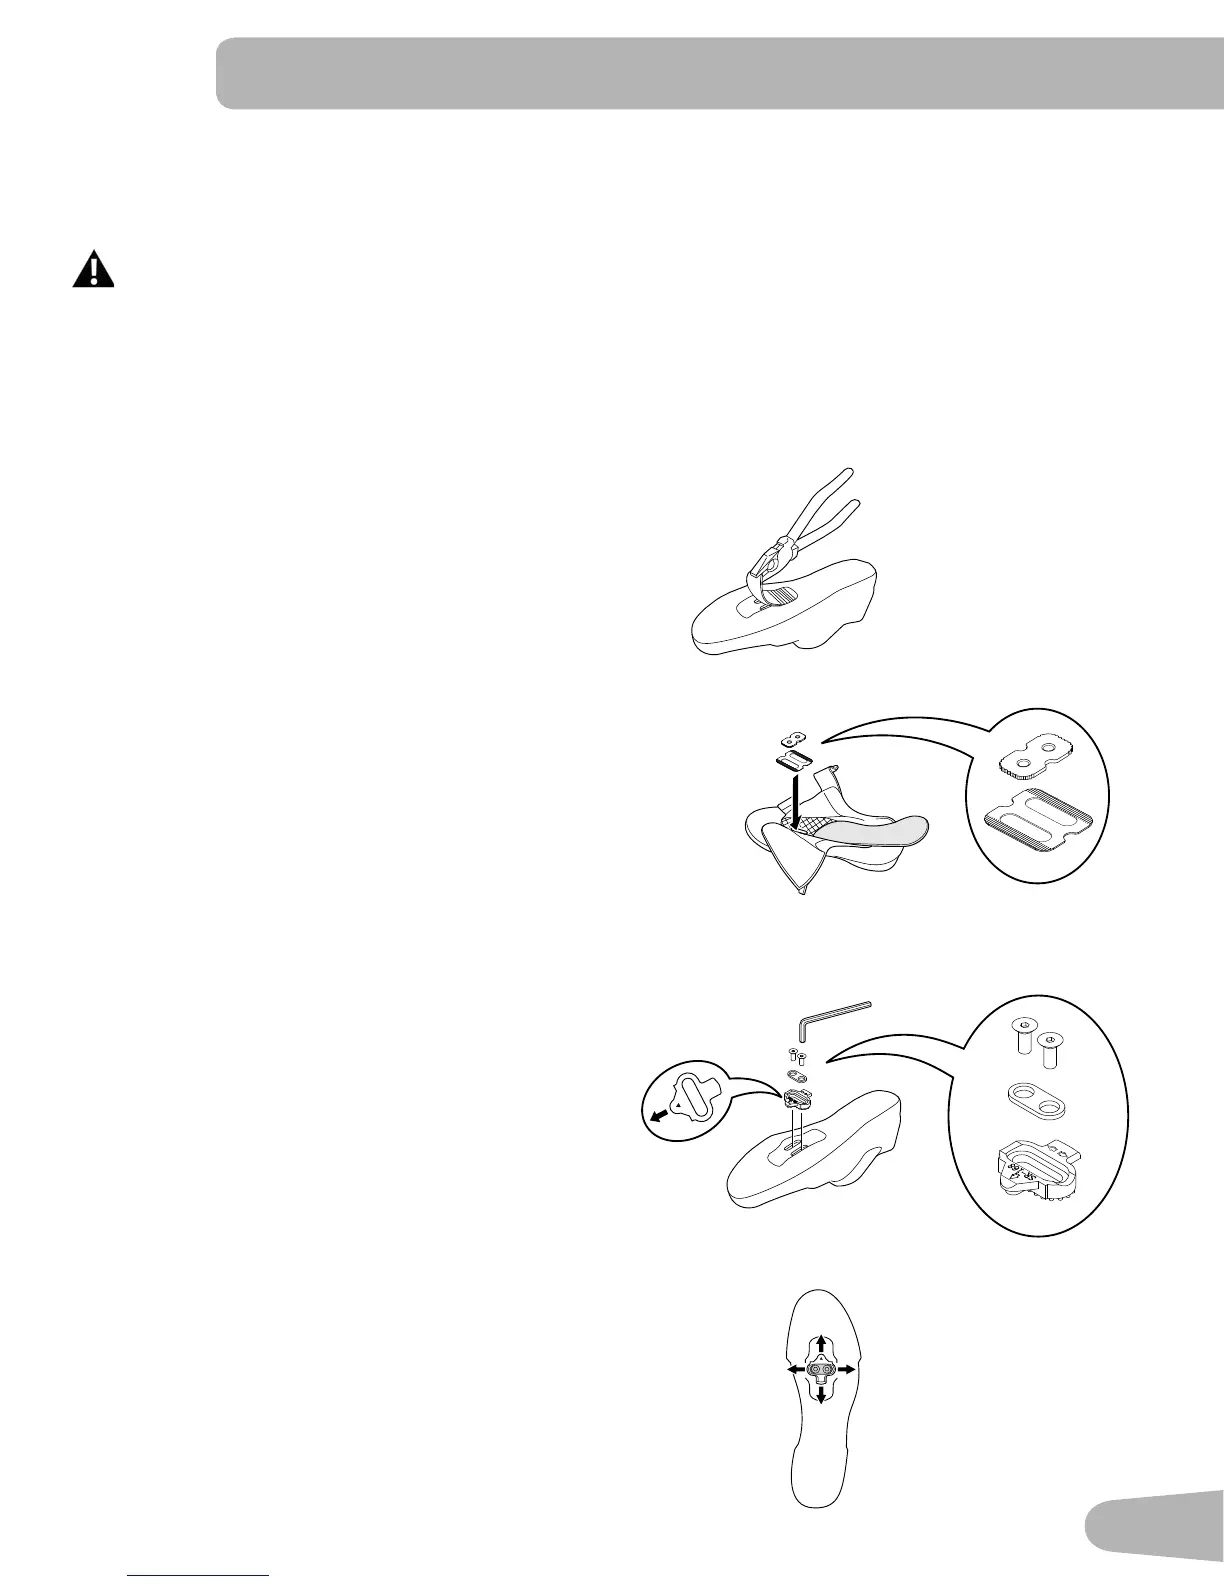
Installing Shoe Clips (Cleats) on Cycling Shoes (optional accessory)
Note: TheshoecleatstboththerightandleftPedals.
Tools needed:pliers,4mmhexkey
1. Withapairofpliers,pullofftherubbercovertoexpose
the cleat mounting holes on the bottom of the cycling
shoe.
Note: This step may not be necessary, depending on the
type of shoe.
2. Remove the sockliner and put the cleat nut in position
over the oval holes inside the shoe.
Note: This step may not be necessary, depending on the
type of shoe.
3. From the bottom of the shoe, put a cleat in position over
the cleat holes and then a cleat adapter. Be sure the
single arrow on the cleat points toward the toe of the
shoe. Tighten the cleat mounting bolts (2.5 N·m).
4. The cleat has an adjustment range of 20mm front to
back and 5mm left to right. Practice engaging with the
Pedal and releasing, one shoe at a time. Readjust to
determine the best cleat position.
5. Usinga4mmhexkey,fullytightenthecleatmounting
bolts(5–6N·m).
4 mm
SR-168