EasyManua.ls Logo

Seagull Models SPACE WALKER II User Manual

Seagull Models SPACE WALKER II
20 pages
To Next Page IconTo Next Page
Page #1 background imageLoading...
Page #1 background image
Made in Vietnam.
“Graphics and specfications may change without notice”.
Kit features.
Ready-made—minimal assembly & finishing required.
Ready-covered covering.
Photo-illustrated step-by-step Assembly Manual.
Specifications
Wingspan---------------------------------------- 82.7 in------------------------- 210cm.
Wing area----------------------------------- 1086 sq.in--------------------- 70 sq.dm.
Approximate flying weight------------------ 11 lbs------------------------------- 5kg.
Length-------------------------------------------- 58.7in------------ -------------- 149cm.
Recommended engine size---------- .1.2-1.5 cu.in--------------------- 4-stroke.
Radio System required 4 channels with 6 digital servos/karbonite
or metal gear.
Flying skill level Intermediate/advanced.
Hand-made Almost Ready to Fly R/C Model Aircraft
ASSEMBLY MANUAL
MS: 61
Question and Answer IconNeed help?

Do you have a question about the Seagull Models SPACE WALKER II and is the answer not in the manual?

Seagull Models SPACE WALKER II Specifications

General IconGeneral
Wingspan2280mm / 89.7 in
Weight6.8kg / 15 lbs
Length1683mm / 66.2 in
Engine20 - 30 cc
Electric ConversionOptional
Skill LevelIntermediate
Radio4-channel

Summary

Aircraft Specifications and Kit Features

Specifications

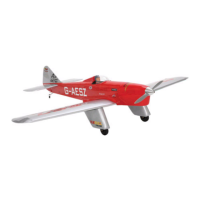
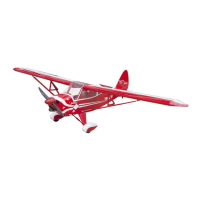
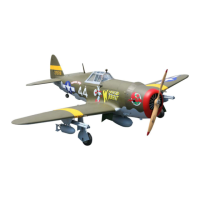
Key technical details and flight characteristics of the Space Walker II.

Kit Features

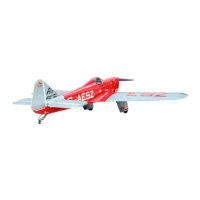
Highlights of the ready-to-fly nature and included components.

Control Surface Hinging

Hinging the Ailerons

Securing control surfaces to wing panels with C/A glue for proper movement.

Hinging the Elevator

Attaching elevator halves to the horizontal stabilizer using hinges.

Hinging the Rudder

Attaching the rudder to the vertical stabilizer using hinges.

Engine and Fuel System Installation

Engine Mount Installation

Mounting the engine securely to the firewall using screws and blind nuts.

Fuel Tank Installation

Preparing and installing the fuel tank stopper assembly and tank.

Landing Gear and Wheel Assembly

Wheel and Wheel Pants Installation

Assembling and attaching wheels and their fairings to the landing gear.

Installing the Main Landing Gear

Securing the main landing gear struts to the fuselage.

Cowling and Dummy Engine Setup

Cowling Installation

Fitting and trimming the fiberglass engine cowl to the fuselage.

Dummy Engine and Spinner Installation

Installing the dummy engine, propeller, and spinner cone.

Fuselage Component Installation

Installing the Fuselage Servo

Mounting servos for control surfaces within the fuselage.

Installing the Switch

Locating and fitting the power switch into the fuselage.

Horizontal Stabilizer

Mounting the horizontal stabilizer to the fuselage rear.

Vertical Stabilizer Installation

Attaching the vertical stabilizer to the fuselage.

Control System Linkages

Installing the Aileron Servos

Routing and securing servos for aileron control within the wing.

Aileron Control Horn Installation

Attaching control horns to the ailerons for servo connection.

Elevator/Rudder Control Horns and Pushrods

Installing control horns and pushrods for elevator and rudder.

Final Assembly and Setup

Mounting the Tail Wheel

Installing the tail wheel assembly.

Installing Tail Strut Support

Assembling and installing the tail strut support system.

Installation Pilot

Fitting the pilot figure into the cockpit area.

Attachment Wing-Fuselage

Connecting the wing assembly to the fuselage.

Pre-Flight Checks and Configuration

Control Throws

Setting the range of motion for control surfaces on the transmitter.

Balancing

Achieving the correct center of gravity for stable flight.

Flight Preparation

Performing final checks on systems and controls before flying.

Related product manuals