PV150+ Quick Start Guide
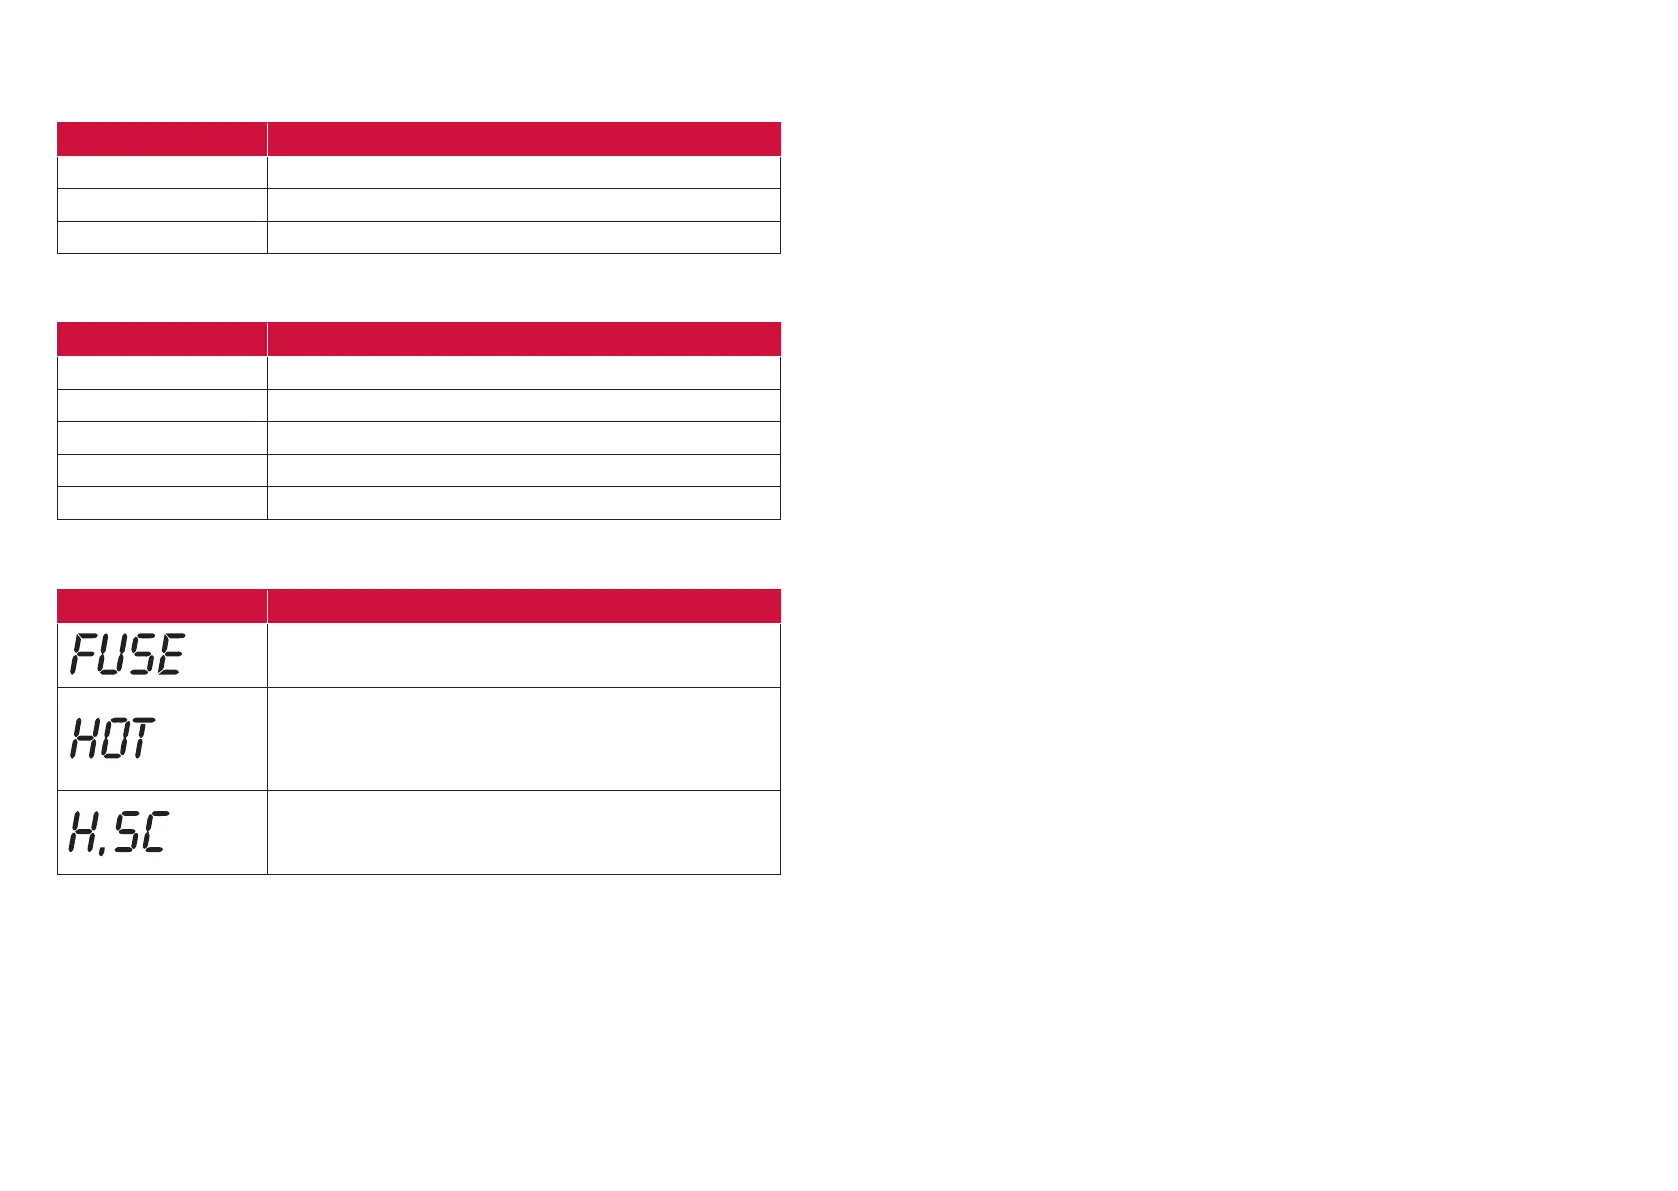
Viso Minimum insulation resistance
250V 0.5M
500V 1.0M
1000V 1.0M
Measuring Ranges
Insulation Limits
Warning Messages
Downloading to PC
1. Connect the PV150+ to PC using the USB cable.
2. (This will create a COM port on the PC).
3. Run the Seaward Solar Datalogger application on the PC.
4. Select the correct COM port. Use the Help menu – Trouble shooting guide, to help find
the correct COM port.
5. Click the Download button.
6. Press and hold the Recall key on the PV150+.
Function Range
Rpe 0 - 199/30V - 440V
Vo/c 5V - 1000V
Is/c 0.5A - 15A
Insulation 0.05M - 199M
I ac/dc 0.1A - 40A
Error Message Remedy
The internal fuse has blown. Refer to section 8.5 in the
operating instructions for details on how to replace the fuse.
The electronics within the PV150+ have reached the
maximum safe temperature. This can occur after repeated
short circuit current measurements at high current levels.
Allow the unit to cool down before further use.
The DC short circuit current has exceeded the maximum
rated value of 15A. The measurement sequence has been
aborted.
Pairing with Survey 200R
1. Make sure there are no other units operating nearby.
2. Turn off both the PV150+ and Survey 200R unit.
3. Press and hold the Survey 200R ON/OFF keys, keep both keys pressed.
4. Press and hold the PV150+ Rpe and Auto keys, keep both buttons pressed.
5. When the PV150+ has successfully paired, it will beep and display the serial number of
the Survey 200R.
6. The top line of the PV150+ LCD will show the W/m2 icon.
Un-pairing with Survey 200R
1. Make sure there are no other units operating nearby.
2. Turn the PV150+ off.
3. Press and hold the Rpe and Auto keys on the PV150+, keep both buttons pressed. Keep
both buttons pressed for about 10 seconds.
4. The PV150+ will then beep and clear its screen. The unit is no longer paired with a
Survey 200R.
5. The top line of the LCD will display Rpe ohms.
Solarlink
1. Pair the PV150+ and Survey 200R.
2. To enable/disable Solarlink, press and hold the Survey 200R temperature key, then
momentarily press the OK key.
3. When Solarlink is active there is a flashing icon above the temperature key.
4. If the Survey 200R is within range, the PV150+ will indicate the measured irradiance.
5. If the Survey 200R is not within range, or the measured value is outside the measuring
range the PV150+ irradiance value will be replaced with “- - - -”.
Changing Auto Shutdown Time
1. Turn the PV150+ unit off.
2. Press and hold the NULL key, then press both the ON/OFF keys together. Keep holding
the NULL key.
3. The display will show “OFF” on line 1, and the turnoff time on line 2 (in minutes).
4. Keep holding the NULL key and press the Viso key. Each press of the Viso key will
increment the turnoff time.
5. Increment beyond 10 to set the time back to 1 minute.