26
11. FUNCTION SETTINGS
This printer can set various functions according to use conditions and intended use.
The setting contents are stored in the Memory Switch (hereinafter referred to as MS) in the FLASH
memory mounted in the printer, and it is possible to set MS by using the switches or command input.
This section describes the setting procedure by using the switches.
See "20. MS SETTINGS LIST" for the MS setting list.
■ Procedure for Setting Functions Using Switches
To set the functions using the switches, set the printer in the Setting Mode.
To enter the Setting Mode, follow the procedure below.
Load the thermal paper in the printer as instructed in "8. LOADING THERMAL PAPER". (1)
Ensure that no error occurs, and then turn off the printer.
See "6. EACH PART OF PRINTER" for the error status.
Hold the FEED Switch down and press the POWER Switch, then release the POWER Switch first. (2)
Keep pressing the FEED Switch until the test print is completed.
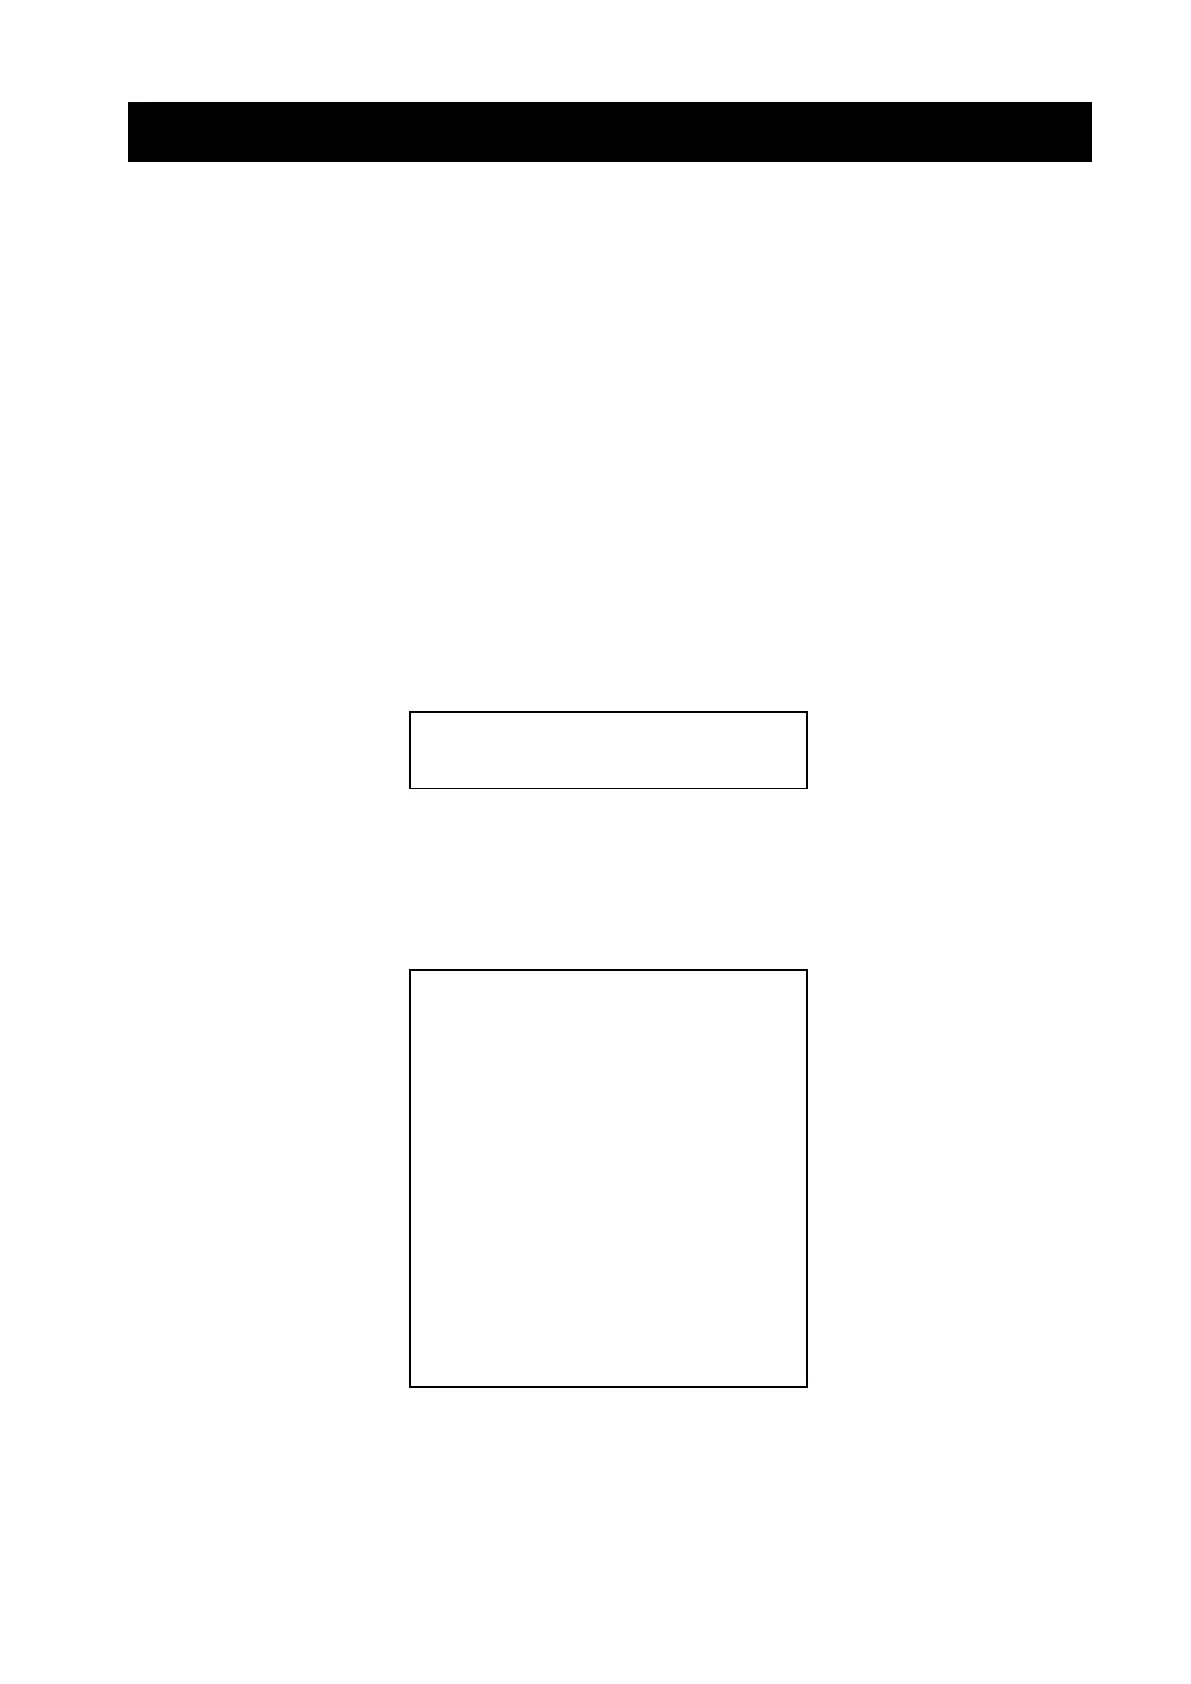
A message of mode selection is printed as shown in Figure 11-1 when the test print has completed. (3)
To enter the Setting Mode, press the FEED Switch.
Figure 11-1 Mode Selection Message
A message for selecting MS to be set is printed as shown in Figure 11-2 when the printer enters the (4)
Setting Mode.
Press the FEED Switch the number of times corresponding to the selected MS number, and then
press the POWER Switch.
・For “11: I/F Setting”, the items to be set are different for each model.
・When pressing the FEED Switch once, "1 : MS1" is selected.
・When pressing the POWER Switch without pressing the FEED Switch, "0 : Exit" is selected.
Figure 11-2 MS Selection Message
[Enter Setting Mode]
Enter Setting Mode: Feed SW
Exit: Power SW
[MS Slection]
0 : Exit
1 : MS1
2 : MS2
3 : MS3
4 : MS4
5 : MS5
6 : MS6
7 : MS7
8 : MS13
9 : MS17
10: MS18
11: I/F Setting
12: International Character
13: Character Code Table
14: Default Setting
Press the FEED switch an equal
number of times to the selected number.
After that, press the POWER SW.
 Loading...