14
If the chimney extends 5 feet or more above the roof deck, a
Universal Roof Brace Kit is required (see Figure 35).
ROOF BRACE KIT (URBK)
of the flashing for a better fit. Ensure that the chimney is level and
plumb before nailing flashing to the roof. Nail flashing to the roof
deck (under the shingles) along the upper edge and down each side
with 12 nails with neoprene washers or cover the nails with a
suitable non hardening waterproof caulking . Seal the shingles to
the plate in the same manner. As a precaution, apply a bead of
caulking along all seams of the flashing above the roof as per
Figure 28.
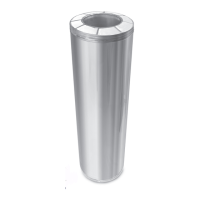
Shingles
Flashing
Nails
Roof Flashing Installation
Apply a bead of
silicone caulking
along back seamApply a
bead of
silicone
caulking
along seam
of cone
On steep roofs, it is recommended that an ice deflector or cricket
fabricated from heavy-gauge galvanized steel be installed. The
wedge-shaped deflector is installed against the chimney on the
upper slope. Its function is to split ice and snow as they slide
down the roof, preventing damage to the chimney. This is not a
supplied item. Contact a sheet metal fabrication shop in your
area for your custom ice deflector.
The flashing and storm collar should be painted to match the roof
shingles. This will extend its life and improve the appearance.
The chimney may be painted also with a HEAT RESISTANT
paint. To improve adhesion to the CF Sentinel chimney, degrease,
clean, prime before painting. Follow the paint manufacturer's
instructions.
Apply non-hardening high temperature silicone caulking just
above the top of the flashing cone where it meets the chimney
outer casing. Slide the tab end of the storm collar into the slot
end. DO NOT BEND THE TAB OVER YET. Slide the collar down
the chimney until it contacts the flashing and the caulking. Bend
the tab back over the slot for a snug fit. Apply additional caulking
above the storm collar as required.
Continue adding chimney lengths until the proper height is
achieved (See figure 30). Install the Round Top as per the
instructions under the Round Top section.
Figure 28
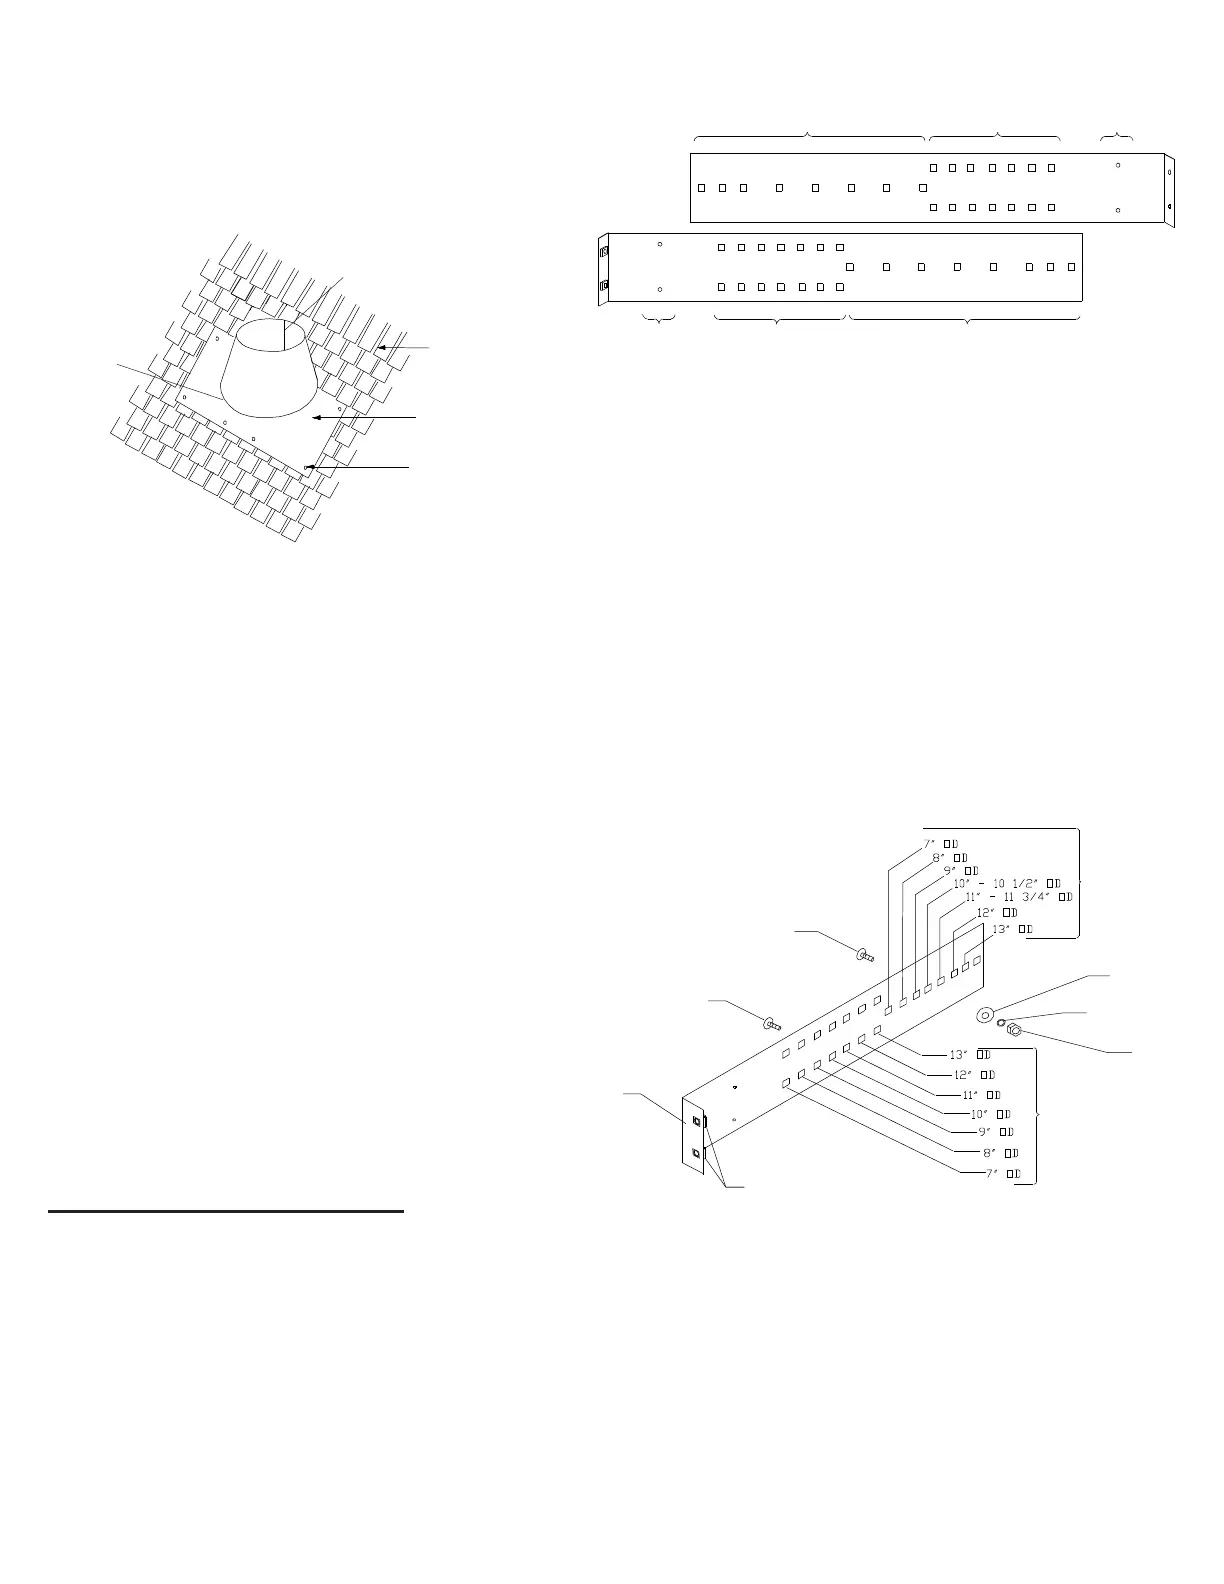
The Universal Roof Brace Kit (URBK) will provide lateral support
to the chimney above the roof line. The URBK is required when
the chimney extends 5 feet (1600mm) or more above the roof
penetration. The URBK contains Telescoping Legs, Support
Band, Roof Angle Brackets and hardware package.
The Universal Roof Brace Kit (URBK) accommodates most
models of chimneys with outer diameters ranging from 7"
through 13".
Single Row of Holes used to assemble
Support Band to OD of the Chimney
Double Row of Holes used
to attach Telescoping Legs
to Support Band
Figure 29
Support Band Holes Identifier
Support Band Elevator
bolt Through Appropriate
Holes of both halves
Figure 30
1/4” Nut
Lock Washer
Large
Washer
Form
Tab
Assembly of Universal
Support Band (2 Halves)
Cage Nuts
Single row
selection holes
used to form
Support Band
A. Measure the outside (OD) diameter of your chimney.
B. From the single row holes (see Figures 29 and 30), select
the hole in each halves that corresponds to the outside
diameter identified with the chimney being installed. Place
the two halves together. Insert an elevator bolt through the
chosen holes (Ex - for an 10” OD chimney, place the elevator
bolt through the holes identified for 10” OD). The elevator bolt
should be oriented opposite the direction the formed tabs are
pointed. Secure the center bolt with washers and 1/4”
flanged nut (see Figure 31). NOTE: On smaller diameter
chimney the excess band material can be cut off.
Elevator bolt for
Telescoping Legs
Through Appropriate
Holes of both halves
Double rows selection
holes used to
attachTelescoping Legs
NOTE: Upper or Lower
row can be utilized
Securing Holes
to Chimney
(Only 1
required)
Single Row of Holes used to assemble
Support Band to OD of the Chimney
Double Row of Holes
used to attach
Telescoping Legs to
Support Band
Securing Holes
to Chimney
(Only 1
required)
C. Form the band into a circle and loosely connect tabs using
the supplied 2” bolts into the 2 cage nuts located on1 form
tab.
 Loading...