R2 Smart Road Cycling Helmet | 11
2 WEARING THE HELMET
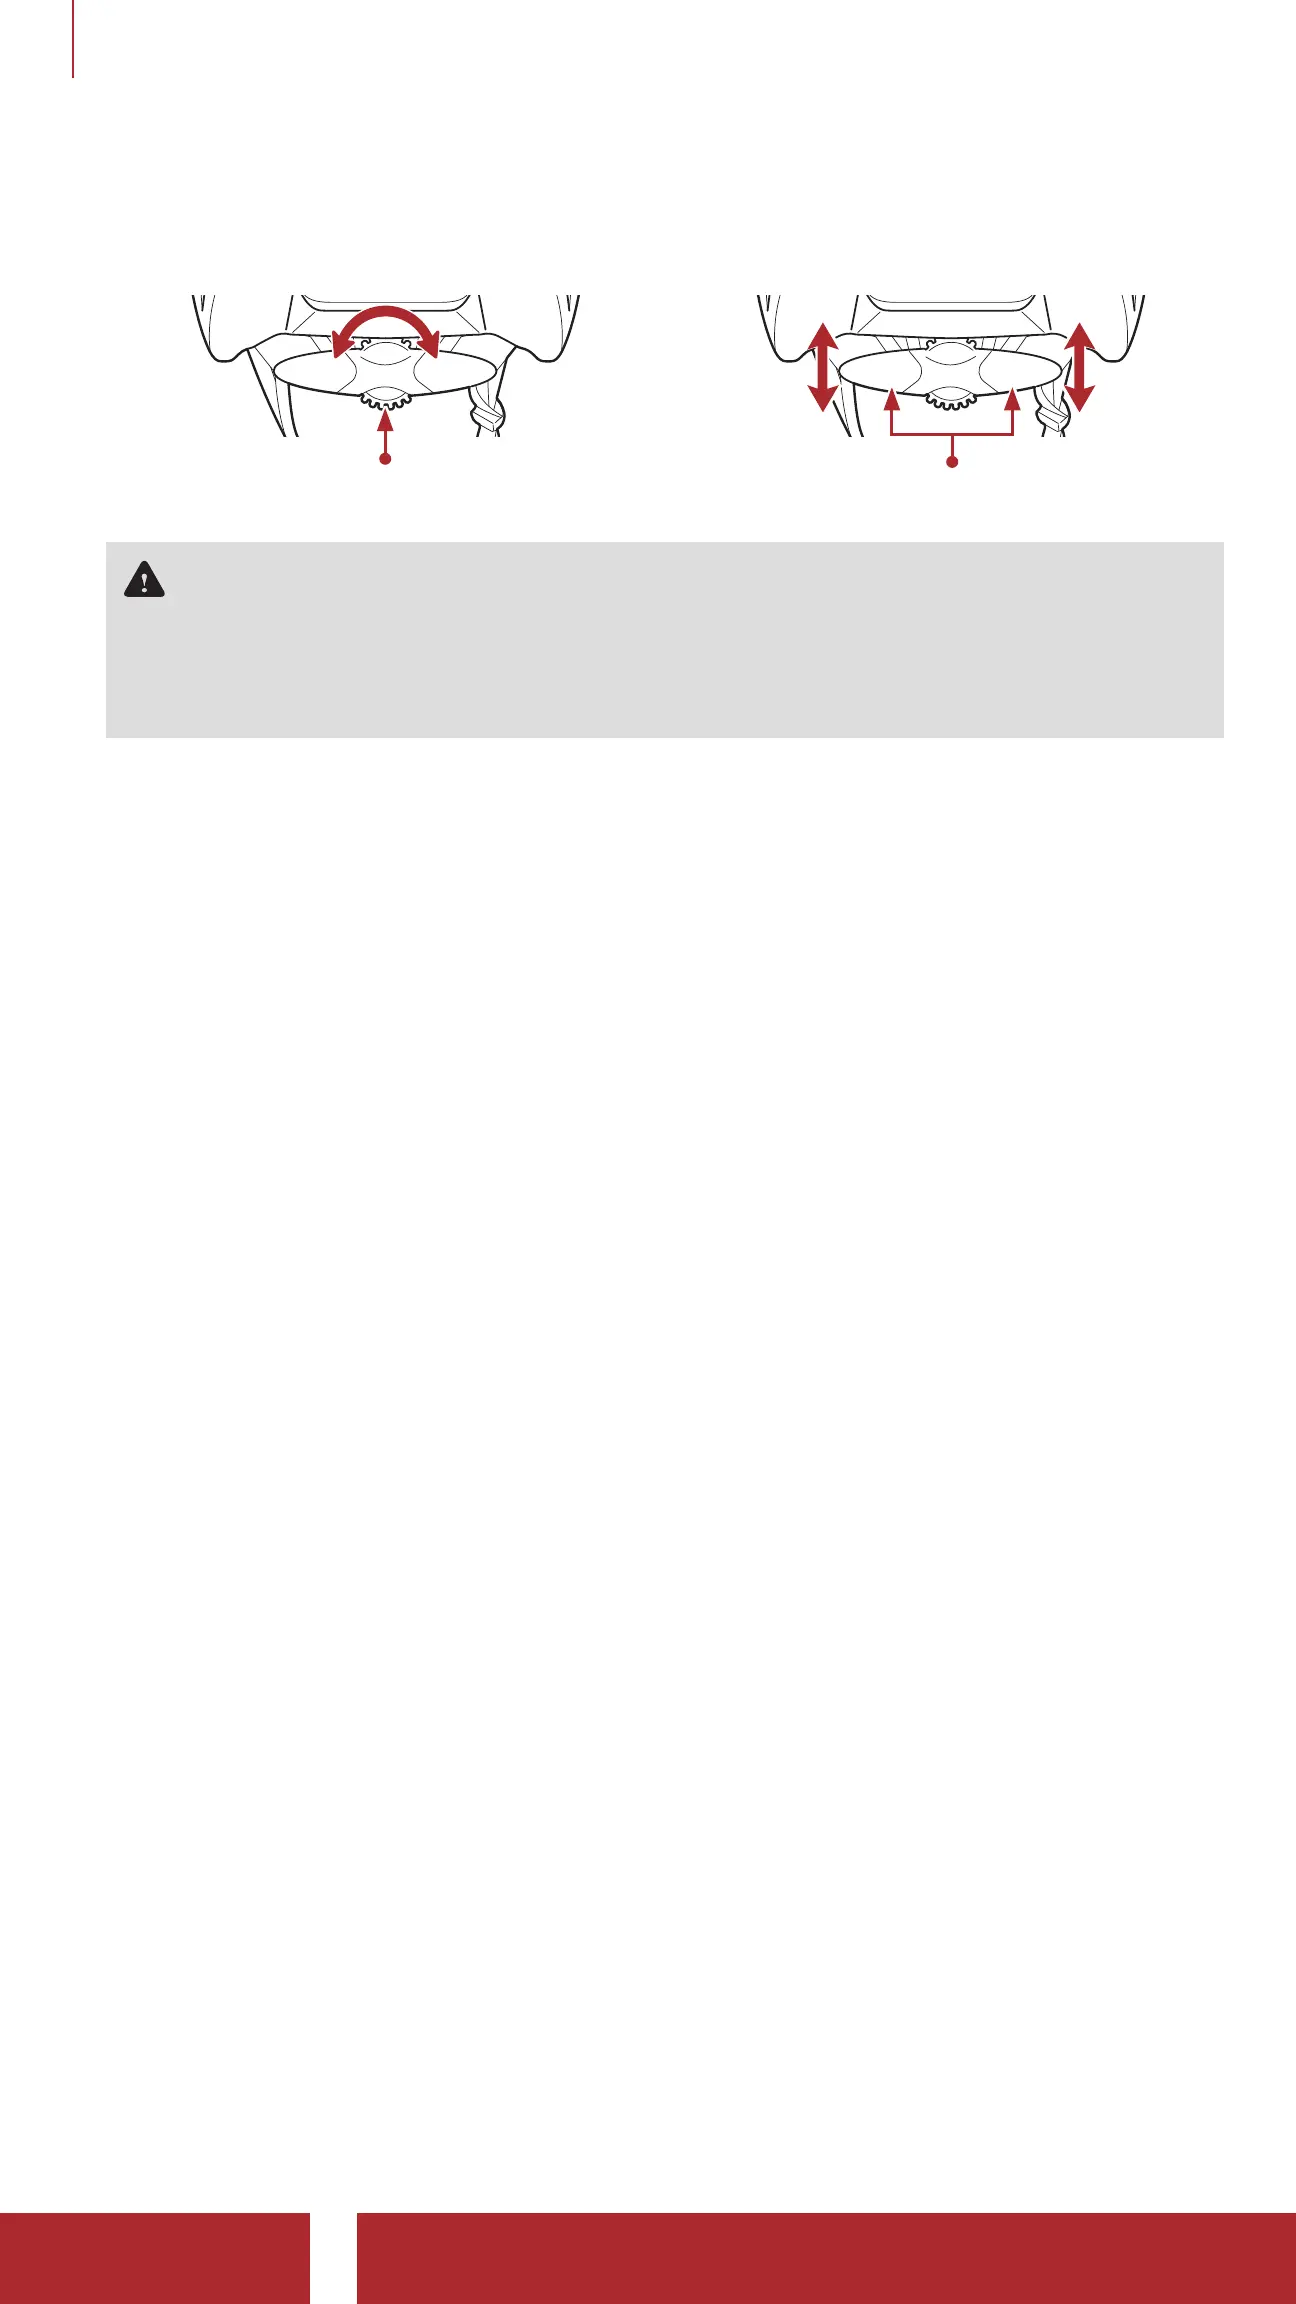
7. To change the height of the retention system, firmly pull or push the
retention system upward or downward to a different position.
Retention System Knob
Retention System
WARNING: For maximum protection, this helmet must be fitted
and attached properly to the wearer’s head in accordance with the
following instructions. If after adjustment the helmet does not fit
properly, do not use the helmet. Return it to the retailer or Sena.
2.2 Helmet Fitment Check
With the retention system knob turned clockwise until comfortably tight
and the chinstrap buckled under the chin and back against the throat,
grab the helmet with both hands and try to remove it by rolling the
helmet forward and backward as far as you can. This is an important test
to ensure that the helmet fits correctly. When you do this, you should
feel the chinstrap pull against the underside of your chin and the helmet
will resist any movement. If this isn’t the case, tighten the chinstrap and
try it again until this happens. If you cannot achieve the proper fit, DO
NOT USE THIS HELMET. Replace it with a different size until the correct
fit is achieved.
Also, for a proper Helmet Fitment Check if you can roll the helmet
forward such that it blocks your vision or if you can roll the helmet
backwards such that your forehead is not covered, tighten the chinstrap
and the retention system and try again until you cannot roll the helmet
forward or backwards.