SENNHEISER ELECTRONIC GMBH & CO. KG
COMPONENT MAINTENANCE MANUAL
HMEC 26-SERIES
Page 3004
Jan 23/13
23-41-48
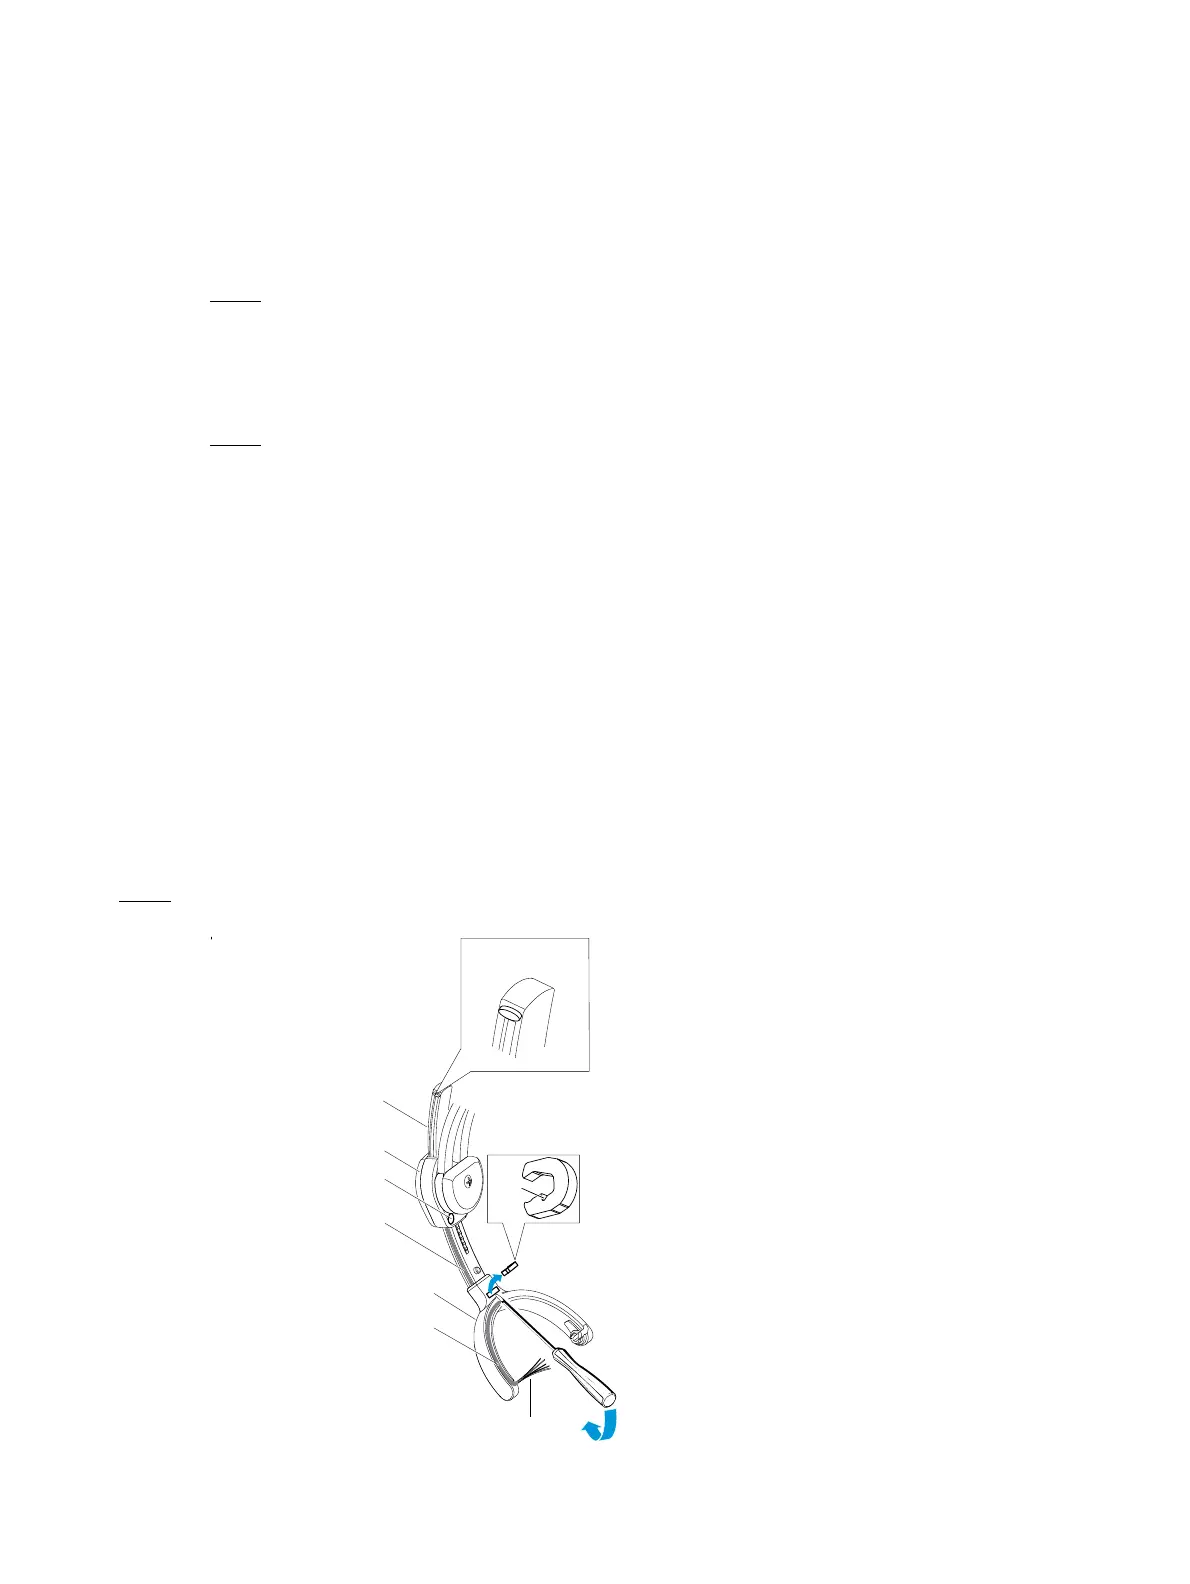
E. Disassembly of the split headband (Ref. IPL Fig. 18 and Fig. below)
(1) Removal of the latch for headband (030)
(a) Use a small flat screwdriver and press out the latch for headband (030).
NOTE:
AFTER THE REMOVAL THE LATCH CAN BE DAMAGED OR GET LOST.
RECOMMENDATION: DO NOT INSTALL THIS REMOVED LATCH (030) AGAIN.
USE NEW HEADBAND LATCHES (REF. IPL).
(2) Removal of the the yoke (020)
NOTE:
BEFORE YOU REMOVE THE YOKE (020), DISASSEMBLE THE ACOUSTIC UNITS
(REF. CHAPTER C).
(b) Take out the headband cable from the headband channel of the yoke (020).
(c) Remove the yoke (020) from the end piece of headband (010).
(3) Removal of the end piece of headband (010).
(d) Do steps D(1) to D(2).
(e) Unscrew the 2 screws of the end piece holder.
(f) Remove the cover of the end piece holder. For the assembly of the end piece (010) keep
in mind the laying of the cable.
(g) Remove the end piece of headband (010) from the end piece holder. During this step the
headband cable in the cable channel of the end piece comes out automatically.
NOTE:
CHECK THE HEADBAND CABLE FOR DAMAGES. IF THE HEADBAND CABLE IS DAMAGED,
REMOVE THE COMPLETE HEADBAND (REF. IPL FIG. 1 OR 3).
e.g. 3/64"
Headband cable
Yoke
End piece with notch
for cable routing
Cable channel
of the yoke
Screw
Cover of the
end piece holder
Cable channel
of the end piece
End piece stopper
Latch
Oct 30/08