UltraWave Product Guide Page 23
requires a normally open, unsupervised momentary switch input. The momentary switch input
must be closed for a minimum of the time specified in the Filter Window parameter (via the UCM).
See Table 6
for example input wiring diagrams and supervision resistor values.
In Remote control mode, the two outputs are used by the security management system (SMS) as
output control points. The AUX input is available to report the status of an auxiliary security device
to the SMS.
T6 - transmitter unit outputs
The transmitter unit operates only in Local control mode. T6 connects to output 1 and output 2
(see Figure 19
for connection details). You can use the UCM to specify the conditions that will
activate the two outputs (see Alarm data communications
on page 11). The transmitter unit does
not include an input.
Relay contact ratings
The dry contact relays are Form C rated for 30 V @ 1 A maximum, non-inductive load.
Auxiliary input (receiver unit)
In Remote control mode, the receiver’s AUX input provides an auxiliary device input for the
security management system. The receiver determines the input’s status via an internal reference
voltage, and the configuration of the contact closures and supervision resistors. Any change in the
input’s status is reported to the SMS.
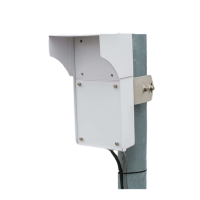
Cable ports
Each UltraWave unit includes two 22 mm (0.875 in.) cable ports and two compression glands. Pull
the cables through the compression glands, into the enclosure and through the locking nut. Then
install the compression glands in the cable ports. After making the wiring connections, hand-
tighten the compression glands to provide weather protection and strain relief.
Making the I/O wiring connections
1. Pull the data cable into the enclosure.
2. Prepare the data cable - strip length = 6.4 mm (0.25 in.).
3. Remove the terminal block from T6, make the wiring connections, and then replace the
terminal block (see Figure 18
).
Enclosure tamper switch
Each UltraWave unit includes a mechanical tamper switch (closed = secure, open = tamper) to
indicate if the enclosure cover is removed. Placing a shunt on header T2 overrides the tamper
switch (shunt ON = secure).
Transmitter/Receiver grounding
1. Connect an approved ground wire to a properly installed ground rod at the UltraWave unit’s
installation location.
2. Connect the ground wire to the ground lug on the transmitter/receiver PCB (see Figure 18
).
Note The contact closure input to the AUX input must be voltage-free.
Note Senstar recommends using a low resistance (5
or less) earth ground
connection at each unit. Consult the local electrical codes for
additional grounding information.