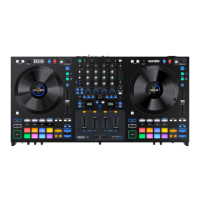
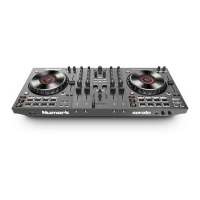
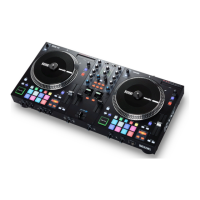
press this button to “stutter-play” the track by returning to the beginning of the track and restarting playback.
31. Sync / Sync Off: Press this button to automatically match the corresponding Deck’s tempo with the opposite
Deck’s tempo and phase. Press and hold Shift and press this button to deactivate Sync.
32. Start/Stop: Press this button to start and stop the platter. The LED around this button will be dim when power is
on and no track is playing, bright when a track is playing, and flashing red when the track is near its end.
33. Performance Pads: These pads have different functions on each deck depending on the current pad mode.
Note: See Operation > Pad Modes to learn how to use the pads in each mode, described below.
34. Hot Cue / Pitch Play: Press this button to enter Hot Cue mode. Press the button a second time to enter Pitch
Play mode.
Note: The Serato Pitch N Time plugin (not included) is required to use Pitch Play mode.
35. Saved Loop: Press this button to enter Saved Loop mode.
36. Roll / Auto Loop: Press this button to enter Roll mode. Press the button a second time to enter Auto Loop mode.
37. Sampler / Scratch Bank: Press this button to enter Sampler mode. Press the button a second time to enter
Scratch Bank mode. In this mode, you can assign songs to each pad in the software, and then tap the pad to
quickly load the song from the specified starting point to the deck. This is useful for preparing and performing
with song samples for scratching.
38. Slicer / Slicer Loop: Press this button to enter Slicer mode. Press the button a second time to enter Slicer Loop
mode.
39. Parameter : Use these buttons for various functions in each pad mode. Press and hold Shift and use these
buttons to access secondary parameters.
40. Loop On/Off / Reloop: Press this button to create an auto-loop with the length that is set in the software. Press
and hold Shift and then press this button to skip to the last-played loop and activate it immediately.
Note: Roll sizes will affect loop sizes in the software and loop based on the last roll size.
41. Loop In / x1/2: Press this button to create a Loop In point at the current location. Press and hold Shift and press
this button to halve the length of the current loop.
42. Loop Out / x2: Press this button to create a Loop Out point at the current location. Press and hold Shift and
press this button to double the length of the current loop.
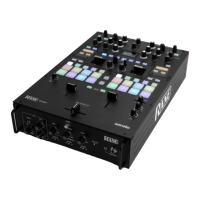
Front Panel
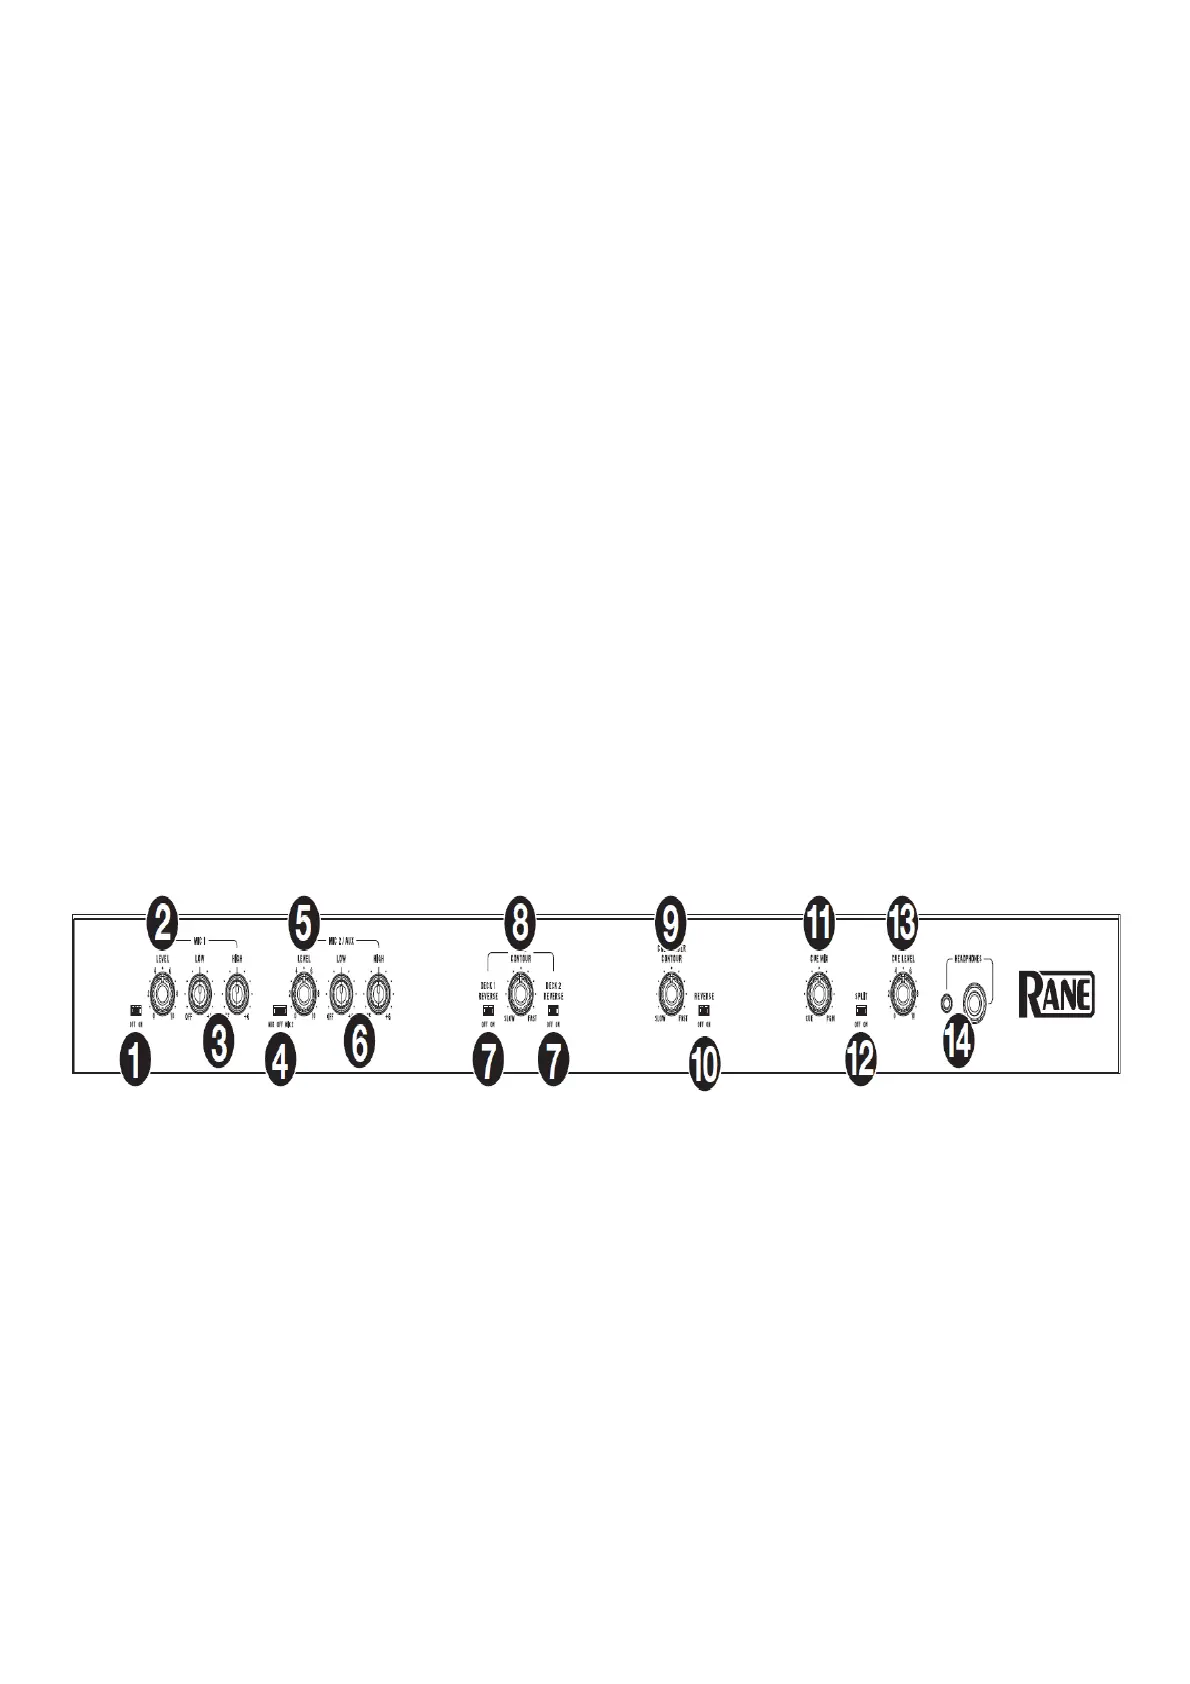
1. Mic 1 – Off/On: When set to Off, the Mic 1 Input is disabled. When set to On, the Mic 1 Input on the rear panel is
active, and its audio signal is routed directly to the program mix and cue mix.
2. Mic 1 Level: Turn this knob to adjust the gain of the Mic 1 Input.
3. Mic 1 Tone: Turn this knob to adjust the balance of low (bass) and high (treble) frequencies of the audio signal
coming from the Mic 1 Input.
4. Mic 2 – Aux/Off/Mic 2: When set to Aux, the Aux In on the rear panel is active. When set to Off, the Aux Input
and Mic 2 Input are both disabled. When set to Mic 2, the Mic 2 Input on the rear panel is active, and its audio
signal is routed directly to the program mix and cue mix. Both audio signals are routed directly to the program
mix and cue mix when active.
5. Mic 2 / Aux Level: Turn this knob to adjust the gain of the Mic 2 Input or AUX Input.
6. Mic 2 / Aux Tone: Turn this knob to adjust the balance of low (bass) and high (treble) frequencies of the audio
signal coming from the Mic 2 Input or AUX Input.
7. Deck Reverse: Set this switch to On to reverse the direction of the deck faders. Set it to Off to use the
conventional fader direction.
8. Deck Contour: Adjusts the slope of the deck fader curve. Turn the knob to the left for a smooth fade (mixing) or
to the right for a sharp cut (scratching). The center position is a typical setting for club performances.
9. Crossfader Contour: Adjusts the slope of the crossfader curve. Turn the knob to the left for a smooth fade
(mixing) or to the right for a sharp cut (scratching). The center position is a typical setting for club performances.
10. Crossfader Reverse: Set this switch to On to reverse the direction of the crossfader. Set it to Off to use the