5-33
SCANNER/INTERNET FAX
Contents
3
Switch to USB memory mode and
display the image settings screen.
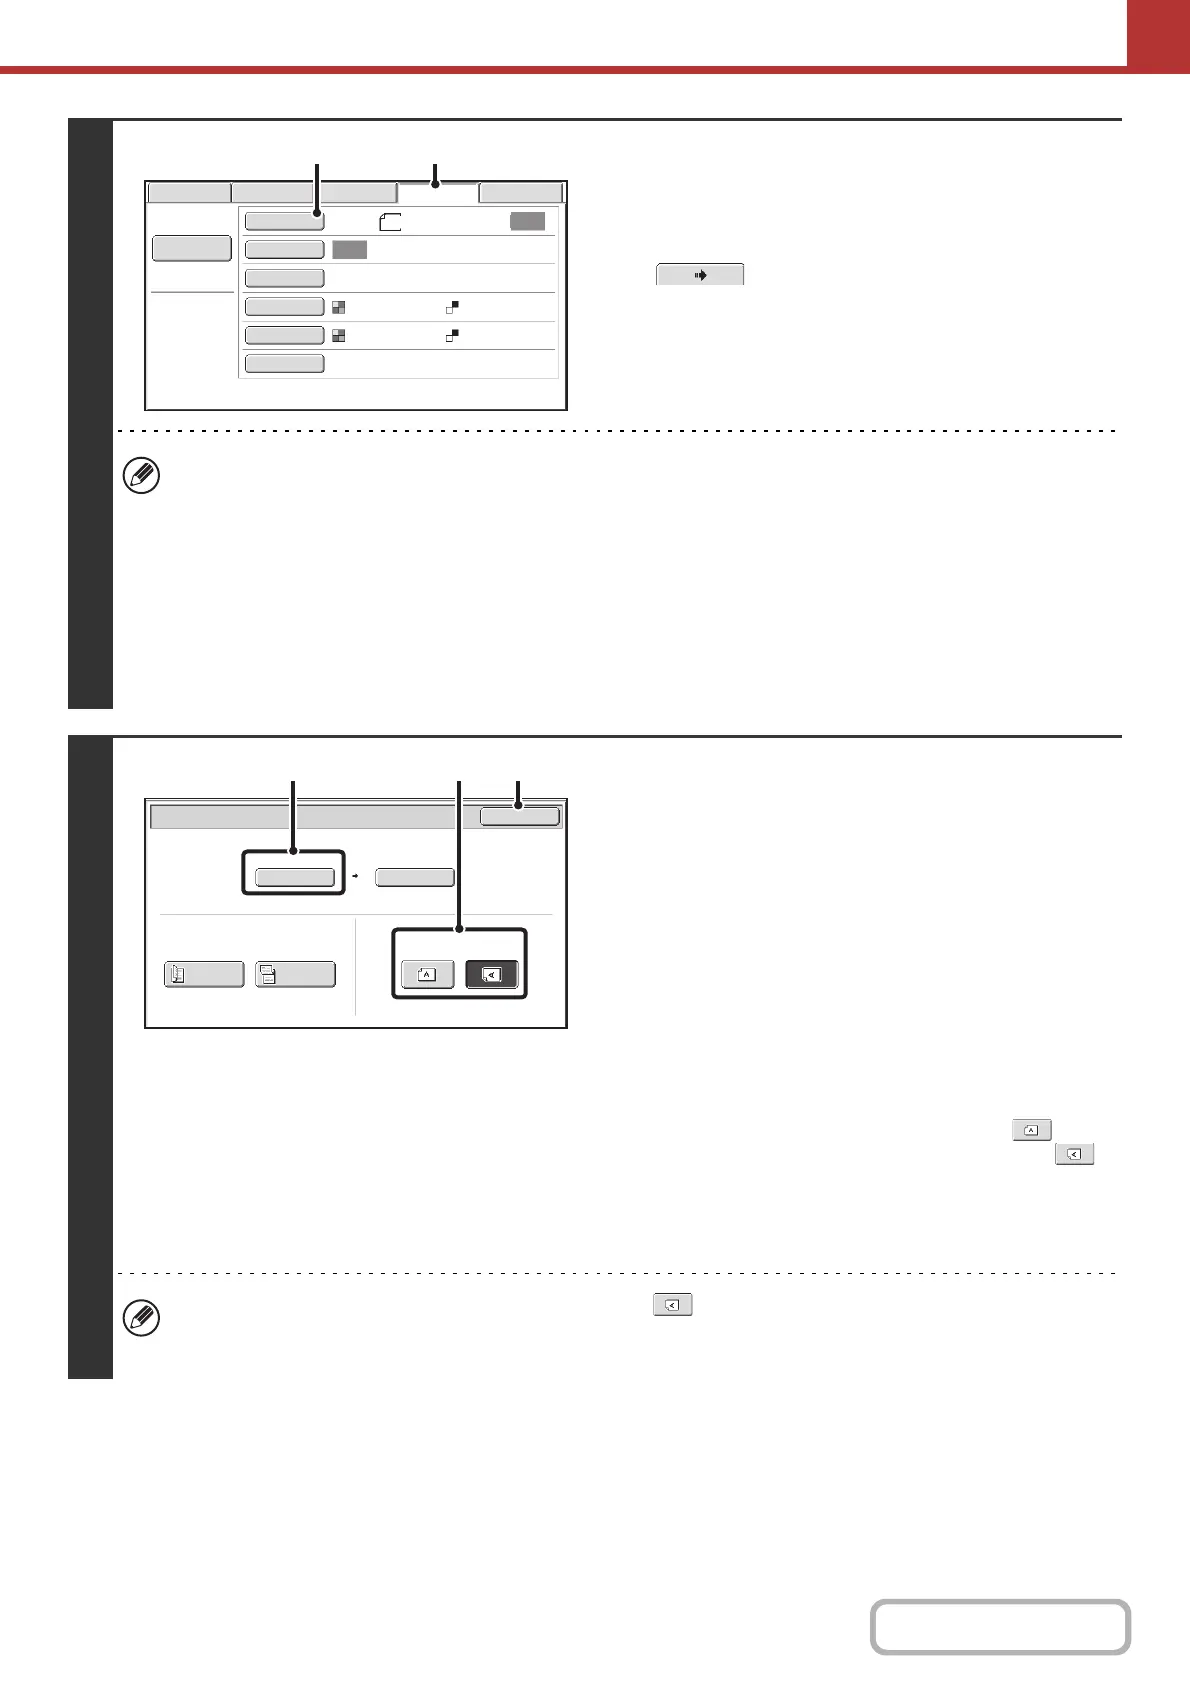
(1) Touch the [USB Mem. Scan] tab
If the [USB Mem. Scan] tab does not appear, touch the
tab to move the screen.
(2) Touch the [Original] key.
• When scanning to USB memory, there is no need to specify the destination.
• If a destination of another mode has been previously specified, a message will appear when you change to USB
memory mode indicating that the destination setting will be cleared. Touch the [OK] key in the message screen and
go to the next step.
• The current settings for [Original], [Exposure], [Resolution], [File Format], and [Color Mode] are indicated at the right
of each key. To change a setting, touch the appropriate key.
☞ AUTOMATICALLY SCANNING BOTH SIDES OF AN ORIGINAL (2-Sided Original) (page 5-50), SPECIFYING
THE ORIGINAL SCAN SIZE AND SEND SIZE (page 5-51), CHANGING THE EXPOSURE AND ORIGINAL
IMAGE TYPE (page 5-57), CHANGING THE RESOLUTION (page 5-59), CHANGING THE FILE FORMAT
(page 5-60), CHANGING THE COLOR MODE (page 5-64), SPECIAL MODES (page 5-65)
4
Check the original scan size and
placement orientation.
To make sure that the original is scanned in the correct
orientation (the orientation in which the top edge of the original
appears at the top of the display), check the size and
orientation of the original placed in step 1.
(1) Check the scan size.
Check if the size of the placed original is displayed. If the
displayed size is different from the size of the placed
original, set the original size.
☞ SPECIFYING THE ORIGINAL SCAN SIZE AND
SEND SIZE (page 5-51)
(2) Touch the appropriate orientation key.
If the top edge of the original is up, touch the key. If
the top edge of the original is to the left, touch the
key.
(3) Touch the [OK] key.
You will return to the screen of step 3.
• The placement orientation of the original is initially set to . If you placed the original with the top edge to the
left, this step is not necessary.
• The original size set in the system settings appears as the original size.
File Name
USB Mem. ScanFaxInternet Fax PC Scan
Scan
Auto
Scan:
Send:
Auto
Text
200X200dpi
PDF
Auto/Grayscale
Mono2
PDF
Special Modes
Color Mode
File Format
Resolution
Exposure
Original
8½x11
(1)(2)
USB Mem. Scan/Original
OK
Auto
Scan Size
2-Sided
Tablet
2-Sided
Booklet
Send Size
100%
Image Orientation
8½x11
(3)(2)(1)