24
No. Adjusting point Adjusting conditions Adjusting procedure
PG-A10S
PG-A10S-SL
AN-A10T
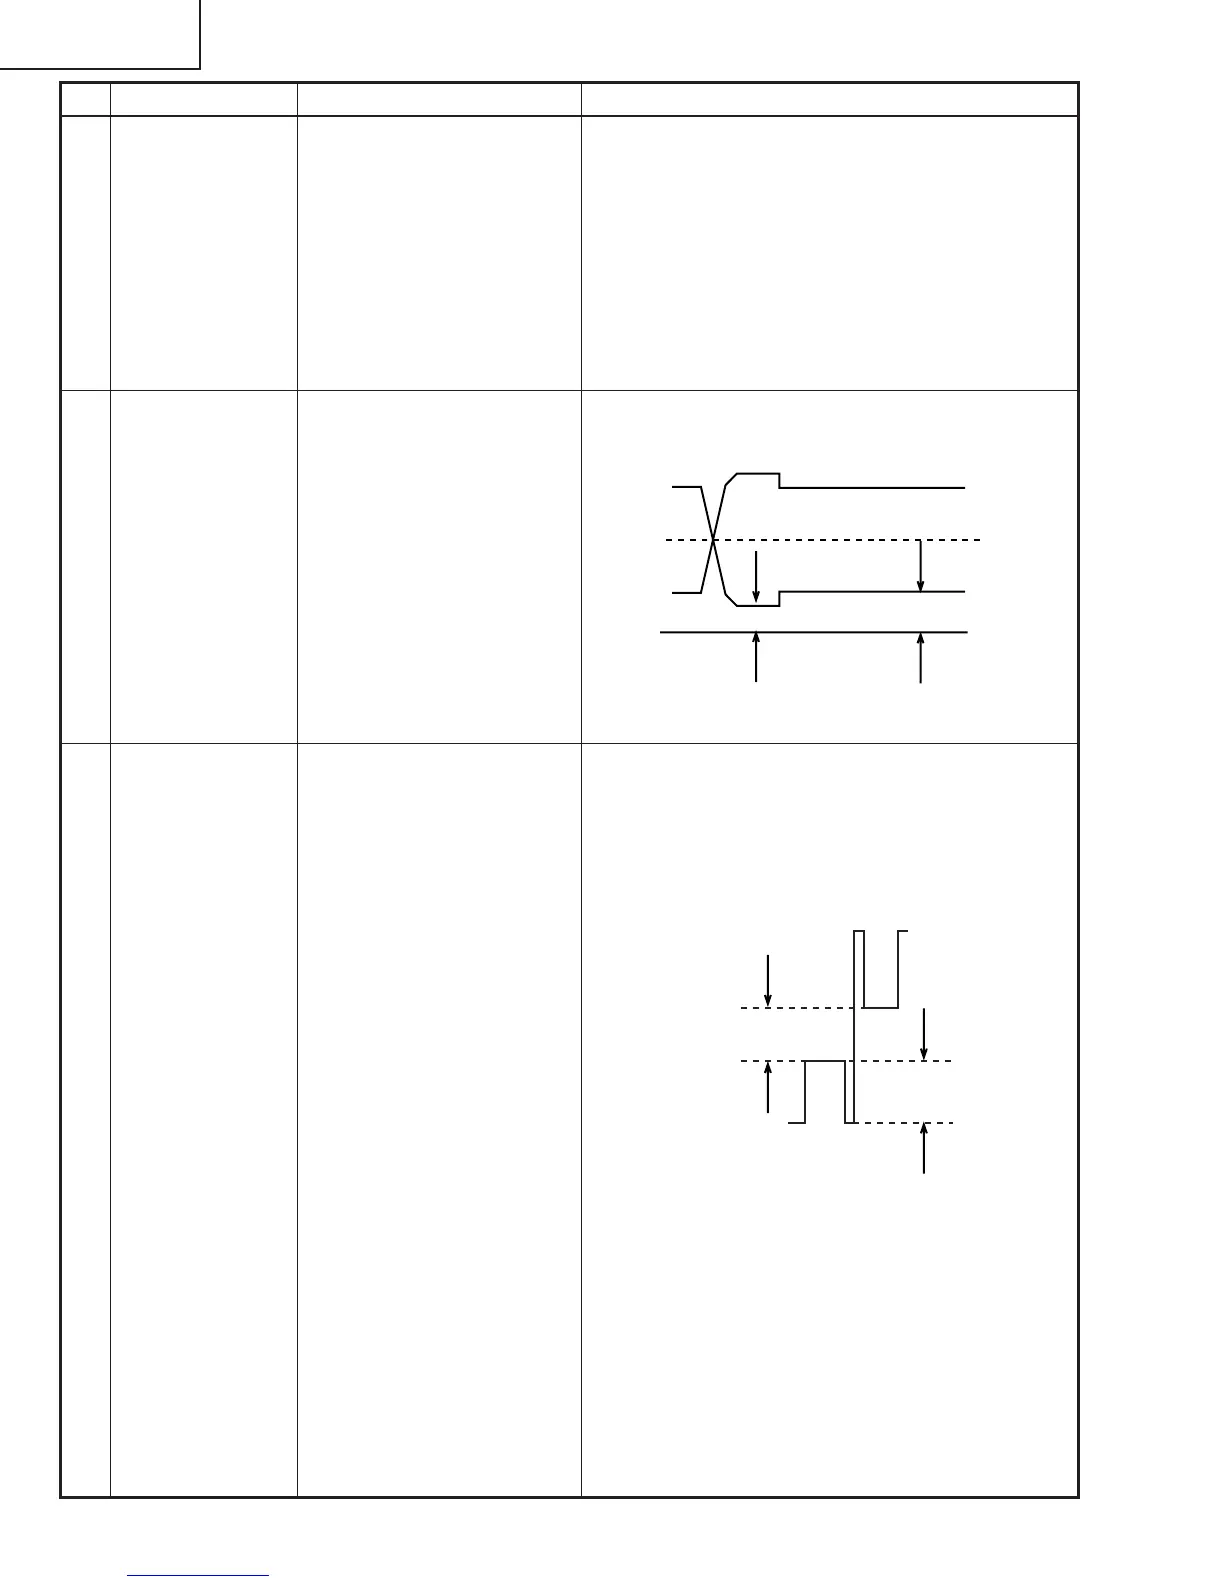
5 Video Bright-
ness/Contrast
adjustment
1. Feed an NTSC composite
video 10-step signal (no
setup) with 100% ampli-
tude.
2. Select the following group
and subjects.
Group : VIDEO
Subject : Bright
Contrast
(Process GAMMA interlock)
1. Check the setting value.
Contrast (White Level): 5
Bright (Black Level): 8
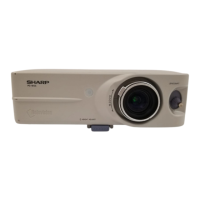
6 PSIG adjust-
ment
1. Select the following group
and subjects.
Group : OUTPUT2
Subject : PSIG-H
PSIG-L
2. Check the fixed value.
PSIG-H: 64
PSIG-L: 146
PSIG
2.5V DC
5.6V DC
GND
1. Feed the XGA signal and adjust to make the follow-
ing PSIG waveform. (TP1101, TP1201 and TP1301)
Adjust with PSIG-H
Adjust with PSIG-L
7 R/G/B Black
Level Signal
Amplitude
adjustment
1. Select the following group
and subjects.
Group : OUTPUT1
Subject :
On Green adjustment
G1-BLK
G1-GAIN
On Red Adjustment
R1-BLK
R1-GAIN
On Blue Adjustment
B1-BLK
B1-GAIN
2. Make sure the process ad-
justment color bags appear
onscreen.
3. Connect a synchroscope to
P1301-2P for the G setting.
4. Connect the synchroscope
to P1301-1P and P1301-
3P for the R and B settings,
respectively.
White-to-White
Amplitude
1. Select G1-GAIN. Using the set's control switch or
the remote controller's button, adjust the signal am-
plitude to 3.90 Vp-p ± 0.05 V.
2. Now select G1-BLK. Using the set's control switch
or the remote controller's button, adjust the white-
to-white level to 2.00 Vp-p ± 0.05 V.
3. Do the same for the R and B settings.