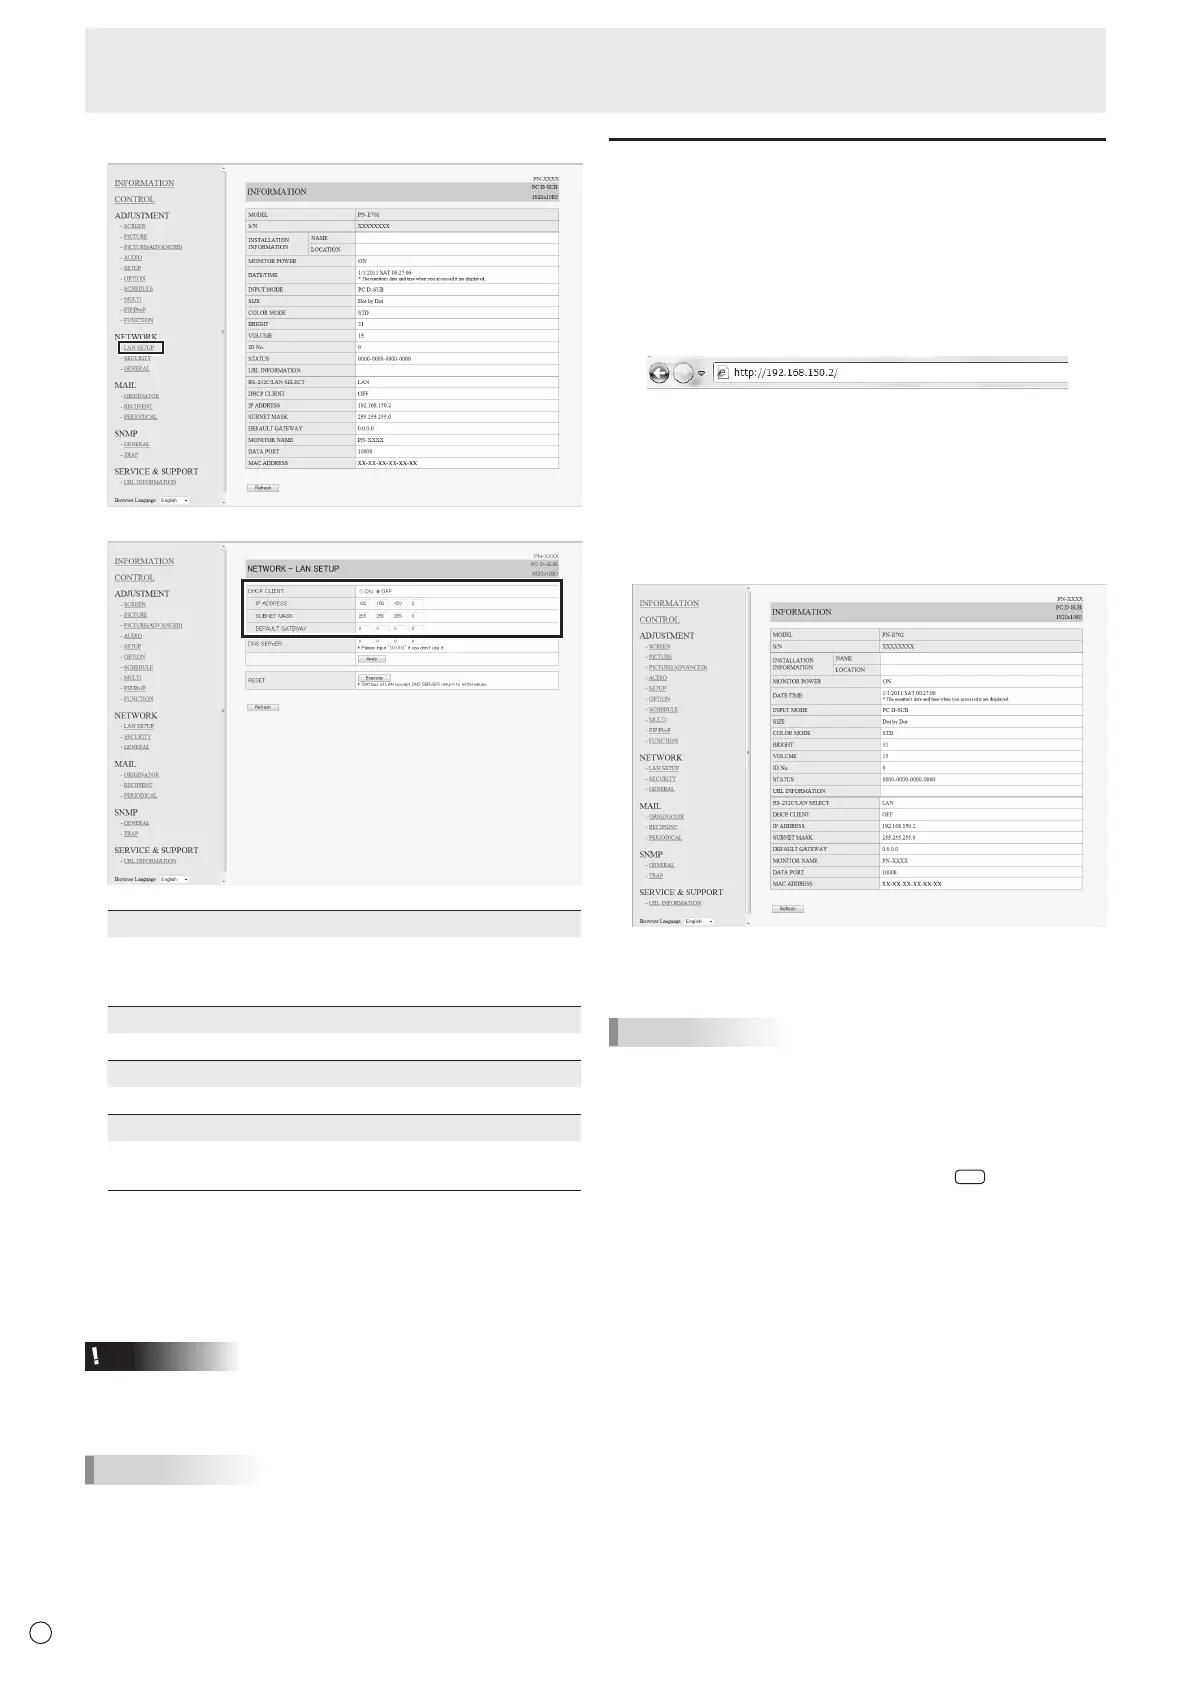
6. Clickon“LANSETUP”underNETWORK.
7. Specifythe“DHCPCLIENT”,“IPADDRESS”,etc.
DHCP CLIENT
IfyourLANhasaDHCPserverandyouwishtoobtainan
address automatically, change this setting to “ON”.
Tosettheaddressmanually,setthisto“OFF”.
IP ADDRESS
IftheDHCPCLIENTissetto“OFF”,specifyanIPaddress.
SUBNET MASK
IftheDHCPCLIENTissetto“OFF”,specifythesubnetmask.
DEFAULT GATEWAY
IftheDHCPCLIENTissetto“OFF”,specifythedefaultgateway.
Ifyouarenotusingadefaultgateway,specify“0.0.0.0”.
8. Whenthesettingischanged,click[Apply].
9. Checkthemessageandclick[OK].
10
.ExitInternetExplorer.
11.
RestorethePC’sIPaddressjottedinStep6,“(2)
SpecifyingthePC’sIPaddress”.
12.
ConnectthemonitorandthePCtotheLAN.
Caution
• Wait10secondsafterclicking[OK]beforeproceeding.
• Whenoperatingusingtheremotecontrolunitorsimilar,
click[Refresh].
TIPS
• WhentheIPaddressissetmanually,theIPaddressesof
themonitorconnectedtotheRS-232Coutputterminaland
the daisy chain of connected monitors that follows can be
assignedautomatically.(Seepage23.)
Controlling with a PC
■ Basic operation
YouuseInternetExploreronaPContheLANtocontrolthe
monitor.
1. LaunchInternetExploreronthePC.
2.
In the “Address” box, type “http://” followed by your monitor’s
IPaddressfollowedby“/”,thenpresstheEnterkey.
YoucanconrmtheIPaddresswiththeDISPLAYfunction.
Whenpromptedtoenterausernameandpassword,type
theusernameandpasswordthatyouspeciedinthe
securitysettings(seepage46),andclick[OK].
If you did not make any security settings, leave the spaces
blankandclickon[OK].
3. You can check, control, and change the monitor’s status
and settings by clicking the menu items on the left side of
the screen.
• Ifyouseean[Apply]buttonnexttoasetting,clickitafter
you change that setting.
TIPS
• Seepages45to49fordetailsoneachsetting.
• Ifyouclick[Refresh]beforethescreennishesupdating
thecurrentdisplay,the“ServerBusyError”willappear.
Waitforamomentbeforeoperatingyourmonitoragain.
• Youcannotoperatethemonitorwhileitiswarmingup.
• If“DHCPCLIENT”issetto“ON”,press
on the remote
control unit two times and then check the monitor’s IP
address.
Controlling the Monitor with a PC (LAN)