9
E
Connecting Peripheral Equipment
Caution
• Be sure to turn off the main power switch and disconnect
the plug from the power outlet before connecting/
disconnecting cables. Also, read the manual of the
equipment to be connected.
• Be careful not to confuse the input terminal with the output
terminal when connecting cables. Accidentally reversing
cables connected to the input and output terminals may
cause malfunctions and the other problems.
TIPS
• Images may not be displayed properly depending on the
computer (video card) to be connected.
• Use the automatic screen adjustment when a PC screen is
displayed for the rst time using D-SUB or when the setting
of the PC is changed.
• If the audio output from the playback device is connected
directly to speakers or other devices, the video on the
monitor may appear delayed from the audio portion.
Audio should be played through this monitor by connecting
the playback device to the monitor’s audio input, and
connecting the monitor’s audio output to the speakers or
other devices.
• Connect the audio used in each input mode to the audio
input terminals below.
Input mode Audio input terminal
D-SUB,
DVI-D
PC audio input terminal
COMPONENT,
VIDEO
AV audio input terminal
HDMI
PC/AV HDMI input terminal,
PC audio input terminal *
USB -
* If audio will not be input by HDMI cable.
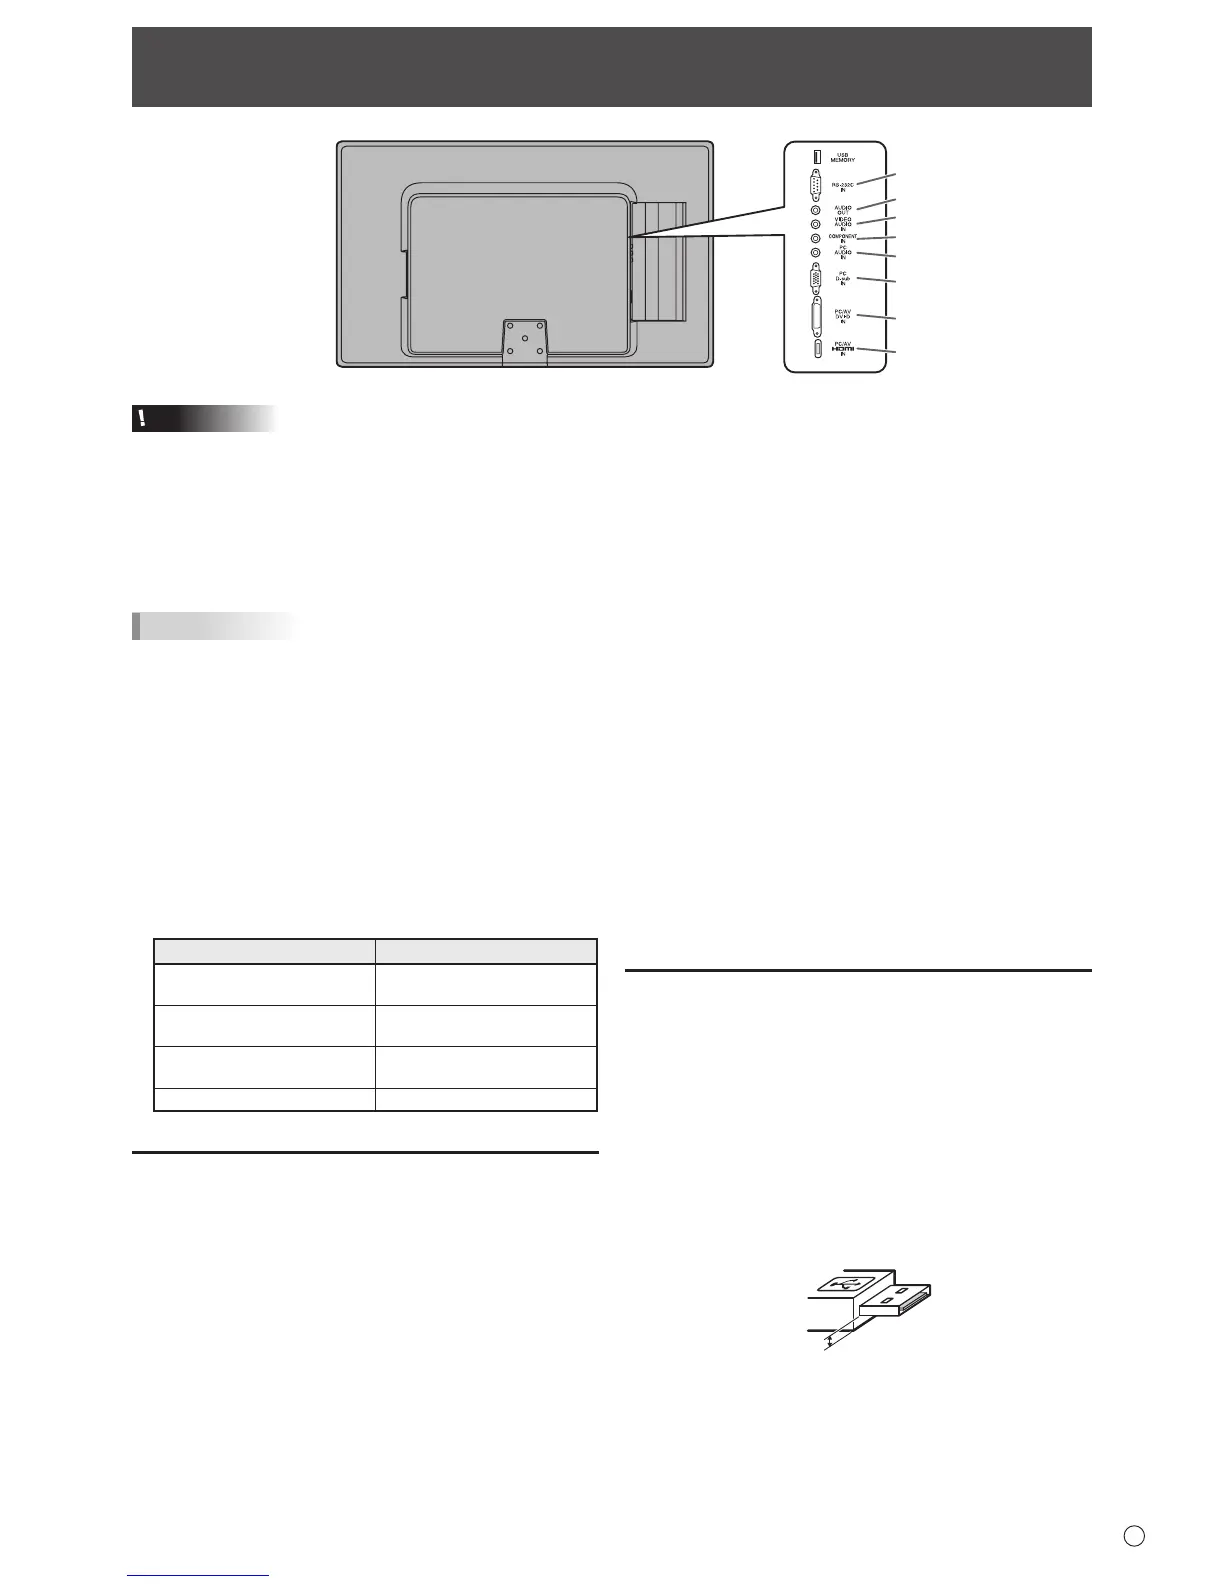
Connection with a PC or AV equipment
1. RS-232C input terminal
• You can control the monitor from a PC by connecting a
commercially available RS-232 straight cable between
these terminals and the PC.
2. Audio output terminal
• Audio input into the monitor is output.
• Connect using a commercially available 3.5 mm mini
stereo jack cable or a 3.5 mm mini stereo jack and RCA
conversion cable.
• The output sound varies depending on the input mode.
• The volume can be adjusted with the volume adjustment.
• The volume of the output sound can be xed by setting
AUDIO OUTPUT on the OPTION menu.
• It is not possible to control the sound output from the
audio output terminal with the AUDIO menu.
3. AV video/AV audio input terminal
• Connect with the provided conversion cable (for AV
video), and then connect the end to a commercially
available video / audio cable (RCA).
4. AV COMPONENT input terminal
• Connect with the provided conversion cable (for AV
component), and then connect the end to a commercially
available component cable (RCA).
5. PC audio input terminal
• Use an audio cable without resistance.
6. PC D-sub input terminal
• Connect using a commercially available signal cable (Mini
D-sub 15 pin).
7. PC/AV DVI-D input terminal
• Connect using a commercially available signal cable
(DVI-D 24 pin).
8. PC/AV HDMI input terminal
• Use a commercially available HDMI cable (conforming to
the HDMI standard).
• If connecting by HDMI cable, connection to the audio
input terminal is unnecessary.
• If audio will not be input using an HDMI cable, connect the
audio to the PC audio input terminal.
USB ash drive connection
• Connect a USB ash drive to the USB port.
• Do not connect a USB device other than a USB ash
drive.
• Turn off the power of the monitor when connecting or
removing a USB ash drive.
• Do not use a USB extension cable.
• Do not use a USB ash drive with a security function.
• Use a USB ash drive with a shape that can be inserted in
the USB port. Some USB ash drives with special shapes
cannot be inserted.
• A USB ash drive that has a thickness of more than 1/8
inch (3.6 mm) below the connector cannot be connected.