27
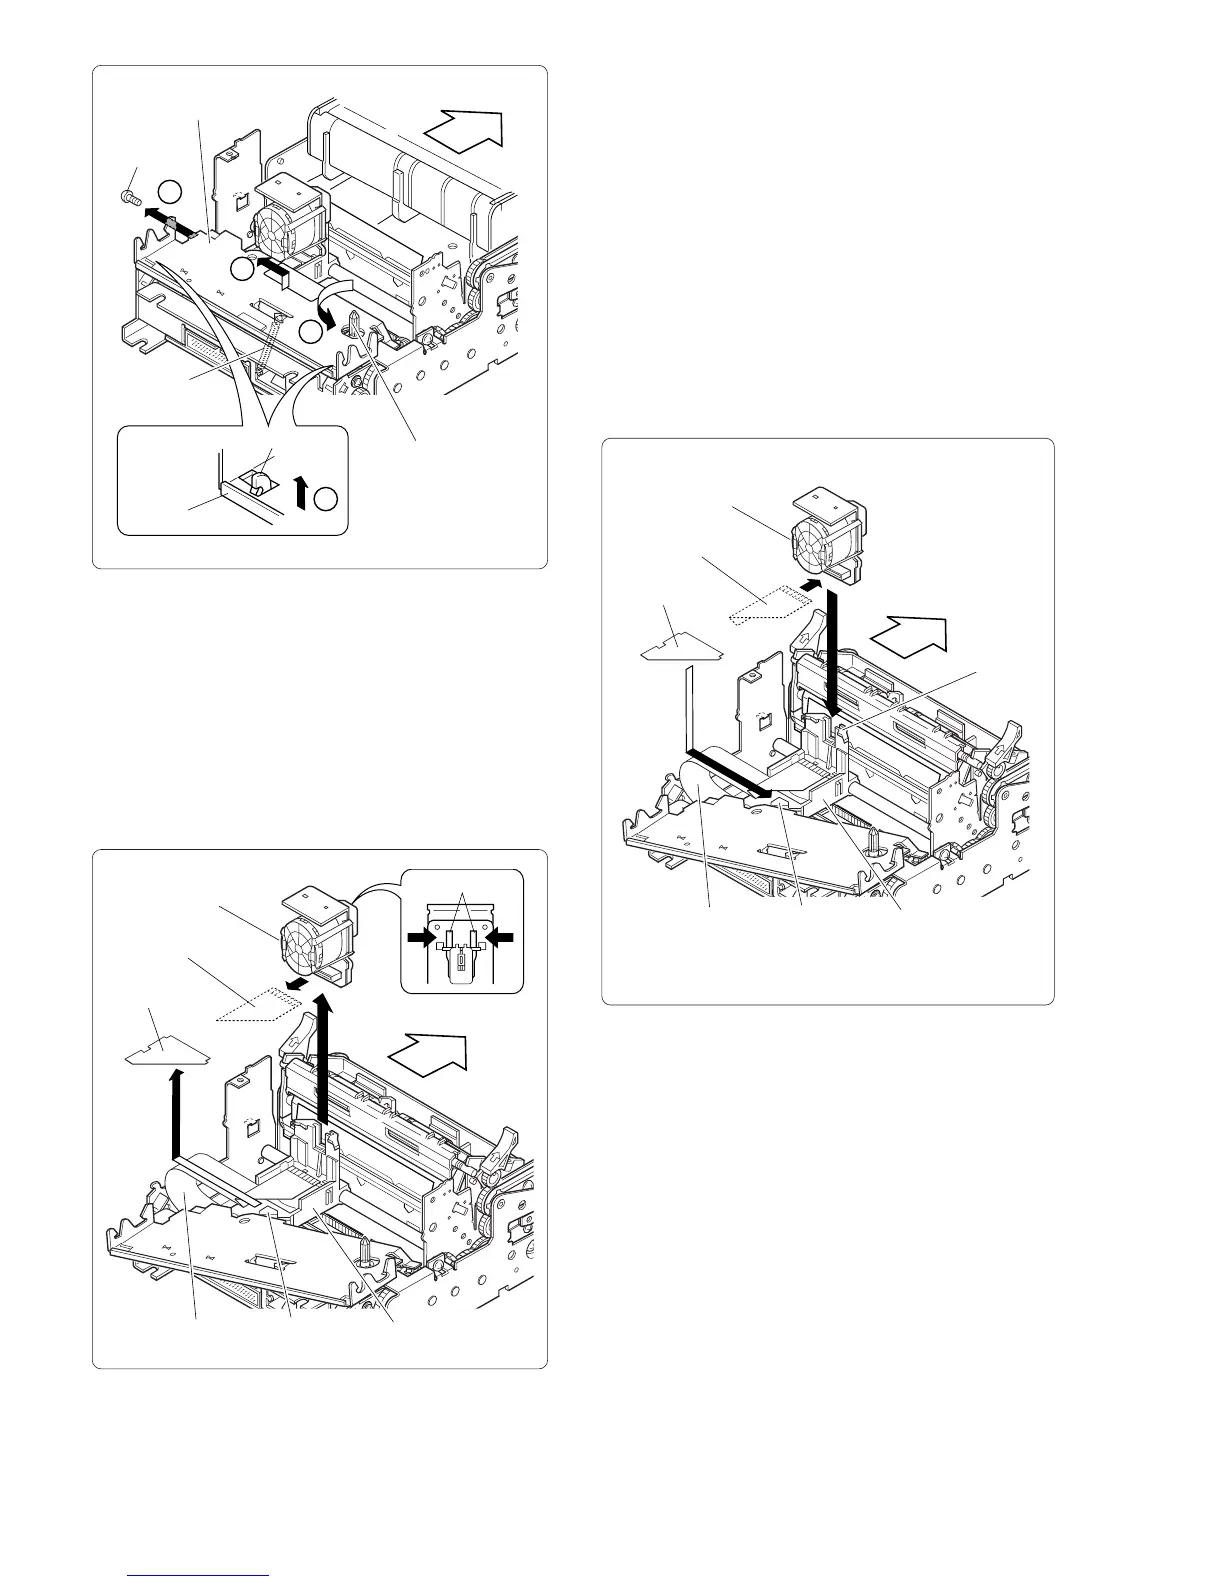
(6) Grasp the left side of the cable fixing sheet and raise
to the left to remove.
Note: The cable fixing sheet is thin and small.
Take care not to drop it into the printer or
otherwise lose it.
(7) Grasp the protrusion on the head assembly and lift up.
(8) When the head assembly is removed from the carriage,
pull out the head cable and disconnect.
Rear
Ribbon plate
spring
Ribbon plate
Fastening
screw
1
2
Ribbon plate
Protrusion
3
4
Ribbon drive
shaft
Rear
Head assembly
Cable fixing
sheet
Head cable
Head cable Slit Carriage
Protrusion
3-5-2 Assembly Procedure
(1) Plug the head cable into the head assembly connector.
Note: Make sure that the head cable is pushed
fully into the connector.
(2) Insert the head assembly into the carriage guide. Just
before the assembly is fully seated, push the bent
section of the head cable into the carriage slit.
Note: Take care not to damage the head cable.
(3) Push the head assembly further in until it locks into
place.
(4) Check orientation of the cable fixing sheet and
insert the sheet into the carriage slit.
Rear
Head assembly
Cable fixing
sheet
Head cable
Head cable Slit Carriage
Guide