-72
Removing and Installing
the Lamp Unit
Warning!
• Do not remove the lamp unit from the pro-
jector right after use. The lamp and parts
around the lamp will be very hot and may
cause burn or injury.
Info
• Make sure the lamp unit is removed using
the handle. Make sure the glass surface of
the lamp unit or the inside of the projector
are not touched.
• To avoid injury to yourself and damage to
the lamp, make sure you carefully follow
the steps below.
• Do not loosen other screws except for the
lamp unit cover and lamp unit.
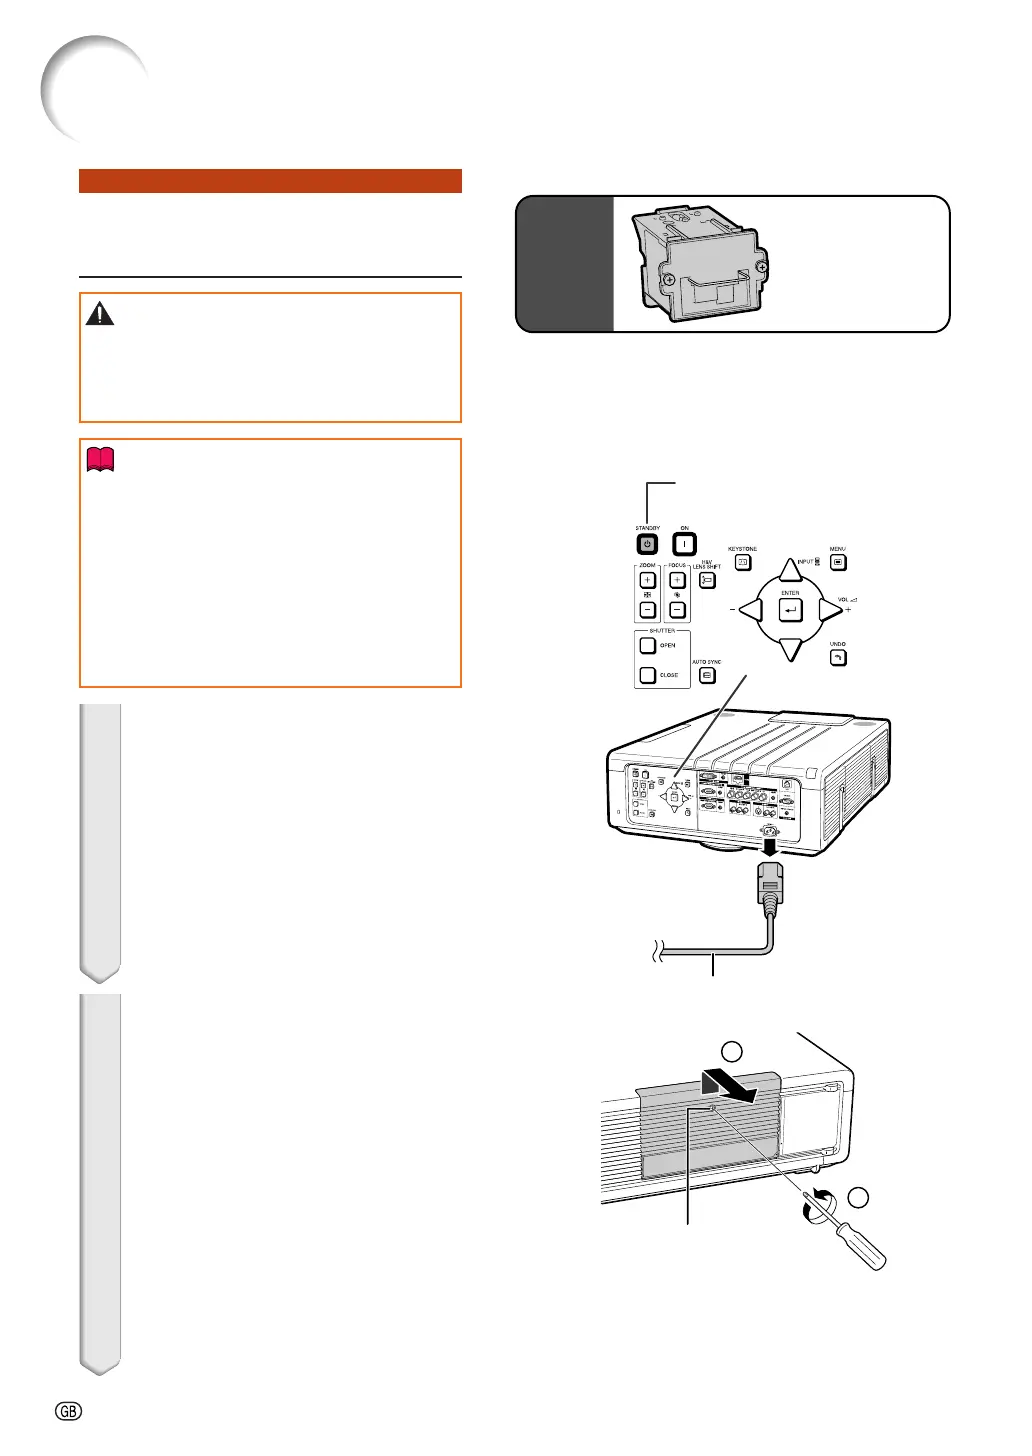
1 Press STANDBY on the projec-
tor or on the remote control to put
the projector into standby mode.
• Disconnect the power cord and unplug
the power cord from the AC socket after
the cooling fan stops.
• The cooling fan may continue to run for
a while even after the power cord is re-
moved.
• Leave the lamp until it has fully cooled
down (about 1 hour).
2 Remove the lamp unit cover.
• Loosen the user service screw (1) that
secures the lamp unit cover. Remove the
lamp unit cover to slide it in the direc-
tion of the arrow (2).
STANDBY button
Power cord
1
2
User service screw
Optional
accessory
Lamp unit
AN-P610LP
Regarding the Lamp



 To Next Page