Alpy 600 - user guide
2.2 Color or black & white ?
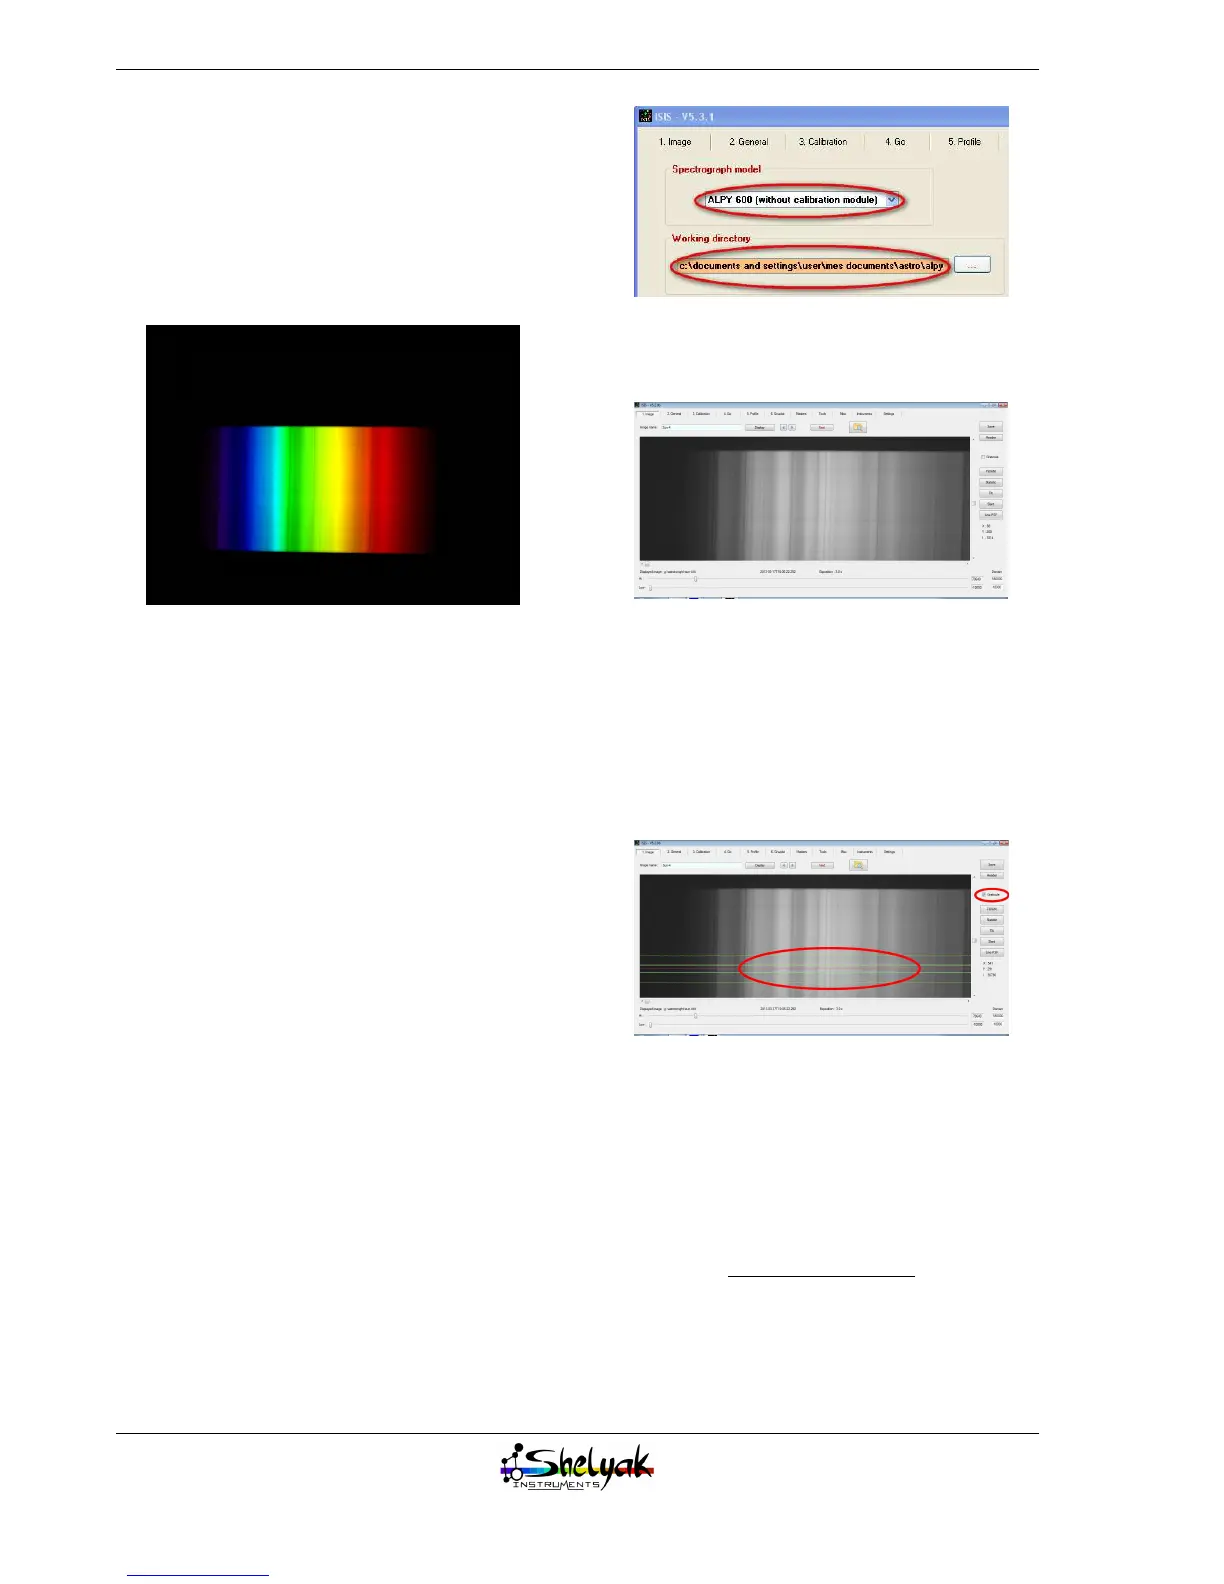
When you look visually at the spectrum, you see a
rainbow, with beautiful colors. Using most CCD cam-
eras, you get only a black & white image. This is nor-
mal, because the CCD camera is not color-sensitive.
If you had used a color camera (or a DSLR camera),
you would have a colored spectrum like this one:
You might think it is better to have the color... it
depends ! If this is only for sharing what a spectrum
is, this is true. But if you want to make measurements
on your spectrum, a black & white camera is prefer-
able : its surface is uniformly sensitive, and there is
no effect of the colored pixels (Bayer matrix effect).
Anyway, keep in mind that color or black & white
only depends on the camera : the spectroscope itself
works in color.
2.3 Preview of your spectrum
You’ve recorded your first spectrum image. That’s
great, but not very useful in this format. Usually, a
spectrum is presented as a profile, giving the light
intensity vs the wavelength. To make the conversion
from image to profile, you must use spectral data re-
duction software. Alpy 600 is provided with ISIS soft-
ware, which is one recommended tool. This docu-
ment isn’t a tutorial of ISIS (refer to the ISIS doc-
umentation
1
, and specially the Alpy tutorial
2
), but
shows very quickly the basics for this first experience.
Here is how to proceed with your Sun spectrum.
Run ISIS, ang go to the "Settings" tab. Select "ALPY
600 (without calibration module)" in the spectrograph
model, and specify the working directory where you’ve
storedyour images (FITS files):
Go in the tab “Image”. Select your Sun image (Sun-
1.fit), and display it :
If you don’t see the spectrum, it is probably because
it is outside of the displayed zone. You can move in
the image using the scrollbars
Select the checkbutton “Reticule”.
It will display the area of the image which will be
selected for profile extraction. If the area is not in the
spectrum, double click in the middle of the spectrum
: it will put the reticule there.
Then, click the button “Next”; ISIS switches to the
“2.General” tab, and updates automatically several fields.
Put “Sun” in the object name. In the options area, se-
lect the “don’t remove background” checkbutton. This
is to tell ISIS that your spectrum is from an extended
object (the spectrum is not a single line in the im-
age). Unselect “wavelength calibration”, because at
this stage, we’ve no data for calibration.
1. http://www.astrosurf.com/buil/isis/isis.htm
2. http://www.astrosurf.com/buil/isis/guide_alpy/tuto_en.htm
18