4
Star spectra in slit mode
In previous chapters, you’ve see how to use the Alpy
600 in slit mode (see chapter 2) and slitless mode
(see chapter3). Slitless mode allows you to find your
target more easily, and capture all the light, which is
important for faint objects.
But slit mode has several advantages:
– A better wavelength calibration (using calibration
lamps),
– Observation of extended objects (nebulae, comets,
galaxies...),
– Allows the sky background to be removed (useful
for faint objects or urban observing conditions),
– The resolution depends only on the slit, not on
observing conditions (tracking, seeing, telescope
focus...).
For these reasons, most observations are made in slit
mode. In this chapter, you’ll see how to work around
the problem of pointing and tracking a star in slit
mode, though
the best solution is definitely to add the Alpy guid-
ing module to your Alpy 600. This is a device which
shows you the entrance of the slit: you can see the star
you are observing. You can use this image to move
the star onto the slit and track it. If you plan to make
regular observations of astronomical objects, this is a
required device - for comfort and efficiency, but also
for the quality of your measurements. It is described
in 7.1.1
However, there are some ways to observe in slit
mode, even without the guiding module. It requires
some experience - most astronomers like challenges !
There are two approaches:
1. Observing with the wide slit and a flip mirror,
2. Observing with the narrow 25µ slit.
The first one is really accessible. The second one is
clearly a challenge - but we did it ourseleves.
Observing with the wide slit
The Alpy 600 includes several slits (refer to section
1.7). One of them is the wide slit, 300µm wide. This is
a trade-off between the thin slit and the slitless mode.
Compared to slitless mode, the size of the slit means
that your spectrum is always at roughly the same po-
sition horizontally in the image, and reduces the un-
certainty in wavelength calibration. Also, it reduces
the sky background effect, and gives more detail in
the flat field.
The difference with the thin slit is that the spectrum
resolution is still given by the star image size, whereas
the thin slit ensures that the resolution comes from
the instrument itself. Of course, because of the field
of view, it is much easier to center the star.
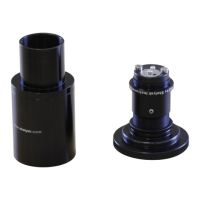
To help you in star pointing, we recommend using a
flip mirror (with a reticle eyepiece) between the tele-
scope and the Alpy 600:
This optional device will help you to put the star in
a very precise position, enough to put it in the wide
slit at least.
Centering the star
Use the telescope finder to locate the star (start al-
ways with a bright one), and flip the mirror to see
the telescope field in the eyepiece. Put the star well
centered in the Field of View (FOV). Then, flip back
the mirror to let the starlight enter the spectroscope.
Take continuous images, until you can see a spectrum
in the image. If there is nothing, put all the thresh-
olds at max sensitivity, and change the focus of the
telescope - the first time you install the flip mirror,
the telescope is probably very unfocused. When star
becomes focused, you should see a large spectrum
(band), which will become brighter and brighter. The
band is due to the fact that an unfocused star is like
33