CHAPTER 2. ALPY 600 - SPECTROSCOPY IN SLIT MODE
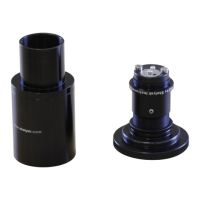
Click on the "Next" button. Isis switches to the "3.
Calibration" tab. Check that “Tilt angle”, “Smile Y”, “X
coordinate of line at wavelength” and “A =” have the
value zero. Put 10.000 in the “Radius” value. Uncheck
the “Auto” after “vertical coordinate”:
Click on the "Next" button. Isis switches to the "4.
Go” tab. Click on the GO button; ISIS runs the data
reduction:
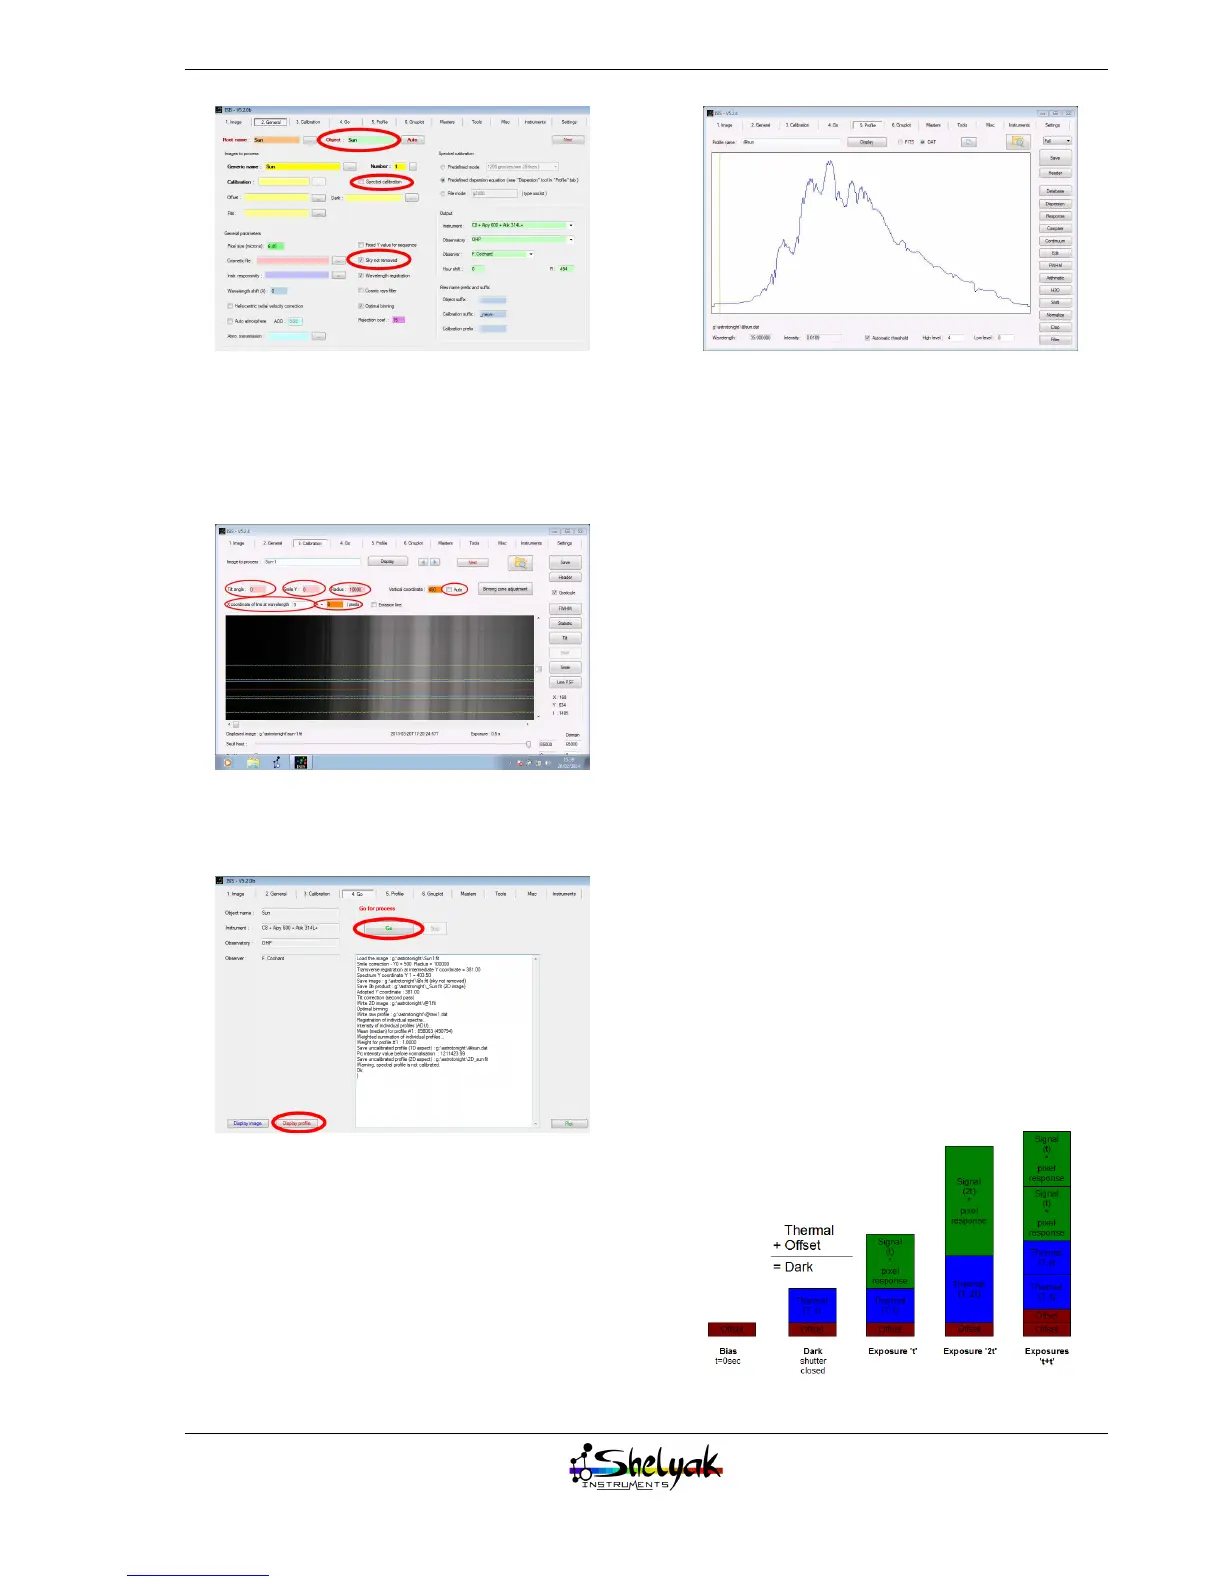
After a few seconds, the process is done. Click on
“Display profile”. You should have this kind of image:
This is your first Sun spectrum profile ! There are a
lot of absorption lines - each of them is the signature
of a chemical element in the external layers of the
Sun’s atmosphere (photosphere).
However, at this stage, your profile is still not of a
high scientific interest. For three reasons, at least :
–The 2D image has not been pre-processed,
–The spectrum is not calibrated in wavelength,
–The profile is not corrected for the Instrumental
Response.
In the next sections, you’ll learn how to proceed to
make these corrections and calibrations.
2.4 Reference images
Digital imaging is affected by several instrumental
effects, such as offset, thermal signal, read-out noise,
hot pixels, and so on. These effects are quite easy
to correct, using reference images : offset, dark, flat
fields.
The pre-processing can be highly automated, once
you have made the proper reference images. These
images are “offset”, “dark frames”, “flat field” and “cal-
ibration”.
It is always better to take a series of images instead
of a single image. From the series, you can make ei-
ther an average or a median. This way, you’ll be able
to eliminate any accidental events (such as cosmic
rays in images), and improve the image quality. ISIS
software can manage series of images for all type of
reference images.
19