38(44)
4. Application and Operation
Open the distribution box and connect the power source in accordance with
wiring diagram. Make sure that the power voltage is in compliance with the
required specifications.
Notes!
Before connecting, the main switch and heat switch should be off.
4.1 Test
After all wires are connected, turn the main switch and the heater switch to “ON”,
then the pilot lamp light, observe if the rotating direction of blower is consistent
with the arrow. If not, exchange any two power cables.
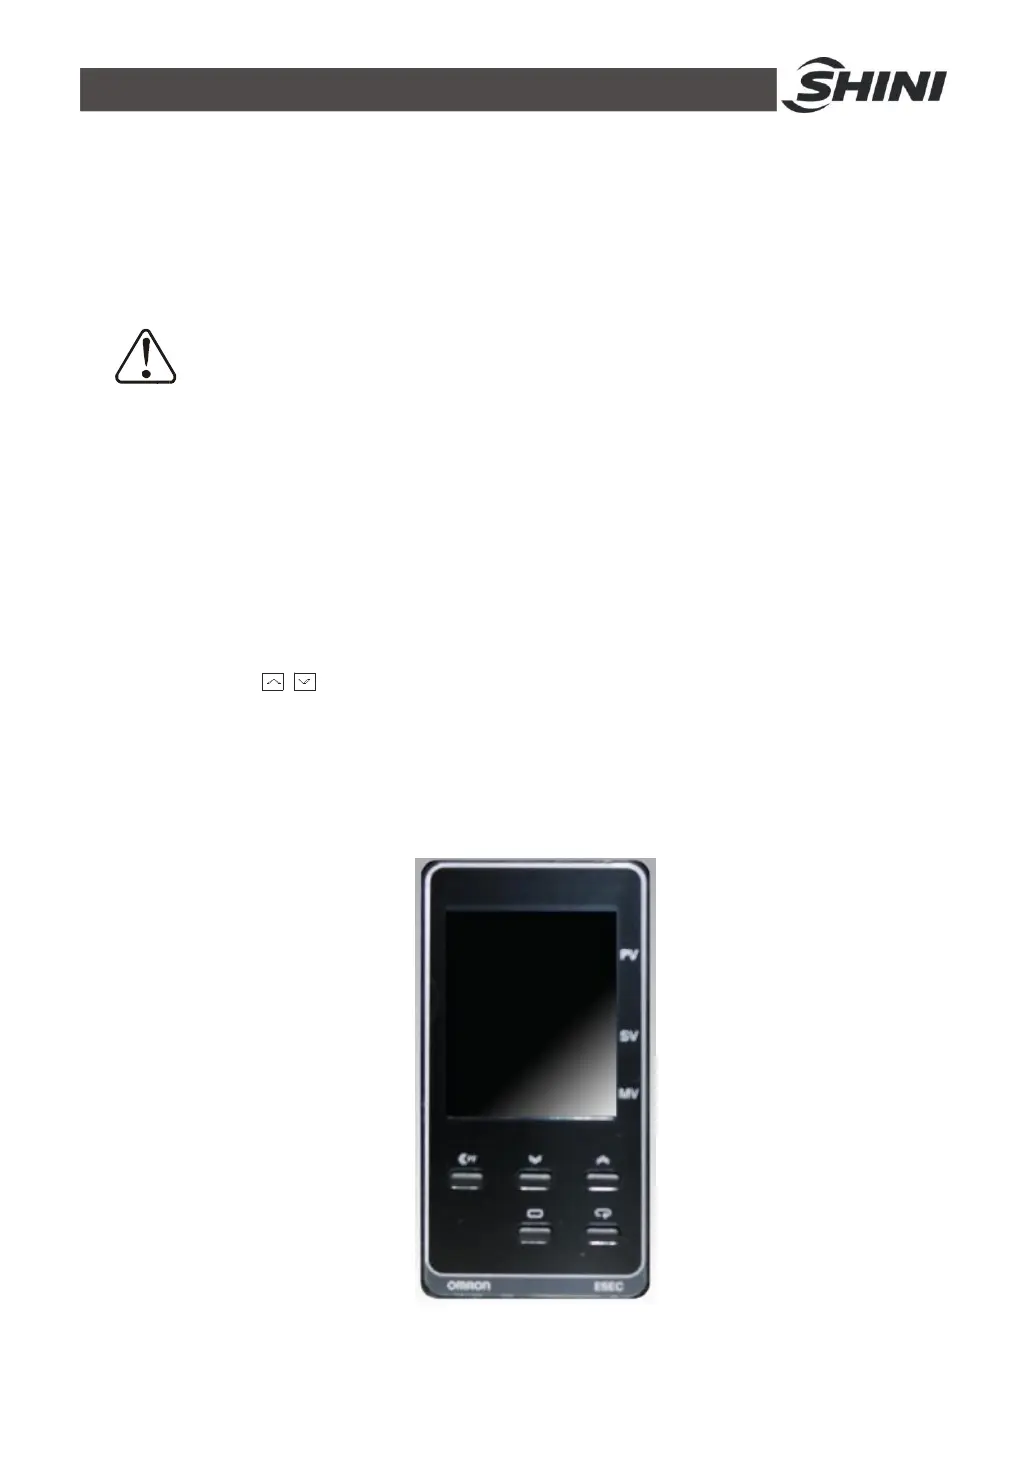
4.2 Setting Temperature
Press the to adjust the temperature, and it will be confirmed automatically
after several seconds. Set the temperature according to material drying thermometer by
adjusting the temperature regulator. After heating for a while, the OUT1 indicator will
flicker intermittently, which means it reaches the set temperature. The real temperature
of temperature controller should be consistent with the set temperature.
Picture 4-1:Temp. Controller