16(33)
3. Installation Layout
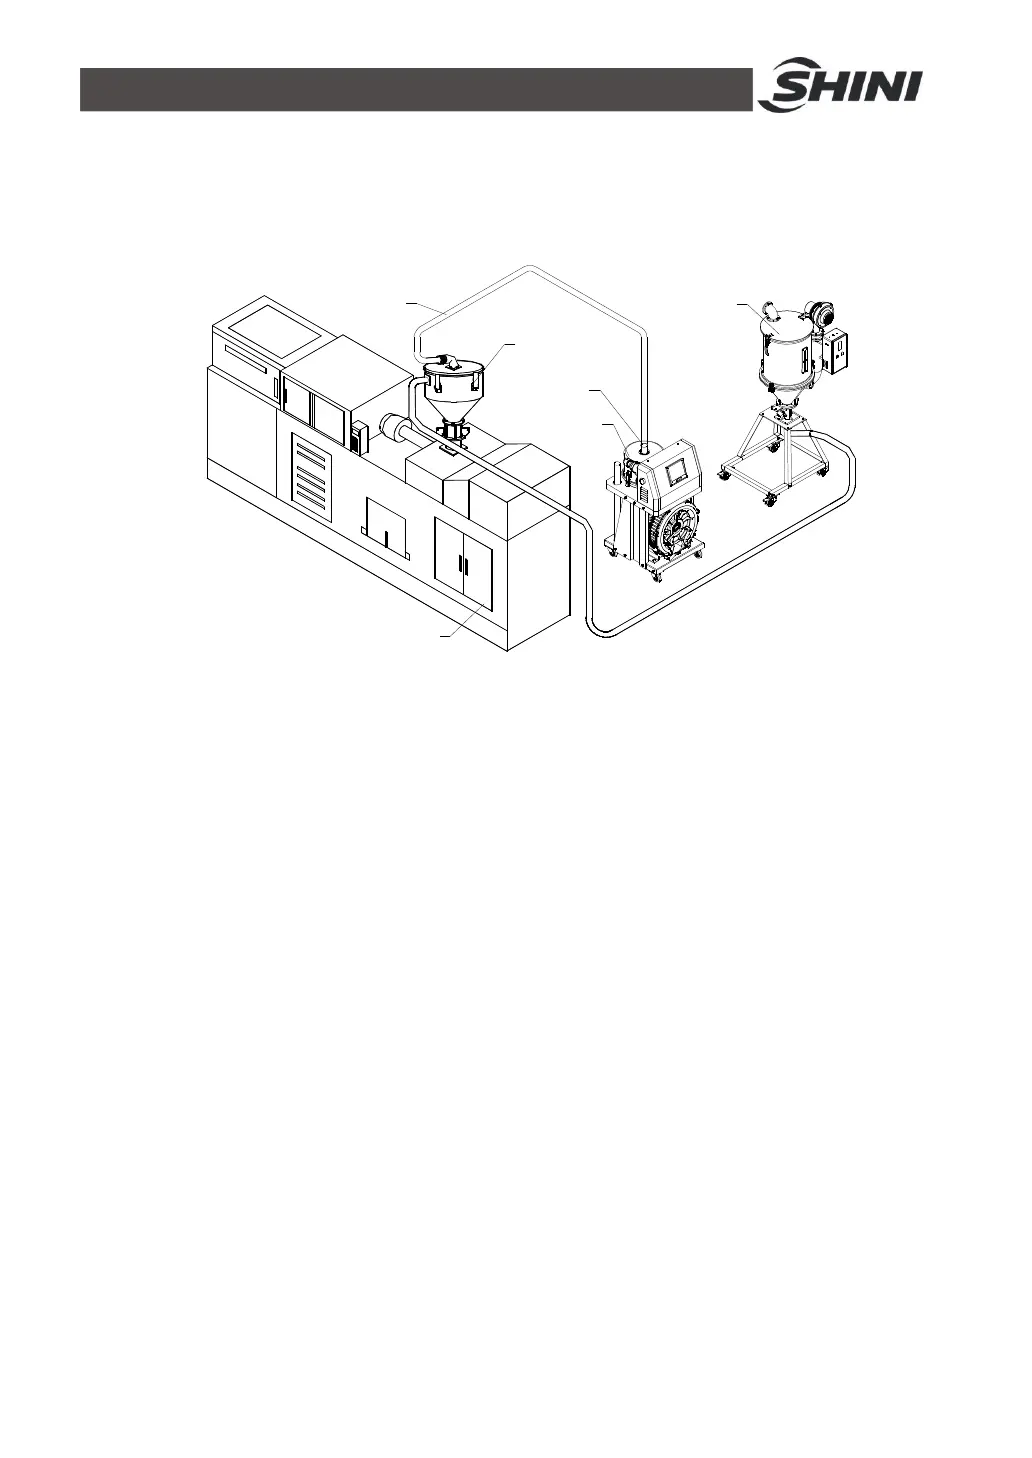
3.1 SAL-810G/820G/830G
Air suction
inlet
SVM
Air suction
pipe
IMM
SAL-810G
Hopper
dryer
Picture 3-1: Installation Layout 1
Notes for Installation and Positioning:
1)
Machine just can be mounted in vertical position. Make sure there’s no
pipe, fixed structure or other objects above the installing location and around
the machine which may block machine’s installation, hit objects or injure
human person.
2) For easy maintenance, it’s suggested to leave 1m space around the machine.
3) Machine should be placed on water-level surface. If it needs to be mounted
on a higher surface (e.g. the scaffold or the interlayer), should ensure its
structure and size could bear the weight and size of the machine.
Installation:
1) Place the SAL-810G/820G/830G machine at a proper position on the ground,
connect the three phase power cord and the earth.
2) Install the material hopper on the top of the hopper dryer and the sensor
hopper onto the plastic injection machine. Connect the signal cord to the
machine SAL-810G/820G/830G.
3) Use the steel wire soft hose, connect the air inlets of the sensor hopper to the
current air inlets of SAL-810G/820G/830G, then connect the material inlets of


 To Next Page