3
Transmitter LED Indicators
LED Indicator Status
Green Ready
Rapidly Flashing Amber Controls locked
Solid Red Battery power low (1 hour remaining*)
Flashing Red and shuts off Batteries dead (change batteries to power on transmitter)
*For alkaline batteries only. For rechargeable batteries, solid red means the batteries are dead.
Before you begin, turn off all transmitters and turn on any equipment
(other microphones or personal monitoring systems) that could cause
interference during the performance.
1. Press and release the group button on the receiver.
The receiver scans for the clearest group and proceeds to channel
scan.
Note: If you want to stop the scan, push the group or channel
button.
2. Turn on transmitter and change the group and channel to match the
receiver (See Manually Setting Group and Channel).
Once the receiver is set up, perform an audio check on the
microphone.
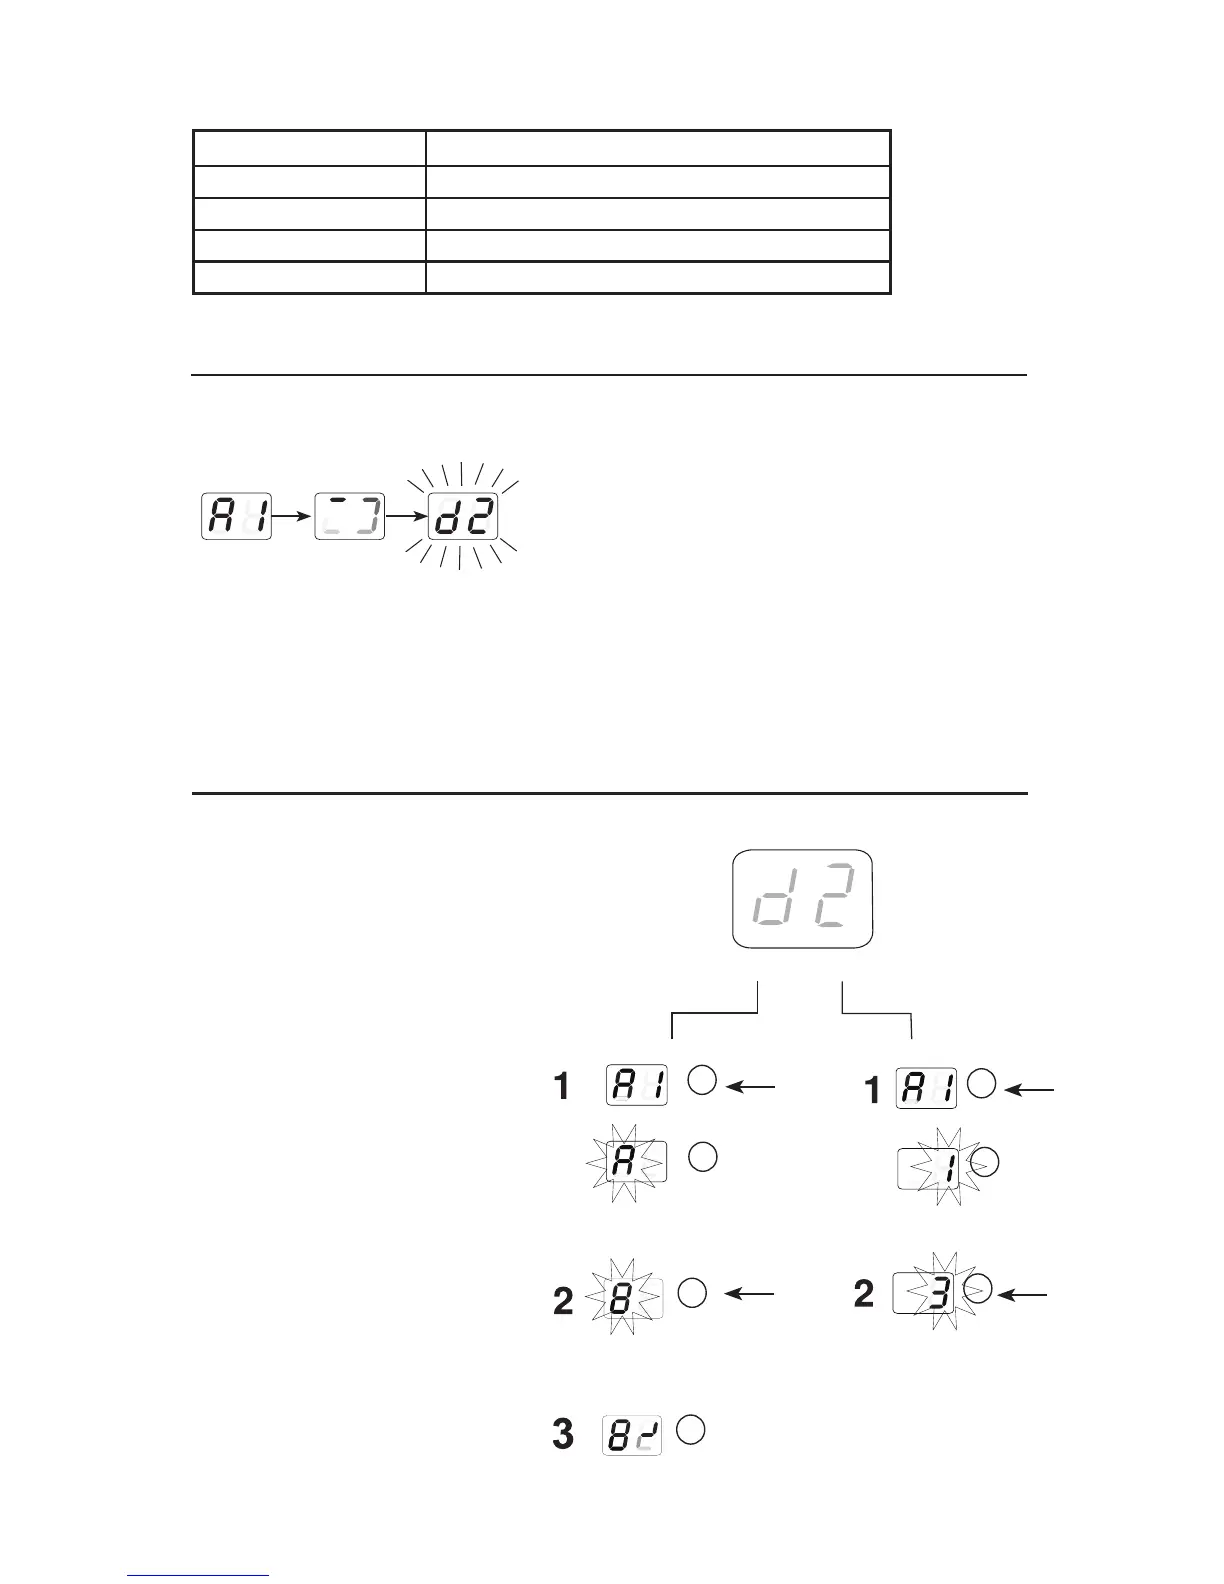
Manually Setting Group and Channel
Single System Setup
Receiver Setup
Group (letter)
1. Hold the group button on the receiver until
the display begins to flash.
2. While the display is flashing, press the
group button again to advance to the next
group.
Note: Only the group setting will be dis-
played during the manual setup.
3. Once the desired group is reached, release
the group button. Then the receiver will au-
tomatically perform a channel scan.
Channel (number)
If channel needs to be changed, follow the
same procedure using the channel button
instead of the group button.
group channel
 Loading...