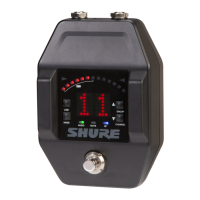
Why does my Shure GLXD6 Music Pedal transmitter power off after 1 hour?
- DDavid EdwardsSep 5, 2025
The transmitter powers off after 1 hour if the transmitter status LED is off. Make sure that the linked receiver is turned on.
Why does my Shure GLXD6 Music Pedal transmitter power off after 1 hour?
The transmitter powers off after 1 hour if the transmitter status LED is off. Make sure that the linked receiver is turned on.
What to do if my Shure GLXD6 has no sound or faint sound?
If you experience no sound or faint sound, verify all sound system connections and adjust the gain as needed. Also, check that the receiver is properly connected to the mixer or amplifier.
Why does my Shure GLXD6 Music Pedal have audio artifacts or dropouts?
Audio artifacts or dropouts may occur if the RF LED is flickering or off. To resolve this, try the following: * Change the receiver and transmitter to a different group and/or channel. * Identify and remove nearby sources of interference such as cell phones, Wi-Fi access points or signal processors. * Charge or change the transmitter battery. * Ensure the receiver and transmitter are within the specified system parameters, set up within the recommended range, and the receiver is away from metallic surfaces. For optimal sound, the transmitter should be used within line of sight of the receiver.
What to do if the transmitter indicator LED on my Shure GLXD6 is flashing red?
If the transmitter indicator LED is flashing red, charge or change the transmitter battery.
Why is there distortion on my Shure Music Pedal?
Distortion can occur if the OL indicator appears on the receiver LCD. To fix this, reduce the transmitter gain.
What to do if the receiver RF LED is off on my Shure Music Pedal?
If the receiver RF LED is off: * Turn on the transmitter. * Ensure the batteries are correctly installed. * Link the transmitter and receiver. * Charge or change the transmitter battery.
Why does my Shure Microphone system have sound level variations?
If you experience sound level variations when switching to different sources with your Shure Microphone system, adjust the transmitter gain as necessary.
What to do if my Shure Microphone system has no sound?
If you're experiencing no sound or faint sound with your Shure Microphone system, here's what to check: * **Receiver RF LED is on:** Ensure all sound system connections are correct and adjust the gain if needed. Also, verify that the receiver is properly connected to the mixer or amplifier. * **Receiver RF LED is off:** Turn on the transmitter, verify the batteries are correctly installed, link the transmitter and receiver, and charge or change the transmitter battery. * **Receiver LCD screen is off:** Ensure the AC adapter is securely plugged into the electrical outlet and that the receiver is powered on. * **Transmitter indicator LED flashing red:** Charge or change the transmitter battery. * **Transmitter plugged into charger:** Disconnect the transmitter from the charger.
What to do if the transmitter is plugged into the charger on my Shure GLXD6?
Disconnect the transmitter from the charger.
Why isn't the transmitter information appearing on the receiver LCD of my Shure Music Pedal?
Transmitter information will not appear on the Receiver LCD if the linked transmitter is off, or the receiver is not linked to a transmitter.
Type | Digital |
---|---|
Product type | Guitar wireless receiver |
Product color | Black |
Frequency range | 2400 - 2483.5 MHz |
Compatible products | GLXD1 |
Transmission distance | 60 m |
6.35 mm (1⁄4-inch) output | 1 |
Battery life (max) | 16 h |
Cables included | USB |
Receiver dimensions (WxDxH) | 65 x 23 x 90 mm |
---|
Describes the controls and indicators when the receiver is in audio mode.
Explains LED colors and flashing states for transmitter status.
Steps for charging the battery using an AC adapter.
Steps for charging the battery via a USB port.
Details battery charging durations and operational runtimes.
Instructions for inserting the rechargeable battery into the transmitter.
Step-by-step process for linking receivers and transmitters.
Steps to choose a specific group for frequency allocation.
How to link additional transmitters to the same receiver.
Strategies to manage interference in the 2.4GHz spectrum.
How to set the transmitter gain for optimal audio levels.
How to prevent accidental changes to receiver settings.
Feature to identify linked transmitter and receiver pairs.
Available settings for the tuner, such as indicator and output modes.
Setting the visual display style for tuning indicators.
Configuring audio output behavior when the tuner is active.
Procedure to reset the receiver to its factory defaults.
Procedure to reset the transmitter to its factory defaults.