10
System Setup
Connect the Components to Form a Network
The following are two setup examples for the MXW system. See Networking section for more details on Dante digital audio and networking best practices.
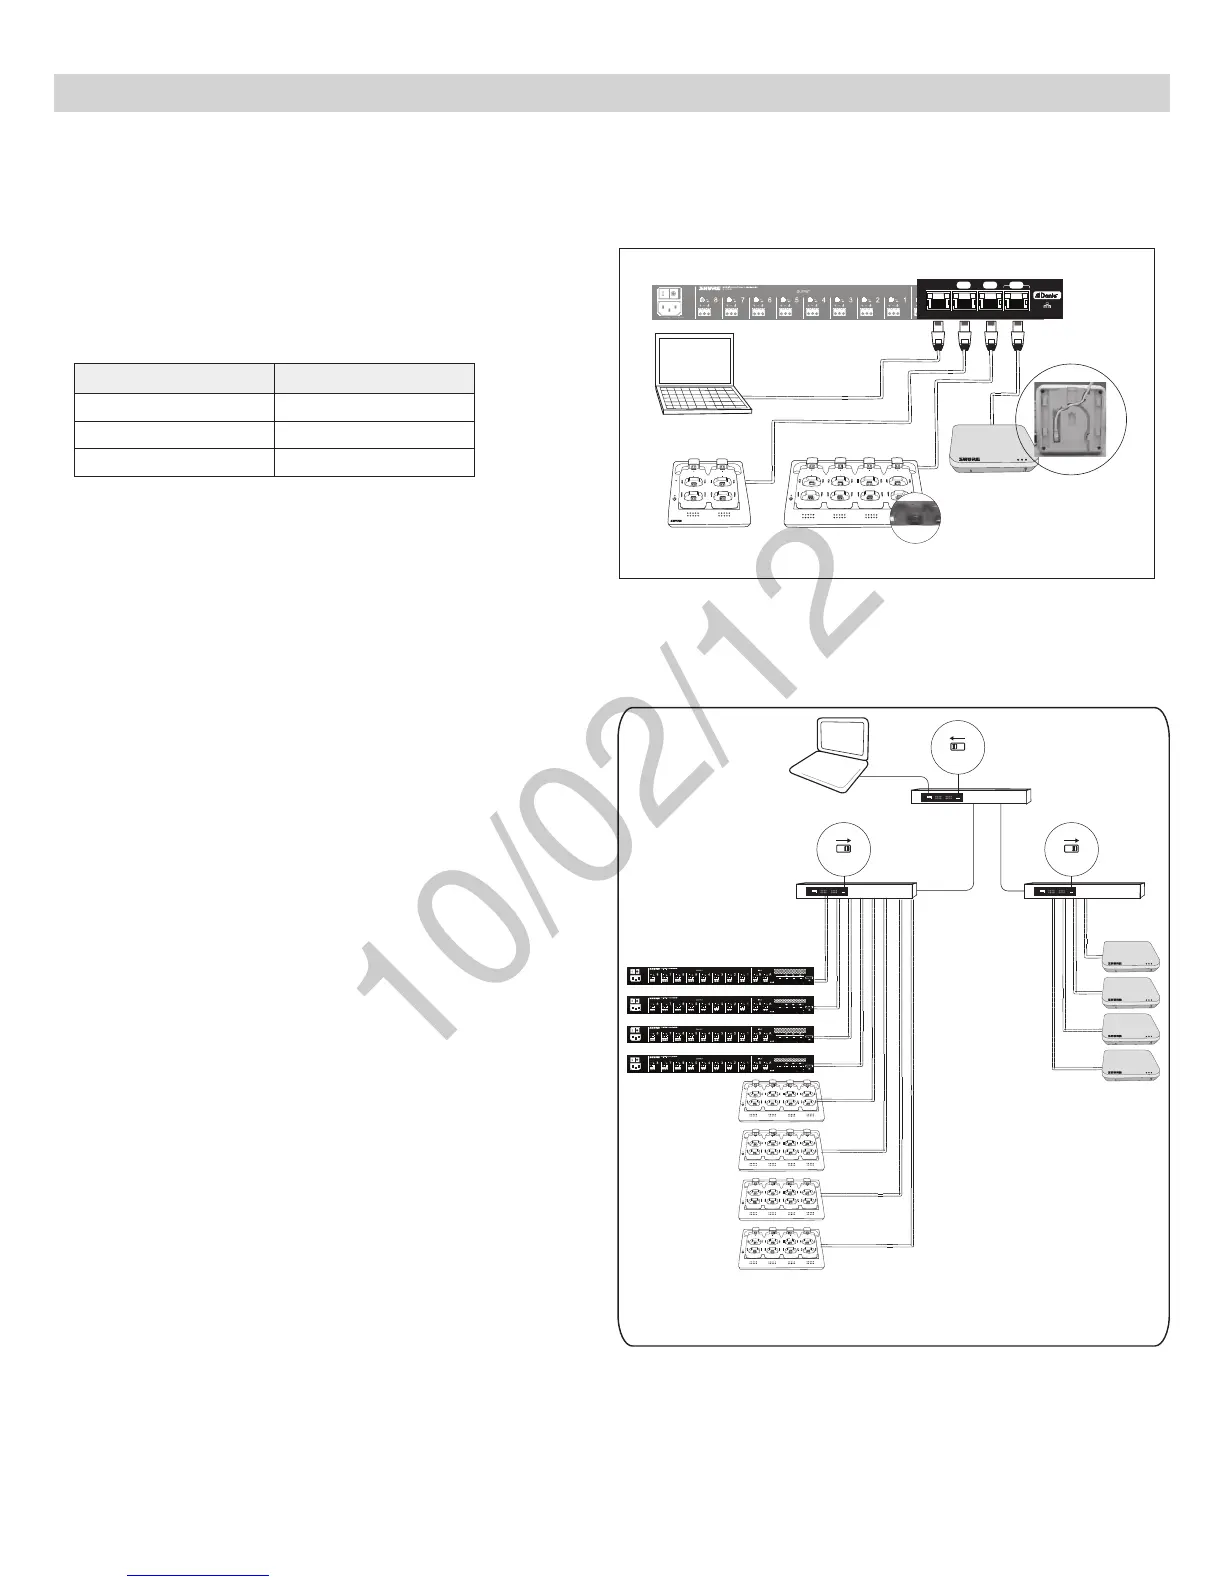
Single Group System (Automatic
Configuration)
Use a Cat5e cable to connect the charger and APT to one of four ports of
the ANI network interface. Reference the table for connecting to the ports:
Port To Component
① Port 1 (PoE) APT
② Port 2 Charger
④ Port 4 (Uplink) Computer (optional)
Requirements:
•
Cat5e(orhigher)ShieldedEthernetCables(≤100m)
++++++++ ++
www.shure.com
MXWANI8
M XW AN I8
uplin k
Input: 100-240V ~ 1A max. 50/60 Hz
234
Class 0 Po E
1
++++++++ ++
www.shure.com
MXWANI8
M XW AN I8
uplin k
Input: 100-240V ~ 1A max. 50/60 Hz
234
Class 0 Po E
1
uplin k
234
Class 0 Po E
1
②
①
7
8
6
5
1
2
3
4
④
③
Link
Power
Single-Group System
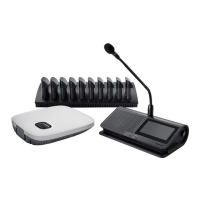
Multiple Group System
Follow these steps for connecting a multiple-group system:
1. Connect a DHCP enabled router to a computer.
2. Connect each charger and audio output device to the router with network
cables
3. Connect each access point to the network via a PoE source.
Requirements:
•
Cat5e(orhigher)ShieldedEthernetCables(≤100m)
• Gigabit Ethernet switch (DHCP-enabled router recommended)
• Computer
Four-Group System
++++++++ ++
www.shure.com
MXWANI8
M XW AN I8
uplink
Input: 100-240V ~ 1A max. 50/60 Hz
234
Class 0 Po E
1
++++++++ ++
www.shure.com
MXWANI8
M XW AN I8
uplink
Input: 100-240V ~ 1A max. 50/60 Hz
234
Class 0 Po E
1
++++++++ ++
www.shure.com
MXWANI8
M XW AN I8
uplink
Input: 100-240V ~ 1A max. 50/60 Hz
234
Class 0 Po E
1
++++++++ ++
www.shure.com
MXWANI8
M XW AN I8
uplink
Input: 100-240V ~ 1A max. 50/60 Hz
234
Class 0 Po E
1
7
8
6
5
1
2
3
4
7
8
6
5
1
2
3
4
7
8
6
5
1
2
3
4
7
8
6
5
1
2
3
4
ON
OFF
DHCP
ON
OFF
DHCP
ON
OFF
DHCP
PoE