INSTALLING THE REBOUND STOP BLOCKS
STEP 4
ITEMS REQUIRED
Remaining Parts in Parts Bag #2 & #3
Parts Bag #4
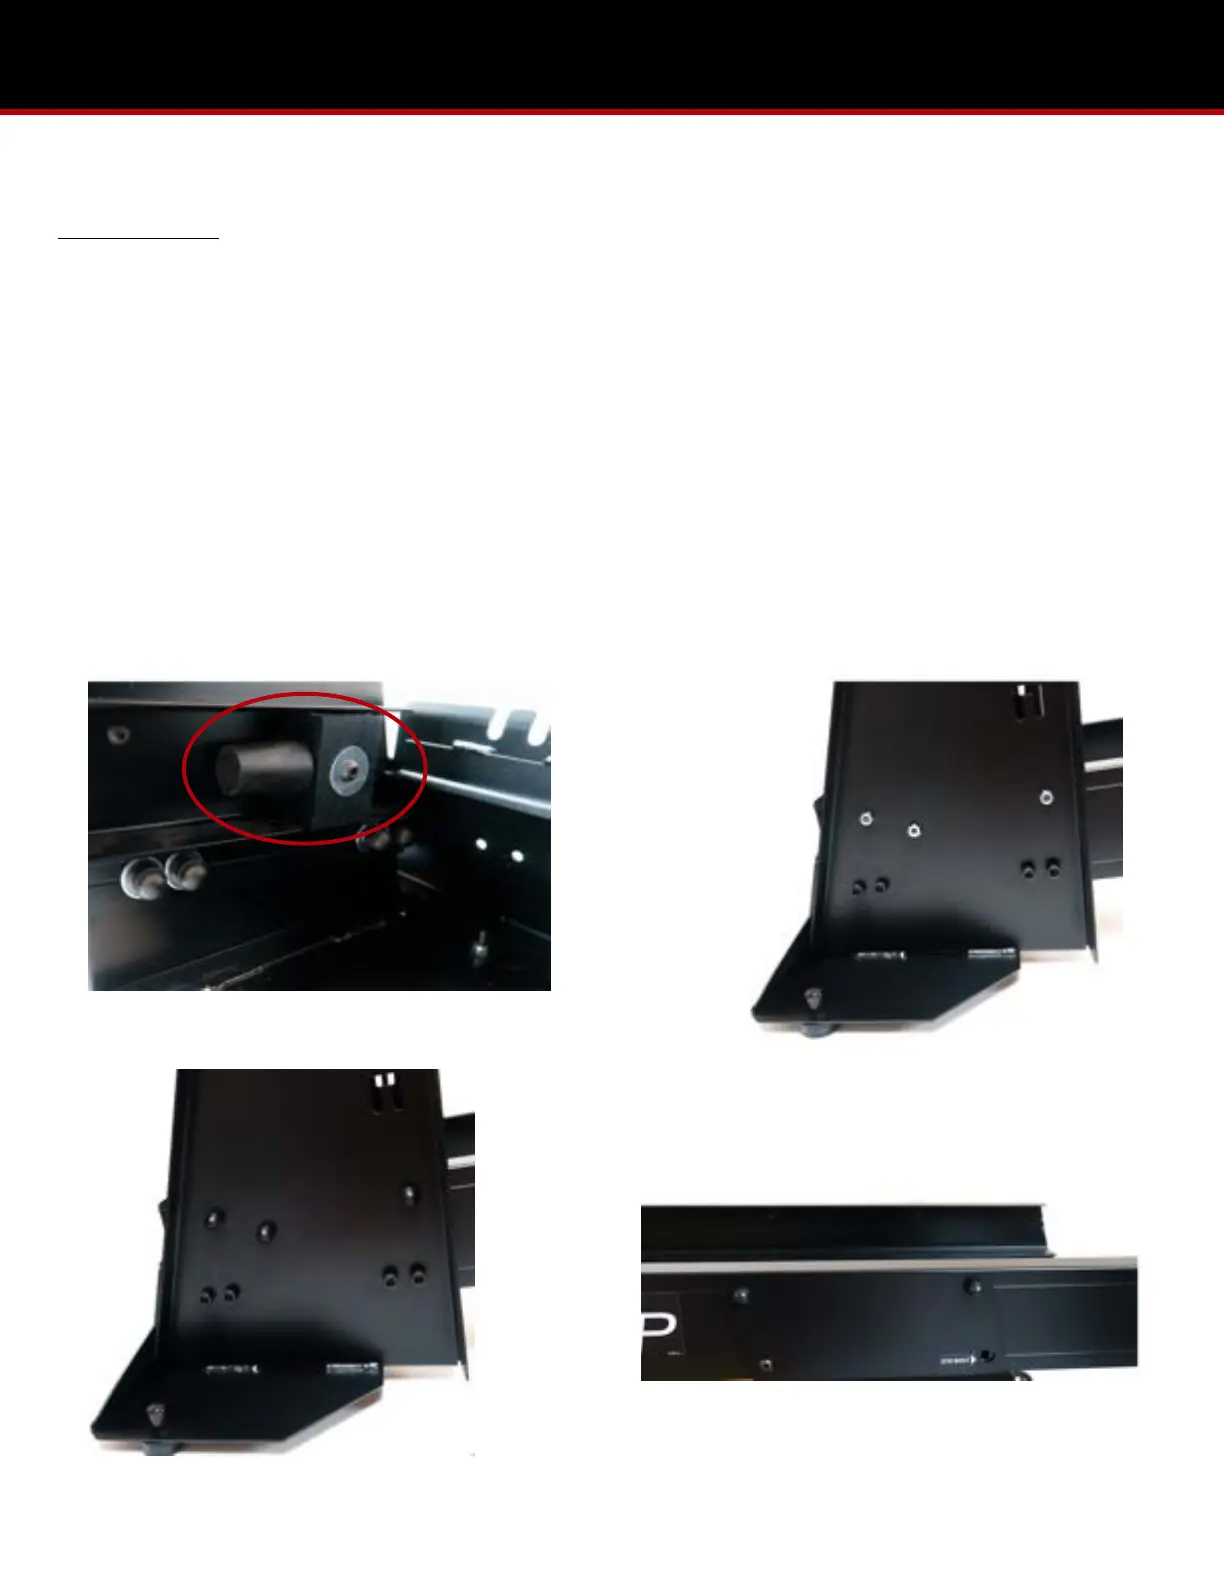
1. Remove the two plastic rebound stop blocks from Parts Bag #4 and unscrew the lock nuts from the bolts.
2. With the bumper cones facing toward the head-end stand, insert the bolts of the plastic rebound blocks into the MVP
rails and through the kickplate structure. Tighten down fully. (Pic 4.1)
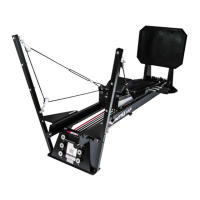
3. Place the nut caps from Parts Bag #4 on the rebound stop blocks and the nut caps from Parts Bag #3 over the lower lock
nuts and upper 4 lock nuts on the kickplate structure. (Pic 4.2 & 4.3)
4. Place the nut caps fro Parts Bag #2 over the 4 lock nuts on the outside of the head-end stand. (Pic 4.4)