INSERTING THE CARRIAGE
STEP 7
ITEMS REQUIRED
Parts Bag #7
Carriage
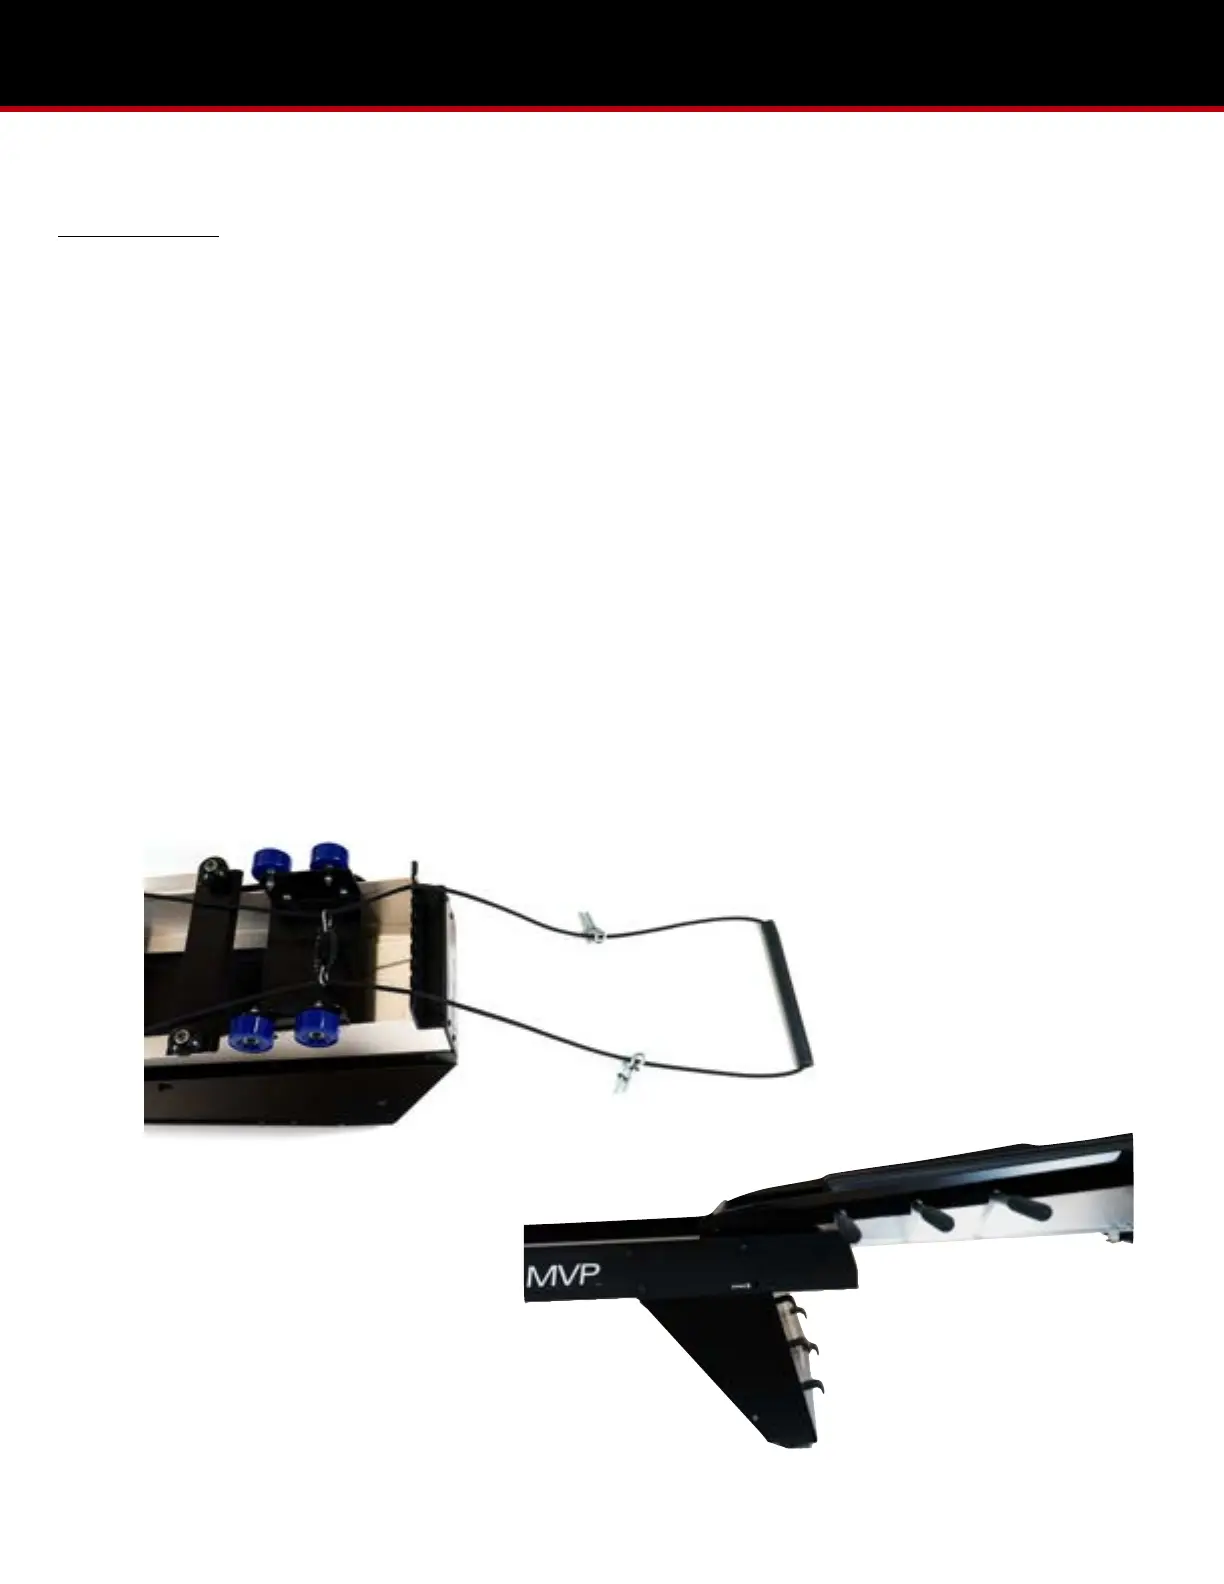
1. While the carriage is still overturned, grasp both sides of the Range of Motion (ROM) Control Rope to the center, pull
them tight, letting the ROM control bar, rebound elastic, and eyebolts extend over the plate between the wheels to rest
on the floor. (Pic 7.1)
2. Keeping the ROM control ropes to the inside of the wheels, turn the carriage over. Insert the foot-end of the carriage
into the MVP rails, and let it gently slide along the inside track until it contacts the rebound blocks. (Pic 7.2)
3. Verify the ROM control ropes are not crossed. With the eyebolts on the inside, insert the two forward eyebolts (closest
to the carriage) outward through the holes of the MVP rails, just behind the carriage. Thread a t-knob onto each bolt.
Make sure the eyebolts are vertical so the ROM control ropes can move freely through the eyebolt holes. (Pic 7.3 & 7.4)
4. Insert the remaining two eyebolts, following the same method through the MVP rails just above the head-end stand. (Pic
7.5)
5. To apply the noise dampener, run an end of the dampener over one side of the rope, under the elasticord lanyards, and
back up over the remaining control rope to then join the ends of the dampener together under the elasticords. (Pic 7.6)
6. From parts bag #7, insert the two knee bumpers into the bottom slot of the MVP rails near the head-end stand so they
rest against the rubber cone. (Pic 7.7)