ASSEMBLING THE MVP RAILS WITH THE CONNECTOR PLATE
STEP 1
ITEMS REQUIRED
MVP Rails
Connector Plate
Parts Bag #1
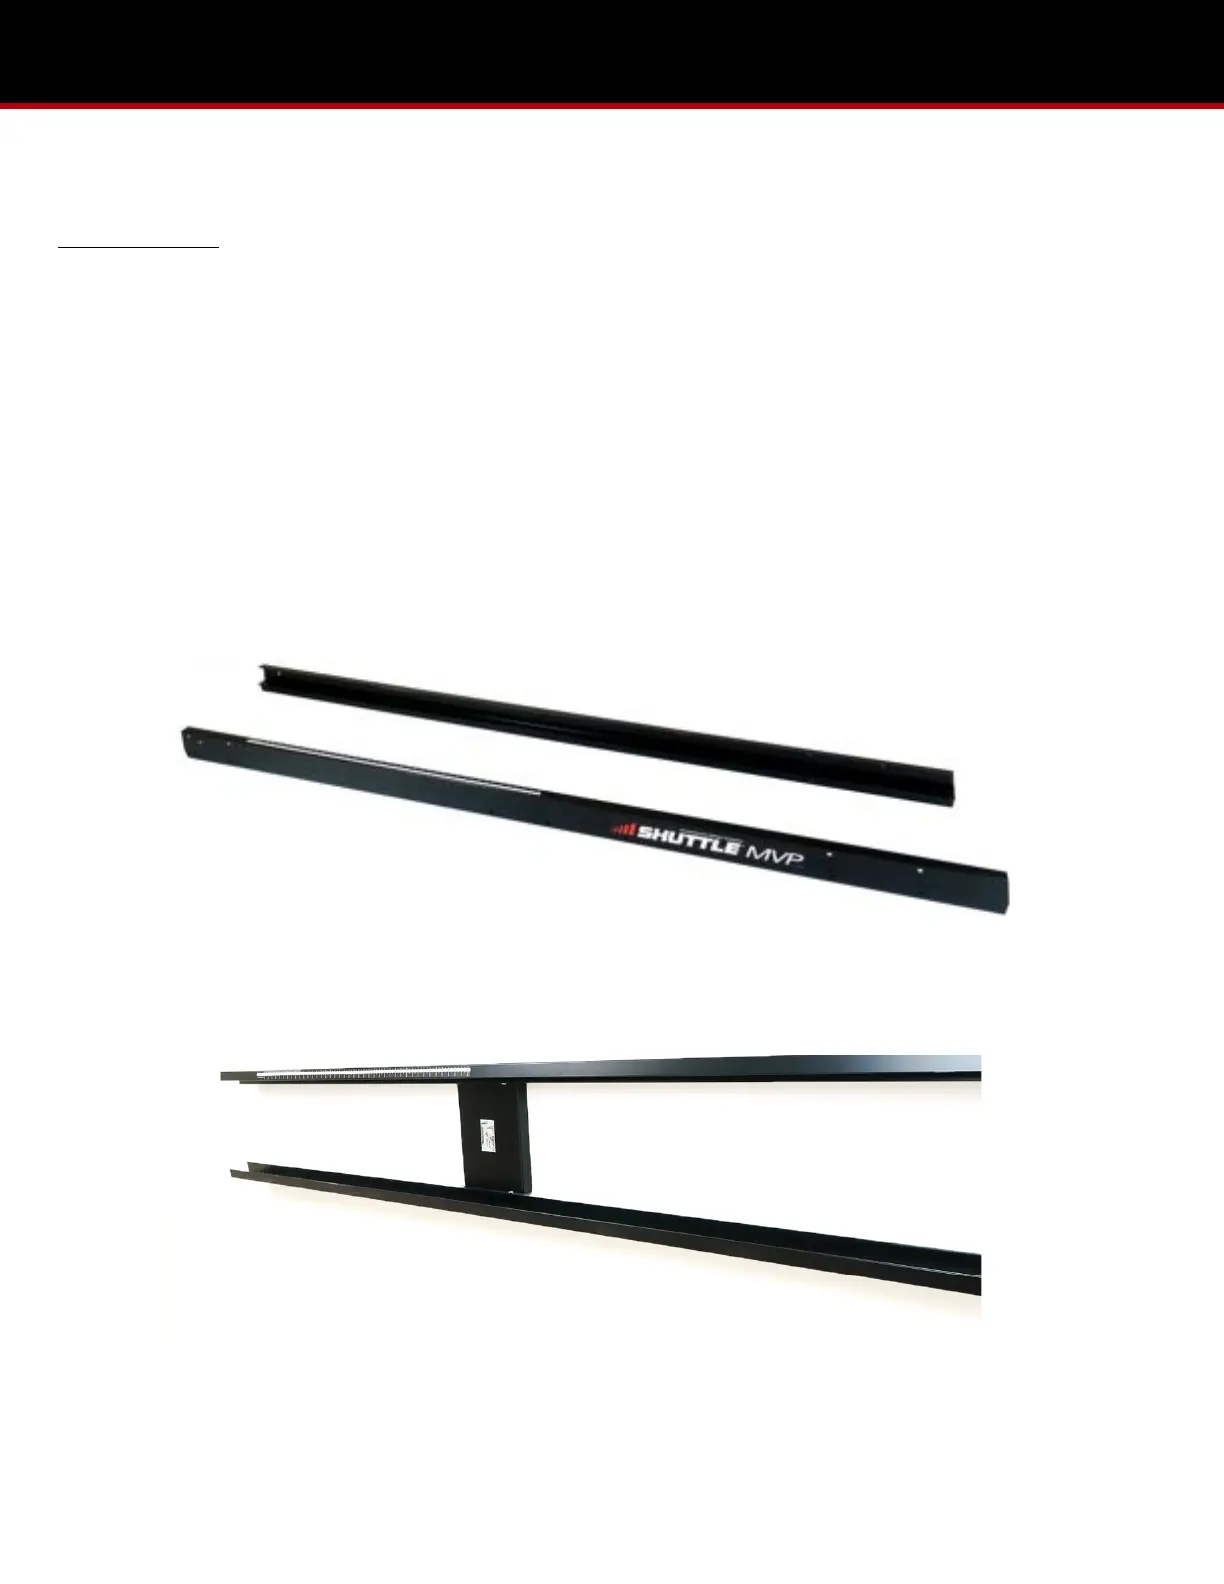
1. Arrange the MVP rails parallel to each other on the floor, upright, hole patterns matching and labels facing outward.
(Pic 1.1)
2. Insert the connector plate (sticker facing up) and align the holes of the plate with those located midway along the rails.
(Pic 1.2)
3. Insert the four 5/16” x 1 3/4” long button head bolts from outside the MVP rails and through the connector plate.
4. Hand tighten a 5/16” lock nut onto each bolt end on the inside of the connector plate.