ATTACHING THE HEAD-END STAND
STEP 2
ITEMS REQUIRED
Head-End Stand
Carriage Box
Parts Bag #2
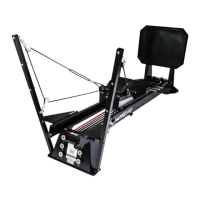
1. Set the assembled MVP rails, right side up, atop the carriage box, allowing the head-end of the rails to overhang the
box at least 18”. (Pic 2.1)
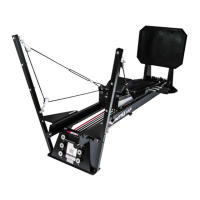
2. Place the head-end of the MVP rails to the inside of the head-end stand vertical tabs, and slide the stand forward until
the holes of each structure are aligned. Once aligned, move the box to where the head-end stand can rest against it.
3. Locate the lower bolt holes (one on each side) of the head-end stand. Insert the 5/16”x 5/8” button head bolts from
outside the head-end stand and through the MVP rails. Hand tighten the 5/16” lock nuts. (Pic 2.2)
4. Locate the upper bolt holes (two on each side) of the head-end stand. Insert the 5/16”x 5/8” button head bolts from
inside the rails and out through the head-end stand. Hand tighten the 5/16” lock nuts. (Pic 2.3)