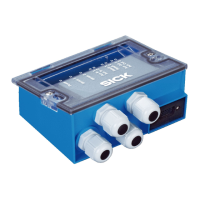
To trigger the illumination unit, its supply voltage is switched on and off via the load
switch of the trigger unit installed in the connection module (see figure 6, page 18). The
Res 2 or Res 4 switching output of the Lector65x forms the control input circuit for the
trigger unit. The supply voltage Uin* applied internally to the trigger unit is protected
by the 2 A fuse of the connection module. The total current for the Lector65x incl.
switching output Res 2 or Res 4 and the illumination unit must not exceed 1.5 A.
Example: Lector65x consumes 1.05 A at DC 19.2 V with no load at its switching out‐
puts. 1.5 A minus 1.05 A equals a max. available current of 0.45 A for the illumination
unit. An external voltage cannot be connected to the illumination unit.
Activating the illumination control in the Lector65x
1. Switch on the supply voltage to the connection module (Lector65x).
2. Set the following parameters in the Lector65x using the Single Device option in the
SOPAS ET configuration software:
°
Result 2 or Result 4 switching output: Select External illumination unit as the
light source.
°
Select the illumination unit model based on the available illumination unit
(e.g., ICLxxx).
°
For other illumination units (e.g., VLR), select the required signal: active low
or active high . Also set the operating mode to continuous or alternating (flash‐
ing). For detailed instructions, see the Electrical installation chapter in the
Lector65x technical information www.sick.com/Lector65x.
ELECTRICAL INSTALLATION 6
8021689/ZZN2/2021-05-07 | SICK O P E R A T I N G I N S T R U C T I O N S | CDB650
19
Subject to change without notice