Press key 3 seconds 1
0%
100%
0%
100%
Ready
Result
|Test
|Teach
|Focus
|Setup
L/A GbE
Funct
Light
Ready
Result
|Test
|Teach
|Focus
|Setup
L/A GbE
Funct
Light
O
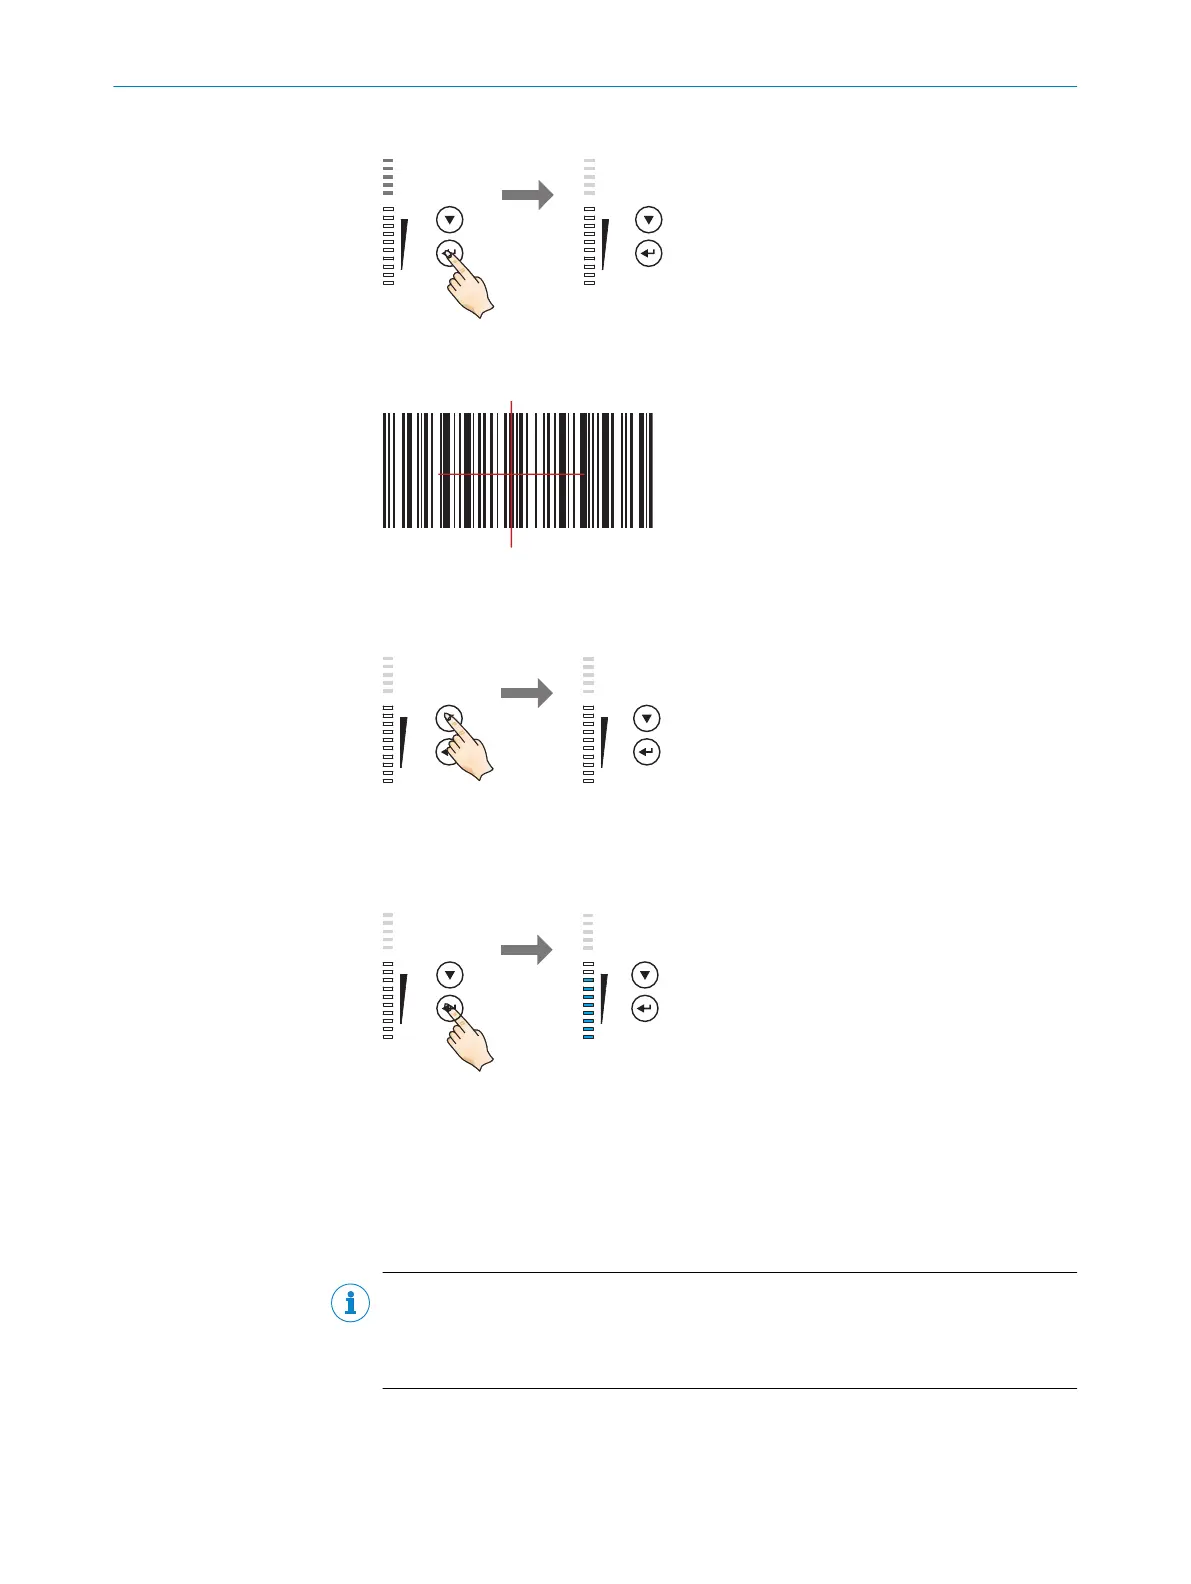
1 Press the p function button for 3 seconds.
2. Align the device with the code.
Figure 16: Test code
3. Select Setup.
Ready
Result
|Test
|Teach
|Focus
|Setup
L/A GbE
Funct
Light
O Ready |Test
Press key 2 x shortly 1
0%
100%
0%
100%
Result
|Teach
|Focus
|
L/A GbE
Funct
Light
O
Setup
1
Press button ▼ twice briefly.
✓
The Setup LED lights up blue.
4. Start Setup.
0%
100%
Result
|Teach
|Focus
L/A GbE
Funct
Light
O
Ready |Test
Ready |Test
Press key 1 x shortly 1
0%
100%
Result
|Teach
|Focus
L/A GbE
Funct
Light
|
Setup
|
Setup
Ö
1
Press the p function button once briefly.
✓
The Setup LED flashes blue.
The device adjusts itself automatically to suit the lighting conditions, working dis‐
tance, and quality of the code presented. According to the default setting, the
device permanently stores the values determined for the two parameter modules
(image, decoder) during this process, thereby overwriting the existing configura‐
tion.
NOTE
If the Setup LED lights up yellow or red, the read result is inadequate. If this is the
case, check the alignment and distance of the device in relation to the code and
repeat the procedure.
5. Wait until Setup has finished. The bar graph display shows the percentage progress
of the Setup function. 100% means Setup has finished.
✓
The Setup LED indicates the result see "Display and control elements", page 18.
6. Exit Setup mode and save the parameters.
7
COMMISSIONING
56
O P E R A T I N G I N S T R U C T I O N S | Lector63x Flex C-mount and S-mount 8018071/16XD/2020-05-06 | SICK
Subject to change without notice

 Loading...