Do you have a question about the SICK Lector621 and is the answer not in the manual?
Provides important information on how to use SICK AG devices safely.
Explains warning symbols and signal words used in the document for hazard communication.
Describes the device's intended purpose, application, and liability limitations.
Defines incorrect usage scenarios and associated risks, including critical warnings.
Specifies required qualifications and training for personnel handling the device safely.
Highlights operational safety and specific hazards related to device operation.
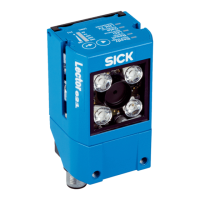
Explains the device type label and its information for identification purposes.
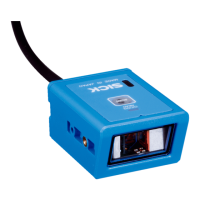
Compares the technical features of the Lector621 and Lector621 ECO variants.
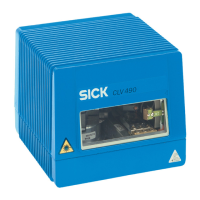
Describes the device's status LEDs, bar graph display, and function buttons.
Details the use of microSD memory cards for parameter sets and firmware updates.
Provides safety notes and recommendations for transporting the product to avoid damage.
Lists the conditions and recommendations for storing the device properly.
General guidelines for mounting the device, considering technical data and environment.
Details space, ambient conditions, heat dissipation, and mounting methods for installation.
Presents diagrams showing field of view geometry and resolution at different working distances.
Provides instructions on aligning and physically mounting the device using screws or brackets.
Presents critical safety precautions for electrical connections and enclosure ratings.
Provides general instructions and notes for correctly wiring the device.
Details the pin assignments for the device's electrical connections.
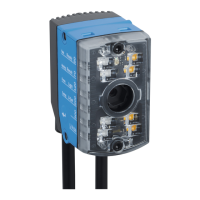
Explains how to connect the device using optional connection modules.
Details the required supply voltage and power output specifications.
Explains how to wire Ethernet and serial data interfaces.
Explains how to wire the physical digital inputs on the device and via modules.
Explains how to wire the device's physical digital outputs.
Guides users through configuring the device using SOPAS ET software.
Details manual device configuration using function buttons and status LEDs.
Outlines the overall initial commissioning process using SOPAS ET.
Details preventive maintenance tasks, intervals, and required personnel.
Provides instructions and precautions for cleaning the device.
Lists possible errors, their situations, and corrective actions.
Details methods for transferring configuration data to a replacement device.
Lists key technical features of the Lector621 and Lector621 ECO variants.
Provides technical data on electrical connections, supply voltage, and dimensions.
Details technical specifications for various device interfaces.
Specifies technical data related to ambient operating conditions.
Details signal assignments for adapter cables with open ends.
Explains how to connect supply voltage via the CDB650-204 module.
Shows how to wire digital inputs Sensor 1 and 2 via the CDB650-204 module.
Shows wiring for digital outputs Result 1-4 via the CDB650-204 module.
Shows how to wire digital inputs Sensor 1 and 2 via the CDM420-0001 module.
Shows wiring for digital outputs Result 1 and 2 via the CDM420-0001 module.
Explains how to connect supply voltage via the CDB620-001 module.
Shows how to wire digital inputs Sensor 1 and 2 via the CDB620-001 module.
Shows wiring for digital outputs Result 1 and 2 via the CDB620-001 module.
Explains how to connect supply voltage via the CDM420-0001 module.
Shows wiring for the RS-232 interface within the CDM420-0001 module.
Shows how to wire digital inputs Sensor 1 and 2 via the CDM420-0001 module.
Shows wiring for digital outputs Result 1 and 2 via the CDM420-0001 module.
Lists and defines abbreviations used throughout the document for clarity.
| Code Resolution | 0.1 mm |
|---|---|
| Enclosure Rating | IP65 |
| Supply Voltage | 10-30 V DC |
| Housing Material | Plastic |
| Light Source | LED |
| 1D Code Types | Code 39, Code 128 |
| 2D Code Types | Data Matrix, QR Code |
| Interfaces | Ethernet, RS232, USB |
| Operating Temperature | 0 °C ... +50 °C |
| Storage Temperature | -20 °C to +70 °C |