PIN Designation Function
6 nc Not connected
7 nc Not connected
8 nc Not connected
9 Uni-I 11 Universal input 11, configurable:
•
S
tatic control input F1
•
Universal input: sleep mode, restarting the device, pausing
event recording
10 Uni-I 12 Universal input 12, configurable:
•
Static control input F2
•
Universal input: sleep mode, restarting the device, pausing
event recording
11 Uni-I 13 Universal input 13, configurable:
•
Static control input G1
•
Universal input: resetting (OSSD pair 3), sleep mode, restarting
the device, pausing event recording
12 Uni-I 14 Universal input 14, configurable:
•
Static control input G2
•
Universal input: EDM (external device monitoring, OSSD pair
3), sleep mode, restarting the device, pausing event recording
13 Uni-I 15 Universal input 15, configurable:
•
Static control input H1
•
Universal input: resetting (OSSD pair 4), sleep mode, restarting
the device, pausing event recording
14 Uni-I 16 Universal input 16, configurable:
•
S
tatic control input H2
•
Universal input: EDM (external device monitoring, OSSD pair
4), sleep mode, restarting the device, pausing event recording
15 Uni-O 03 Universal output 3: contamination, error, reset required (OSSD pair
3), monitoring result
16 Uni-O 04 Universal output 4: contamination, error, reset required (OSSD pair
4), monitoring result
17 0VDC Voltage for inputs and outputs (0VDC)
1)
1)
If at least one connection of the female connector XG2 is used, this 0V connection must be connected in
t
he control cabinet to 0VDC of the power supply unit using a low-impedance and star-point connection.
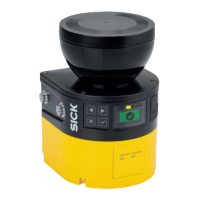
8 Replacing the safety laser scanner
If the safety laser scanner is damaged or defective, you must replace it.
DANGER
H
azard due to lack of effectiveness of the protective device
If an unsuitable configuration is saved in the system plug, it may cause the dangerous
state to not end in time.
b
After replacement, make sure the same system plug is used or the configuration is
restored.
b
Make sure that the safety laser scanner is aligned correctly after the replacement.
MOUNTING INSTRUCTIONS
18
M O U N T I N G I N S T R U C T I O N S | microScan3 Pro I/O 8026187/1H7G/2022-10-19 | SICK
Subject to change without notice
en
 Loading...
