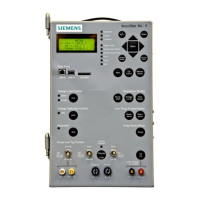
4 Setting Up the MJ-5 Control Panel
Siemens Industry, Inc. 31
Table 4.7: The <PASSWORD> Menu
Note: A Level 2 password will activate all of
the configuration options in that table. The
user will not need to enter a separate
password under level 2 as shown in Table
4.7.
4.6.3 Setting Up the MJ-5 Security System.
Entering the System Key
To make changes to the security system itself, a “System
Key” must first be entered. The System Key is a special
password that allows the security administrator to change
passwords and to enable/disable Level 1 and Level 2
protection.
To enter the System Key, view the System Key xxxx data
item from the <PASSWORD> menu; then press Change/
Save key. The display screen responds by flashing “■” in
the leftmost position of the four-character password field.
This denotes the position in which a character is to be
entered. (The remaining character positions contain “■”)
Use the ▲ and ▼ keys to select the desired character.
Then press the ► key to move the cursor to the next
character to the right, and so on, until all four characters of
the password have been entered. To complete the process,
press the Change/Save key.
When a valid System Key has been entered, “Sys Key
Accepted” appears in the display screen. Re-definition of
the security system is then possible. Access to security
system re-definition continues until the definition session
is:
• Manually terminated by selection of End Session Y(es)
in the <PASSWORD> menu.
• Automatically terminated by expiration of the Screen
timeout period.
Because of the security exposure possible during a security
system definition session, you should always use the
End Session facility when changes are complete to ensure
against unauthorized security system re-definition changes.
Changing Passwords
After entering the System Key (see above), scroll down to
view Password and Password Enable/Disable items.
To change a Level 1 password, view Level 1 PW: in the
<PASSWORD> menu and use the Change/Save and Scroll
keys to enter the new password. Passwords may consist of
any of the following characters: 0-9 and A-Z.
To change a Level 2 password, you must view the menu
associated with that password from the <PASSWORD>
menu. For example, to define a password for the <CON-
FIGURE> menu view Config. PW; then, use the Change/
Save and Scroll keys to enter the new password. You may
use the same Level 2 password for several menus, or you
may use a different Level 2 password for each menu.
Enabling/Disabling Password Checking
After entering the System Key (see above), scroll down to
view Password and Password Enable/Disable items.
In addition to defining passwords for a given level, you
must also enable that level before password checking takes
place. When password checking is enabled for a given
Level, entry of a valid password will be required before you
can change/reset any data item that is protected at that
Level. Password checking is enabled for each level
separately. In other words, you can enable or disable
password protection for Level 1, for Level 2, or for both
Levels. If password checking for a given Level is disabled,
any data item at that Level can be changed or reset without
use of the password.
To activate password checking for Level 1, view the Level
1 parameter; then change the OFF to ON.
To activate password checking for Level 2, you must
specify each menu for which you wish security to be
 Loading...