Appendix L: Retrofitting onto CL-6 Cooper
Siemens Industry, Inc. 78
L: RETROFITTING AN MJ5, MJ-XL or MJ-4A CONTROL PANEL ONTO A CL-6
SERIES COOPER VOLTAGE REGULATOR
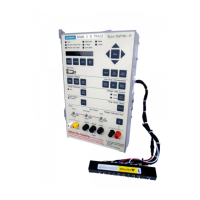
Retrofit Kit Contents
- Instructions and drawing 21-204-112-001
- Cooper Hinges (2), part 21-116-601-229
- Cooper phoenix connector wiring harness (1), part 21-204-112-001
- Metal Bracket (1), part 21-116-601-230
- Nylon spacer (1)
- Panel locking screw (1)
- Philips-head screws (6)
- Fuses: 6A(2), 0.75A(1)
Mounting Instructions
According to the Cooper (McGraw-Edison) Voltage Regulator Instruction Manual (S225-10-10,
12/00), the control panel may be removed while the voltage regulator is energized.
Removing the Cooper Control Panel
Follow the Cooper (McGraw-Edison) instruction manual for removing the control panel, which
should include, but is not limited to the following steps.
1) Make sure the Cooper control panel is not in the process of changing the tap
position.
2) Turn supervisory switch to OFF, turn Auto/Remote-Off-Manual switch to OFF, wait
10 seconds.
3) Turn control panel power (Internal-Off-External Switch) to the OFF position.
4) Remove all fuses from the Cooper control panel.
5) Unscrew the thumbscrews holding the Cooper control panel in place, and swing the
control panel outward.
6) Close (push in) the current shorting switch “C” located at the back of the control
panel enclosure. This shorts out the secondary of the regulator CT.
Warning! Push the C shorting switch closed before attempting to disconnect
the control. Failure to do so will open the regulator CT circuit and may produce
a flashover in the control.
7) Open (pull out) the disconnect switch “V1” (and “V6” if present). These switches are
located at the back of the control panel enclosure. This de-energizes terminal
board “TB2”.
8) Disconnect the control from the back panel at “TB2” (located at bottom of Cooper
control enclosure).
9) Disconnect the control ground lead from the back of the Cooper control enclosure.
10) Remove the Cooper control panel from the hinges and set the control panel aside.
 Loading...