5 Measuring Cycles for Milling Machines and Machining Centres 07.90
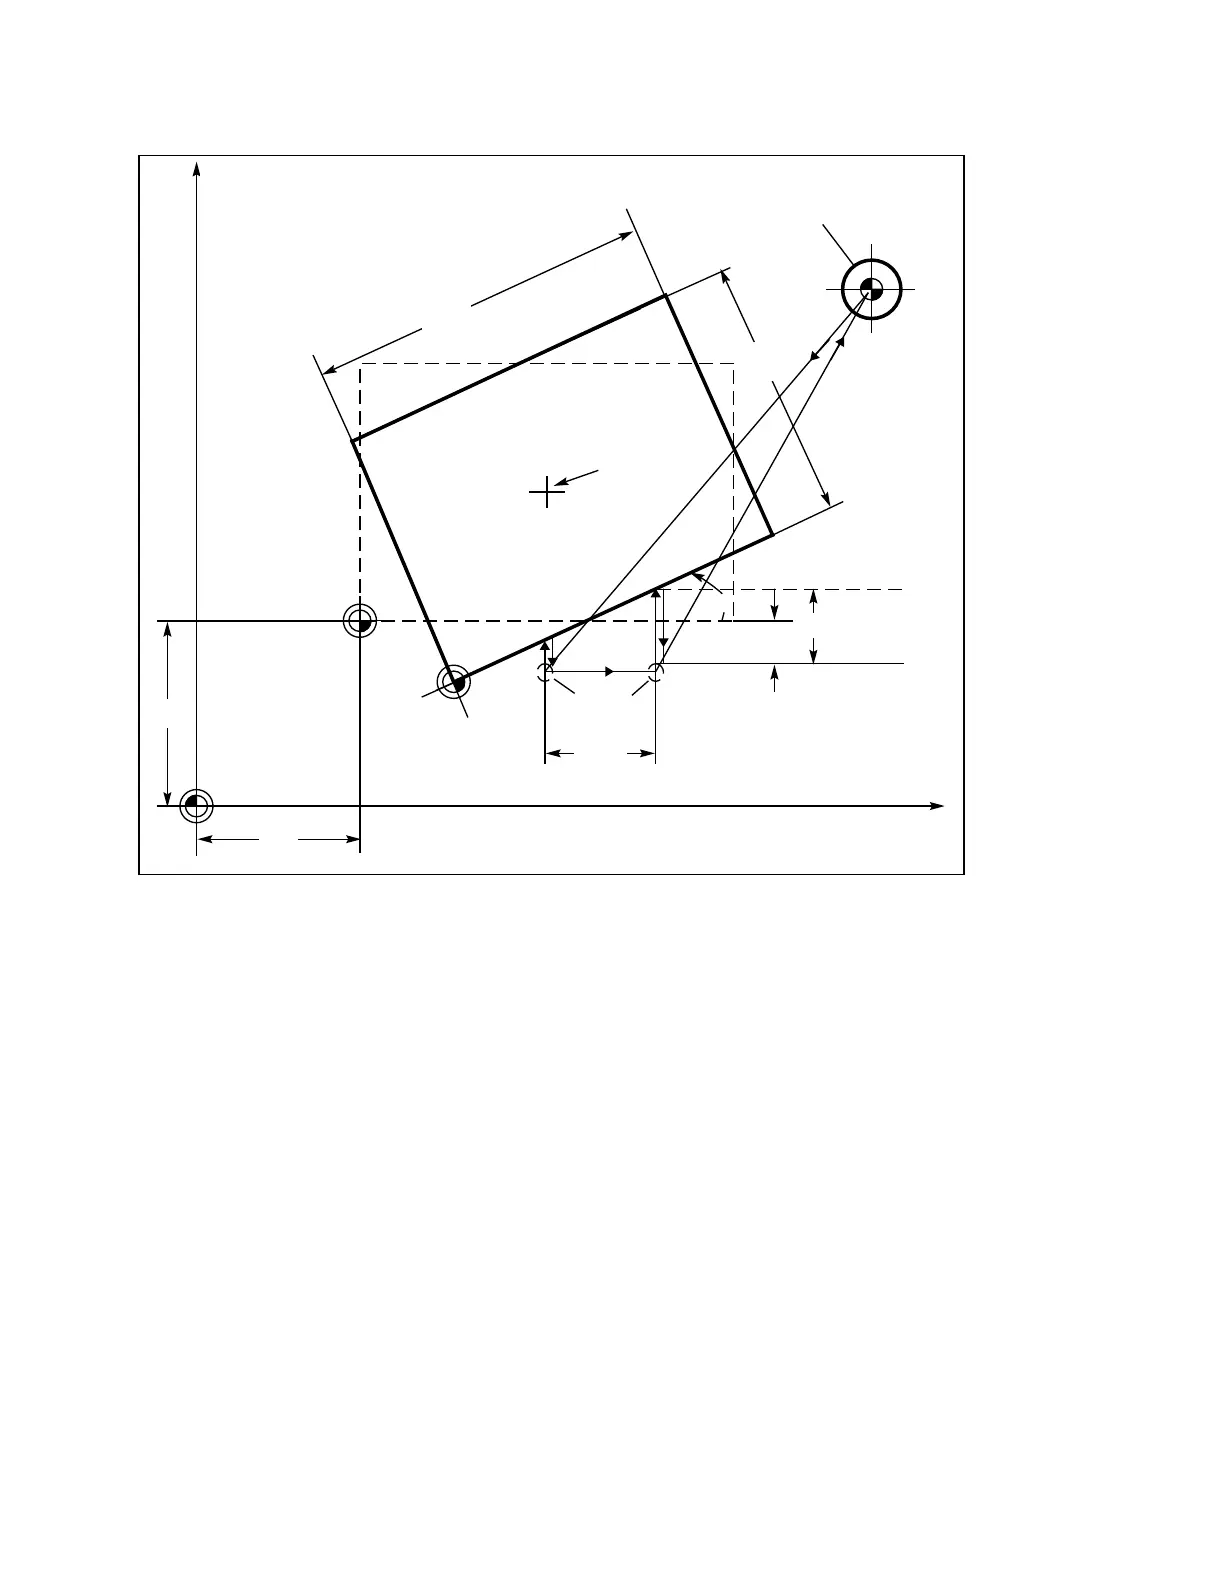
5.4.4 L978 Angular measurement (ZO determination)
Example: Angular measurement with cycle L978 (Data as in Fig. 5.29)
Fig. 5.27 Angular measurement
R24
Workpiece
Centre of rotation
rotary axis
80
(Abscissa)
W
Y
X
M
(Ordinate)
70
150
120
F
Spindle
CP2
CP1
Probe
R19
R28
m
Probe length (Z axis) in TO memory D99 (value 50)
%MPF 9784
N5 G54 T200 T number probe; select ZO
N10 G00 X140 Y70 Position probe in X and Y
axes to face the measuring point
N15 Z40 D99 Position Z axis level with
measuring point
N20 R10=6 R11=10 R19=40 R22=1 Define parameters for measuring cycle
R23=3 R24=0 R25=0 R27=1
R28=5 R30=102 R31=4 R32=0
R36=5
N25 L978 Cycle call for angular measurement
N30 G00 Z160 Run up Z axis
:
Machining centre program
:
:
N... M30
END OF SECTION
5–78 ©
Siemens AG 1990 All Rights Reserved 6FC5197- AB70
SINUMERIK 840/850/880 (BN)

 Loading...


