3.
Operation
3.4
Start-up
3.5
lumper settings
on
the modules
3.4
Start-up
Checking the wiring
Check the wiring of the external circuits before switching the PC on
(see Connection diagram, p.
11).
Check the relevant instructions for installation.
Read the general instructions.
3.5
Jumper settings on the modules
The coding jumpers for the specified addressing range must be
fitted on all
I10 modules and checked (for assignment see "Ad-
dress decoding").
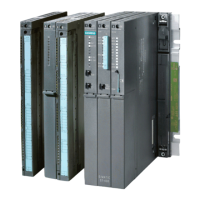
Central processing unit:
Switch on the backup battery by closing the DlPFlX switch
S4.
When using a memory submodule with
5
2K
statements: DlPFlX S5 closedIS6 open
4K
statements: DlPFlX S6 closedIS5 open
Switch off the "Step" LED display: remove the soldered jumper
FG
(service panel).
Checking the power supplies
Permitted tolerance of
+24
V
supply:
20..
.30
V
DC
Maximum ripple content: 5
%
Note: Check carefully that there are no connections to circuits of
higher
voitages.
Inputltimer module:
The pulse edge for interrupt initiation can be adjusted for ail four
interrupt inputs together.
Soldered jumper EF: pulse edge
Soldered jumper FG:
piuse edge
t
lnterrupt generation can be displayed by removing soldered jumper
HK.
When using the internal potentiometer for fine setting of the time,
wire jumpers must be fitted to the screw terminals.
Interface module:
Interrupt generation is activated with the DlPFlX switches X117 and
X118. The assignment is as follows:
None
1
Pulse edge
4
Of
byte
st
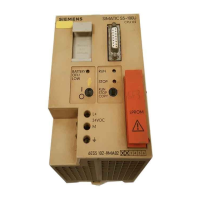
X117
Fig.
24
Jumper assignment and positions of the
DIL
switches on the
CPU
16
I I
X118
Interrupt initiation
 Loading...