GB
│
CY │ 7 ■
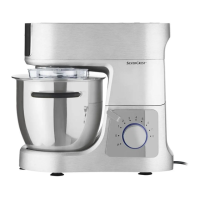
SKV 1200 A1
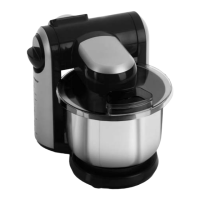
3) To use the lid 9, place it on the part of the
housing which surrounds the attachment tool
socket 7 in such a way that the filling opening
is facing you. On the attachment tool socket 7
there is a locking device for the lid 9:
ATTENTION! PROPERTY DAMAGE!
► Never apply any pressure to the lid 9 when
attaching and removing it in order to ensure
that it is not damaged.
4) Depending on what you want to do, fit the
kneading hook 0, whisk q or beater w into
the attachment tool socket 7:
– Insert the kneading hook 0, whisk q or
beater w into the socket 7 so that the two
metal pins on the axle of the attachment 0
q w lock into the recesses of the attach-
ment tool socket 7.
– Press the attachment 0 q w as far as it
will go into the socket 7 and then turn it
anticlockwise as far as it will go (in the
direction of the arrow
).
– Let go of the attachment 0 q w. This is now
firmly held in the attachment tool socket 7.
5) Add the ingredients into the mixing bowl 6,
observing the following table with the recom-
mended filling quantities:
Filling quantities for... min. max.
Yeast dough N/A
1000g
flour
Cake mixture N/A
900g
plain
flour
Heavy dough
(e.g. shortcrust pastry)
N/A
900g
plain
flour
Cream 200 ml 1500 ml
Egg white
(eggs of weight class M)
2 12
Adjust the remaining ingredients in the recipe
to the respective maximum quantity.
CAUTION! PROPERTY DAMAGE!
► To prevent the appliance from being
overloaded, do not exceed the specified
maximum filling quantities.
If the appliance is labouring: switch off the
appliance, remove half of the dough and
knead each half separately.
NOTE
► Please note that during the kneading or stirring
process, the dough in the mixing bowl 6
increases in volume or is pressed upward
slightly as a result of the movement. You
should therefore never fill the mixing bowl 6
right up to the top!
Warning! Danger of crushing! Make sure
that no parts of the body are located
under the swivel arm 1 when you push it
downwards.
6) Press down the release lever 2 and press the
swivel arm 1 with the attachment mounted
downwards into the working position until the
swivel arm 1 locks in place.

 Loading...