39
GB
6. Remove the auger5 from the screen as-
sembly6 / sorbet assembly19.
7. If necessary, remove the holder7 from
the working container8.
8. Turn the working container8 anticlock-
wise until the
z
mark points to the
opened lock symbol . Remove the
working container8.
12. Cleaning
Clean the device prior to its first use!
DANGER! Risk of electric
shock!
~ Pull the mains plug11 out of the wall
socket before you disassemble and
clean the device.
WARNING! Risk of material damage!
~ Do not use any astringent or abrasive
cleaning agents.
After every use
• Clean the device and all accessories
used after each use and remove all food
residues.
• All accessories must be disassembled
and individually cleaned.
Seals
Proceed as follows for the hygienic cleaning
of the seals20,21 and22:
• Figure A: remove the seal20 from the
drip stopper10.
• Figure B: take the seal21 out of the
working container8.
• Figure C: pull the seal22 on the un-
derside of the working container8 out
of the pulp outlet17.
• The seal22 remains firmly attached to
the working container8 and can be
cleaned in the dishwasher or by hand.
• The seals20 and21 can be cleaned
either in the dishwasher cutlery basket
or manually.
• Allow the seals to dry completely before
reinstalling.
Base unit
DANGER! Risk of electric
shock!
~ The following parts must never be im-
mersed in water or other liquids, and
must not be cleaned in the dishwasher:
-the base unit13 including the power
cable with mains plug11.
~ The cleaning brush14 must not be
cleaned in the dishwasher.
Wipe off the base unit13 and the power
cable11, using a lightly moistened cloth.
Dry with a dry cloth.
Accessories
The following accessories can be cleaned
both by hand and in the dishwasher:
- Food pusher1
- Filling aid2
-Lid4
-Auger5
- Screen assembly6
-Holder7
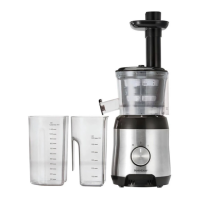
- Working container (max. 300 ml)8
- Juice container (max. 600 ml)15
- Pulp container (max. 1200 ml)16
- Sorbet assembly19
1. Remove food residues with the clean-
ing brush14. Do not exert a lot of
pressure on the screen surfaces of the
screen assembly6.
2. Clean the accessories with warm water
and a little detergent. Afterwards, rinse
all parts with clean water.
Or:
Place the accessories in the dishwasher
and/or the small parts in the cutlery
basket.
__331036_Slow Juicer_B8.book Seite 39 Donnerstag, 7. November 2019 12:33 12

 Loading...