32
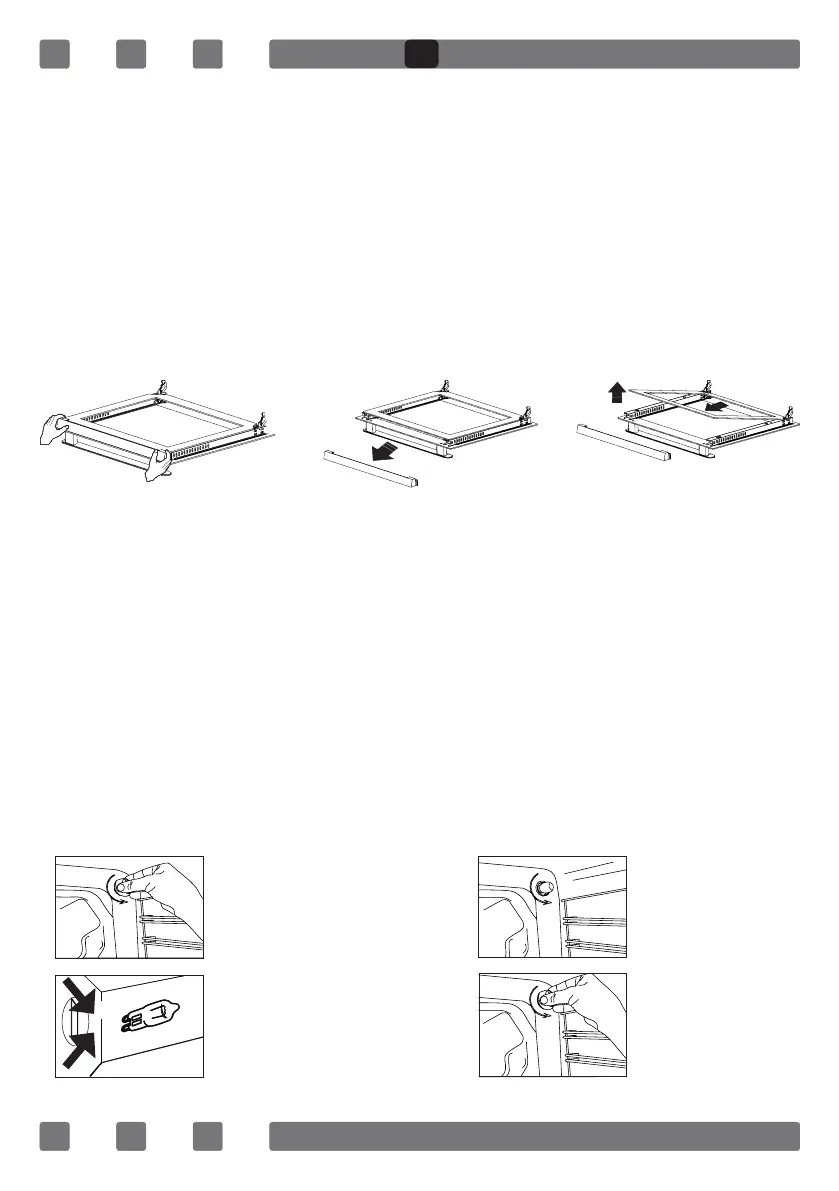
10.2. Cleaning of the Oven Glass
Open the oven door. Pull out the plastic latches on the right and left
side as shown in Fig. 12 and pull out the prole towards yourself as
shown in Fig. 13. Glass is free after the prole is removed as shown
in Fig. 14. Carefully pull the glass that has become free toward you.
The outer glass is xed to the oven door prole. You may easily clean
the glasses after they have been separated. Once the cleaning and
maintenance is complete, you may replace the glasses by performing
the removal procedure in reverse. Make sure that the prole is seated
properly.
10.3. Replacement of the Oven Lamp
WARNING: Disconnect power supply and wait for the oven to cool down
to eliminate the risk of electrocution before replacing the oven lamp.
Hot surfaces may cause burns.
Remove the glass protector by rotating it. Using plastic gloves may
help you if you have difculty in rotating it.
Then, remove the lamp by rotating it, and install the new lamp with the
same specications. Replace the glass protector, plug the appliance and
complete the replacement procedure. You may now use your oven.
Type G9 Lamp Type E14 Lamp
Figure 13Figure 12 Figure 14
1
2
220-240 V, AC
15-25 W
Figure 15
220-240 V, AC
15 W
Figure 16
GB