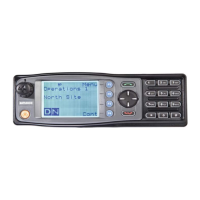
a. From the main default screen, a zone can quickly be selected by pressing
the ‘Zone Up’ or ‘Zone Down’ function keys when these have been
programmed.
4.4. SELECTING A CHANNEL
The radio can have up to 2000 channels in its channel database.
A channel can be selected as follows:
1. Through menu selection:
a. Go to the ‘Channel’ menu, use the ▲ and ▼ keys to choose the required
channel and press the ‘S’ key to select it.By using the function keys:
2. From the main default screen, a channel can quickly be selected by pressing the
‘Channel Up’ or ‘Channel Down’ function keys when these have been
programmed.
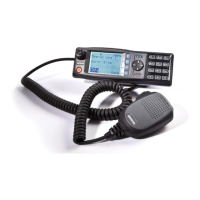
4.5. MAKING A CALL
Select the Zone/Channel required on which to make the call.
When making a call, to avoid interfering with other users of the channel, listen first to
ensure no other transmissions are occurring, or check that the speaker icon is not
present.
If the speaker icon is displayed, there are transmissions present on the channel and
the user should not transmit. If required, the radio may be programmed to prevent
transmission on a busy channel.
To transmit, hold the microphone a few centimetres from the mouth, press the PTT
switch and note that the indicator LED is RED. Speak clearly across the face of the
microphone in a normal conversational manner.
In most systems, it is important to wait a short time between pressing the PTT switch
and commencing to speak. This ensures that the path is properly established and
avoids lost or distorted speech.
Use the correct operating procedure and keep transmissions short.
Release the PTT switch as soon as the message is finished.
The talk group for a transmission is usually associated with a channel selection. A talk
group will address all others that have the same TGID selected.
Note: A Transmit Limit Timer may be setup that limits a continuous transmission on
a channel. The last 10 seconds before the timer expires may be accompanied by
warning beeps.
Doc Number: TNM--U-E-0108 ISSUE 1.5 Page 31