Weekly Closing
SELECT CHANGE SET
2
Next, today's printing line can be set
at any line from above on the
weekly card, by referring to the
example below.
1
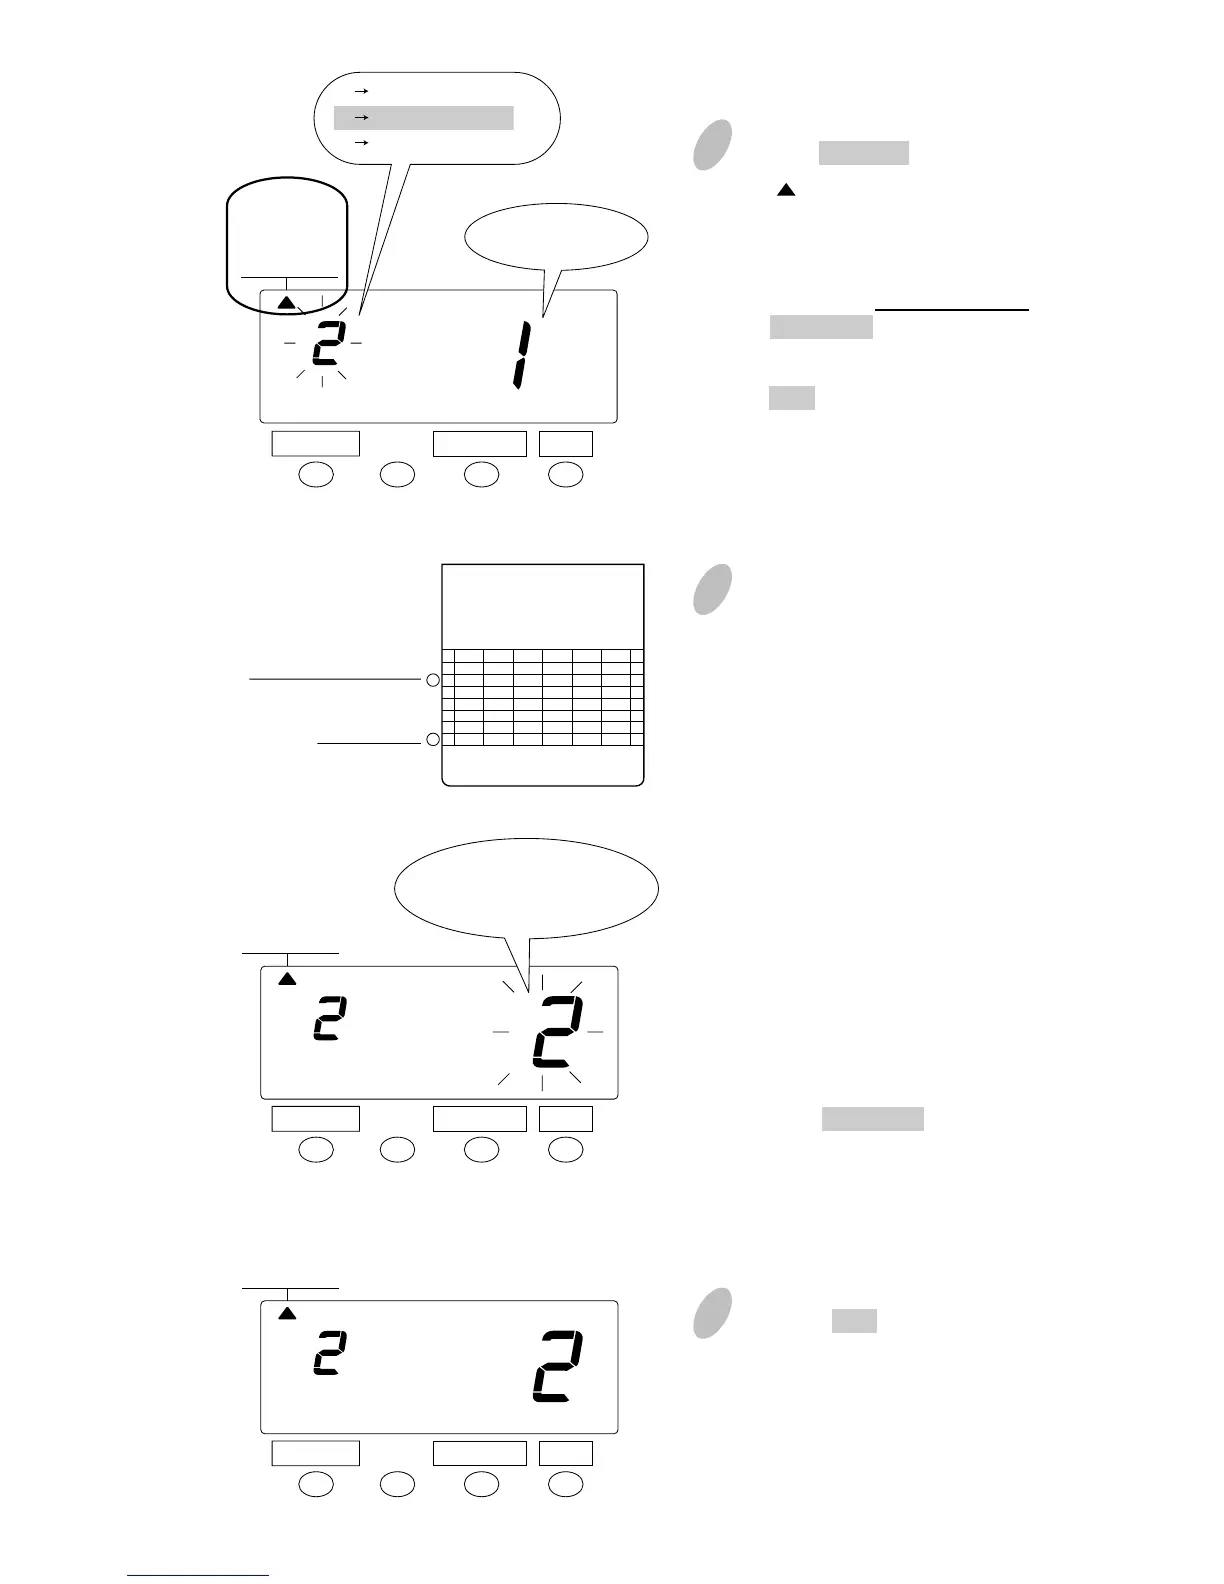
Push the SELECT button to position
the " " mark at the upper side of the
display next to the first item from
the left, "PAY PERIOD".
In the case of weekly closing, push
the CHANGE button to set the left-
side number at "2" and then push
the SET button. At that moment, the
flashing of the display will change
to the right-side number.
3
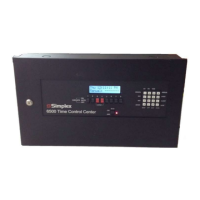
Push the SET button to finish the
setting. At that moment, the display
will change from flashing to steady,
and the setting is now completed.
SELECT CHANGE SET
SELECT CHANGE SET
IN OUT IN OUT IN OUT
1
2
3
4
5
6
7
Today
Tuesday, January 9, 2001
Set closing day
Sunday, January 14, 2001
1. MONTHLY
2. WEEKLY
3. BI-WEEKLY
PAY PERIOD
1. MONTHLY
2. WEEKLY
3. BI-WEEKLY
PAY PERIOD
1. MONTHLY
2. WEEKLY
3. BI-WEEKLY
PAY PERIOD
1 Monthly closing
2 Weekly closing
3 BI-Weekly closing
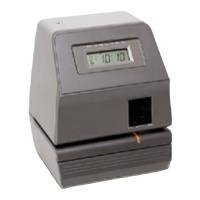
Today's
printing line
Today is printed on
the second line
from the top.
Assume that today is
Tuesday, January 9, 2001
and the closing date is
Sunday.
As illustrated in the figure
on the left, today's
printing line is set at the
second line from the top
since Sunday becomes the
closing date if Sunday,
January 14, 2001 is set at
the bottom line.
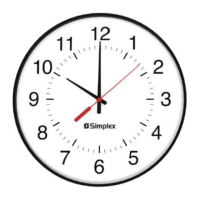
Example:
Push the CHANGE button to set the
right-side number of the display at
"2".
11