11
071807 II. Maintenance Procedures
G. Replacing the Clean Air Motor
G. Step 1.
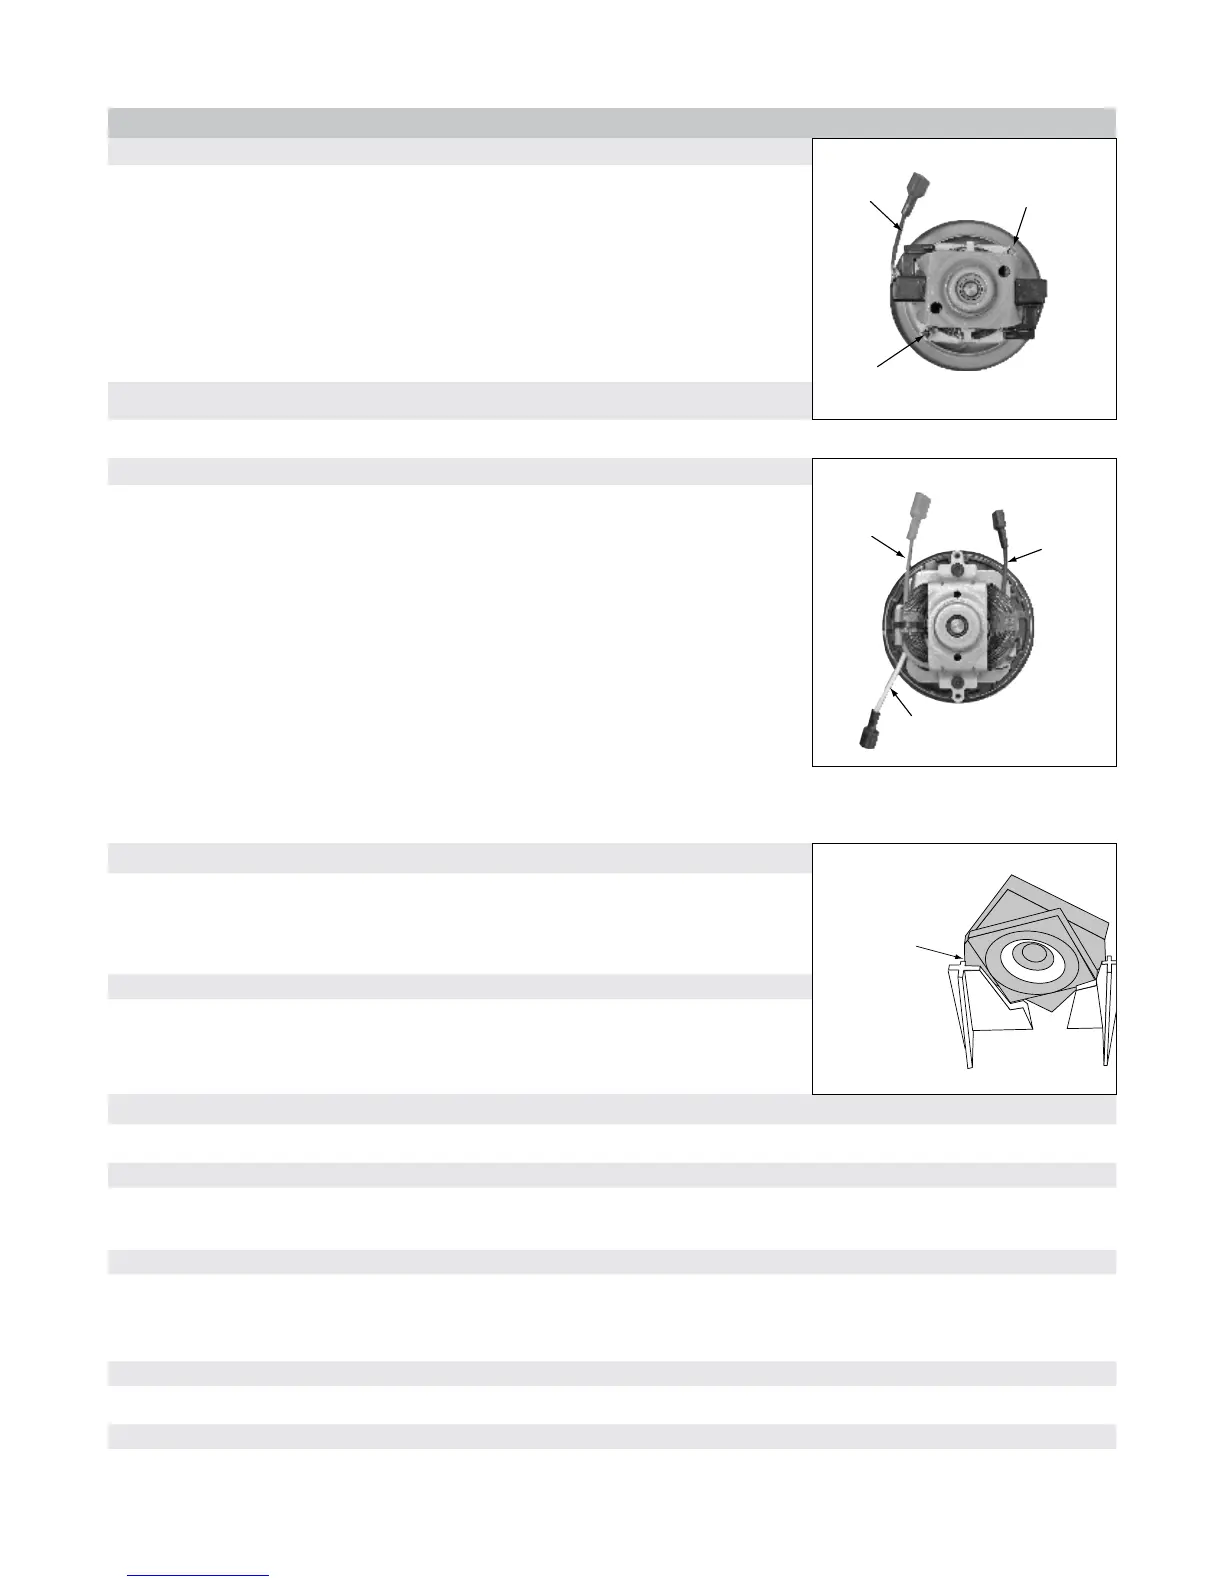
Figure F. Clean Air Motor Wiring
1. Remove the handle and the dust cover.
White Wire
Black/White Wire
Blue Wire
2. Place the vacuum face down on the bench.
3. Remove the base plate by removing the 2 (two) screws.
4. Remove the agitator/brushroll.
5. Remove the 5 (ve) mounting screws on the underside of the nozzle base tray.
(See Figure C. Location of Nozzle Cover Screws)
G. Step 2.
Turn the vacuum over, depress handle release, and lay at. Remove the nozzle cover.
G. Step 3.
Figure G. Ametek Clean Air Motor Wiring
WARNING - If the vacuum is not in the upright position before continuing
with the next step, injury may occur or vacuum may be damaged.
White Wire
Yellow Wire
Black Wire
1. Set the vacuum in the upright position and remove the 2 (two) screws from the
spring assist bar.
2. Lay the vacuum at. Remove the 3 (three) screws from the direct air motor inlet
duct cover, and 1 (one) screw from each of the wire strain relief (2 each).
3. Remove the belt.
4. Remove 3 (three) screws from the idler cover and spring.
5. Disconnect the light lead connector from the light board (disconnect the ground wire if necessary).
6. Remove the 2 (two) screws from each of the nozzle base tray pivot brackets.
G. Step 4. Figure H. Clean Air Motor Placement
1. Lift the dust compartment up out of the nozzle base tray assembly.
Side of
clean air motor
should line up
here in dust
compartment
2. Remove the pivot bushings and the direct air motor inlet seal from the dust
compartment.
G. Step 5.
1. Remove the 4 (four) screws holding the motor cover on the dust compartment.
2. Lift up on the motor cover and set it aside.
G. Step 6.
To remove the clean air motor, grasp and lift it (located in the upper motor compartment) from the mount.
G. Step 7.
Note the orientation of the motor mount on the bracket end of the motor. The motor must be installed in the same manner with
the at edge of the rubber mount against the at walled structure on the dust compartment.
G. Step 8.
Attach the wires to the new motor as shown in Figure F. Clean Air Motor Wiring or Figure G. Ametek Clean Air Motor Wiring.
In the old style motor (Figure F. Clean Air Motor Wiring), notice that the blue wire should again be attached to the base of
the white wire connection with a zip tie.
G. Step 9.
Insert the motor into the motor compartment. (See Figure H. Clean Air Motor Placement)
G. Step 10.
Re-assemble the vacuum by continuing to section II. Maintenance Procedures, H. Installing the Motor Cover.
 Loading...