7
071807 II. Maintenance Procedures
B. Removing the Brush Strips
B. Step 1.
1. Remove the base plate by removing the 2 (two) screws.
2. Remove the agitator/brushroll.
3. If the belt un-loops itself from the motor shaft, the nozzle cover may need to be removed by removing the 5 (ve) mounting
screws on the underside of the nozzle base tray. (See Figure C. Location of Nozzle Cover Screws.)
B. Step 2.
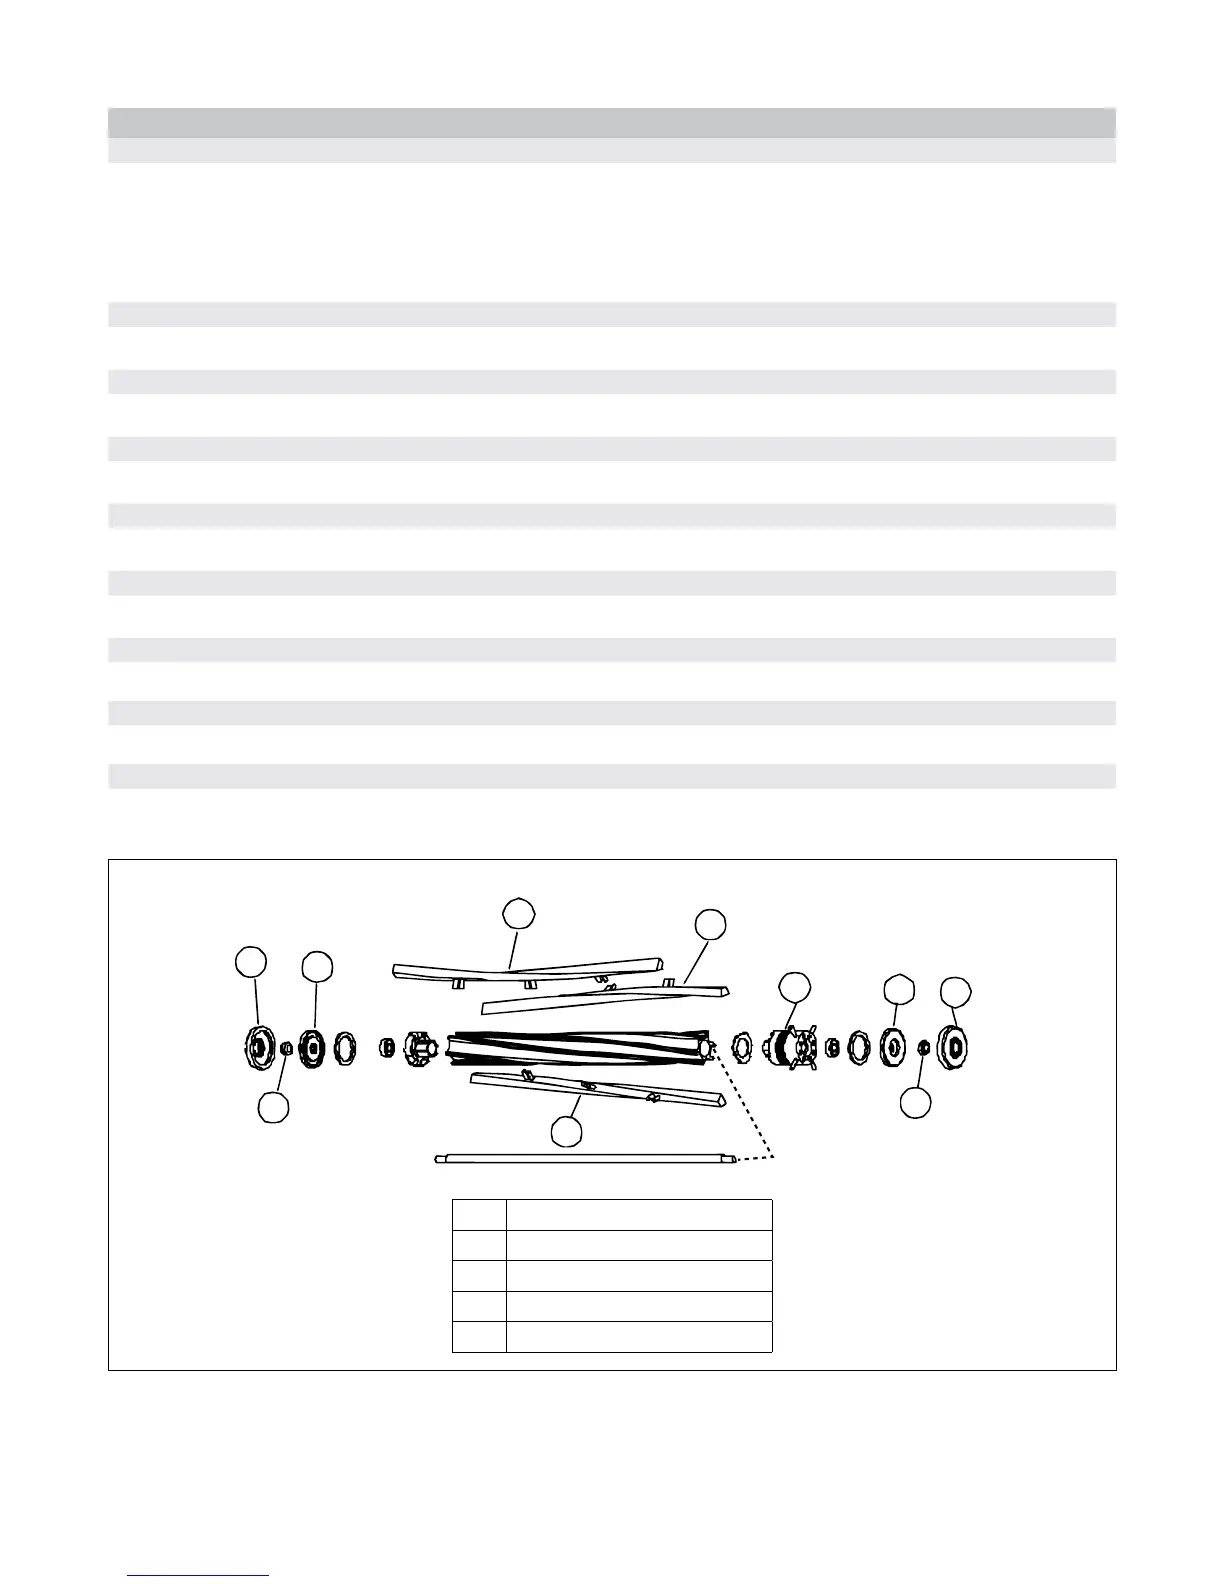
Remove the rubber end cap covers. Figure D. Agitator/Brushroll Assembly
B. Step 3.
Remove the nuts on each end of the agitator/brushroll with a 7/16 socket driver. Figure D. Agitator/Brushroll Assembly
B. Step 4.
Slide off the end caps. Figure D. Agitator/Brushroll Assembly
B. Step 5.
Pry off the belt pulley with a standard screwdriver. Figure D. Agitator/Brushroll Assembly
B. Step 6.
Slide off the brush strips and replace. Figure D. Agitator/Brushroll Assembly
B. Step 7.
Line up the belt pulley and push on.
B. Step 8.
Reinstall the steel end caps and nuts and tighten with a socket.
B. Step 9.
Reinstall the rubber end cap covers.
Figure D. Agitator/Brushroll Assembly
1 Agitator/brushroll End Cap Cover
2 1/4-28 Locking Hex Nut
3 Agitator/brushroll Steel End Cap
4 Agitator/brushroll Pully
5 Brush Strips
 Loading...