SimpliFire • SF-OD43, SF-OD55 • 2047-980 Rev. C • 5/23
12
C. Chase Construction and Moisture
Resistance
This outdoor appliance will shed moderate amounts of
water, but is not waterproof. This appliance must be en-
closed or covered with nishing material and all joints
sealed to prevent water inltration.
This appliance will not perform as an exterior wall. Mois-
ture penetration must be considered for construction that
places the appliance in a wall or within moisture sensitive
materials.
When installed on exterior walls: Hearth & Home
Technologies recommends that the chase be constructed
outside the structure’s weather envelope. Where the plat-
form meets the wall, use a ashing detail similar to that
required for attached decks. Chase platforms, including
hearths should slope away from the structure at 1/8 in.
to 1/4 in. per foot. The appliance can be shimmed level.
Water Drainage: The Forum is designed to operate out-
doors experiencing rain and other sources of moisture.
The appliance is designed to drain excess moisture out
weep holes lated on the appliance base. When construct-
ing the enclosure, the builder must provide a means of
draining water from under the appliance and out of the
structure. This can be achieved by properly positioned
drain holes, slots or other means for all water to exit at
the lowest grade of the structure. Choosing the location
of the appliance is also important so that an area that
may experience excessive water ow or standing water is
avoided. In some cases a drain pan is needed to ensure
proper drainage. This can be constructed from corrosion
resistant metal, or suitable material for outdoor use with
a water resistant membrane. A slope of 1/4” per foot to-
ward the drain ports of the structure is recommended. A
drain pan can also be purchased (SF-OD43-DP) for the
43 inch appliance or the (SF-OD55-DP) for the 55 inch
appliance.
Flashing
• Flash the appliance in a manner consistent with re-
gional practices to prevent water penetration around
the appliance.
• For brick, stone, stucco and similar construction,
weep screeds should be installed per regional
codes.
• See Figures 4.7 and 4.8 for more information re-
garding wall and enclosure construction required to
prevent moisture penetration into the structure. The
appliance will shed moderate amounts of water but
is not waterproof.
Be sure to plan a drain system for your installation.
NOTICE: If the optional drain pan is not used during
construction ensure any water build-up can escape to
the exterior of the nished enclosure.
Water penetration can occur, and accumulate below the
appliance, and if not taken into consideration can cause
deterioration of materials, and may cause premature
failure of the structure.
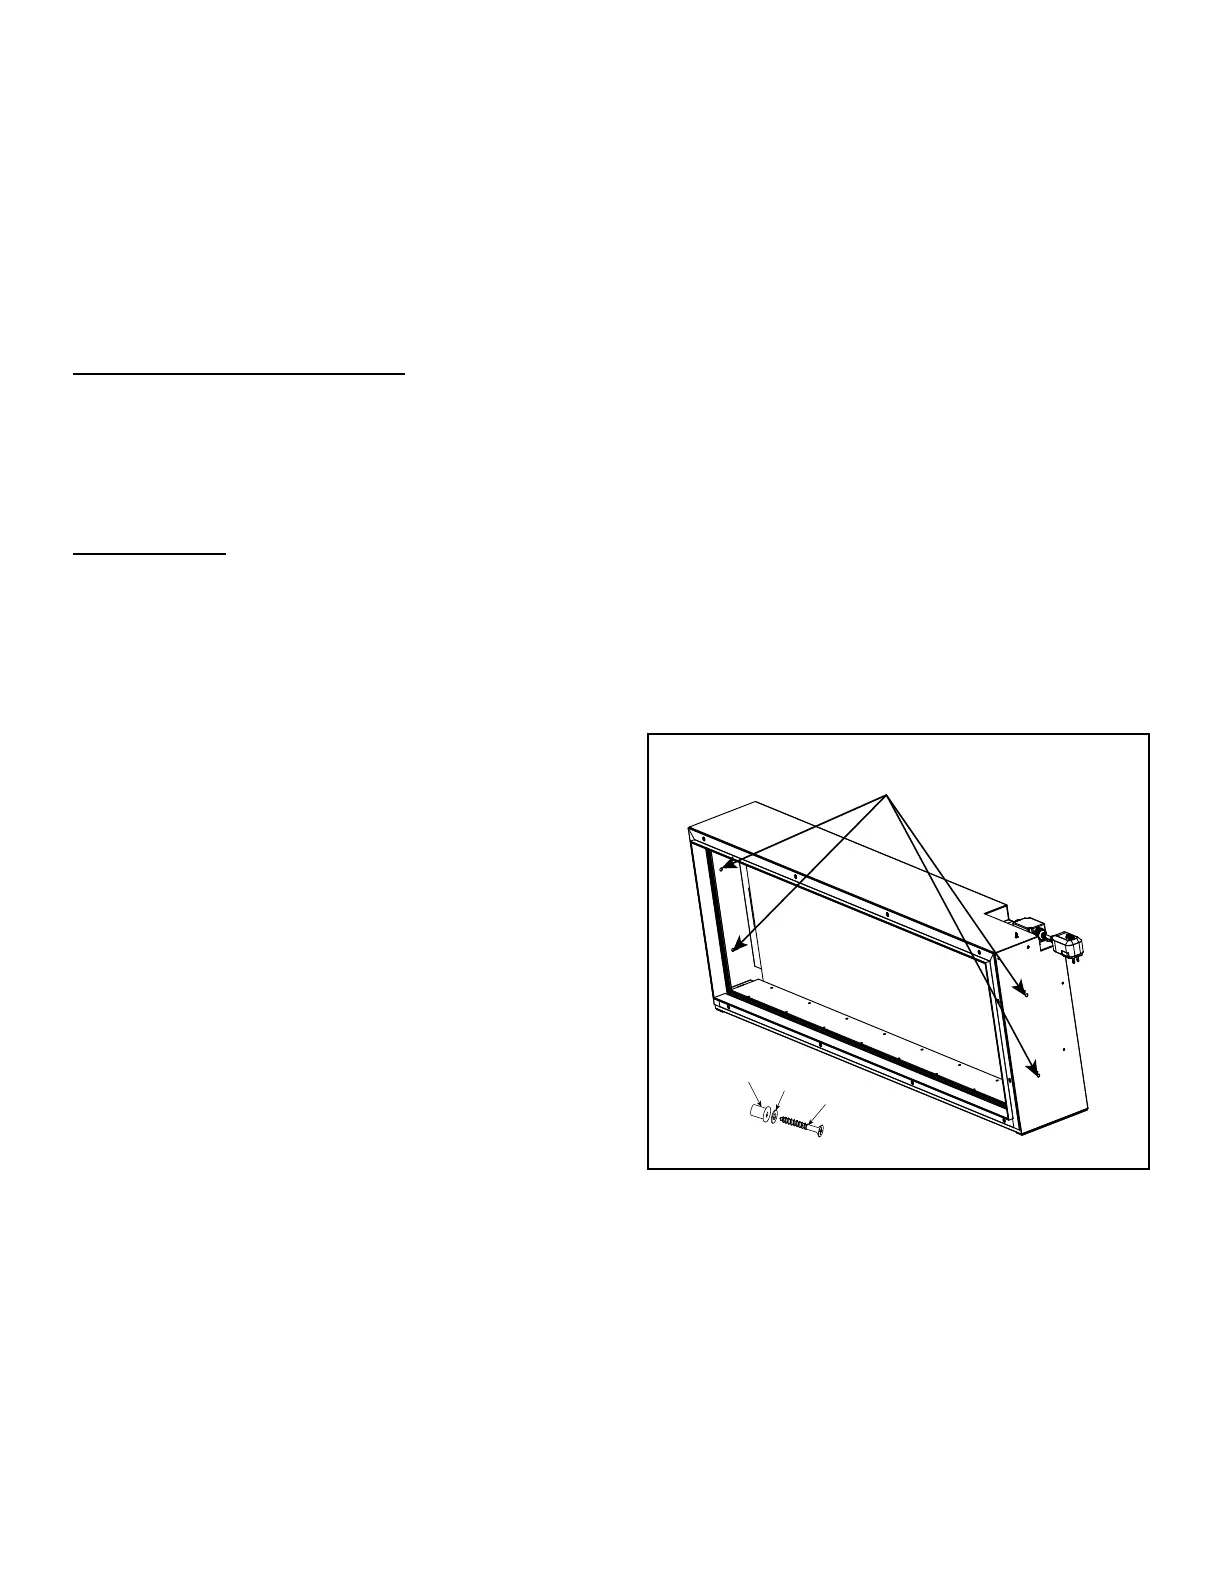
MOUNTING HOLES
RUBBER
BUSHING
WASHER
WOOD
SCREW
Figure 4.6
1. Connect to electrical service. Reference Section
4.F.
2. Install the appliance into the opening. Ensure that
weight of appliance is fully supported by oor or bot-
tom framing member. Level with shims if necessary.
Ensure that it is centered left to right, then fasten it
directly to the framing.
3. For recessed installations using the Front Trim, the
appliance should be pushed into the nished open-
ing until the outer edge of the nishing stops are
ush with the nished surface. See Figure 4.8.
4. With the appliance in place, leveled and plum, attach
it to the framing using 4 sets of the provided rubber
bushings, washers, and wood screws through the
appliance mounting holes. See Figure 4.6.
D. Installation
 Loading...