Legs or heels
to be fitted as
indicated
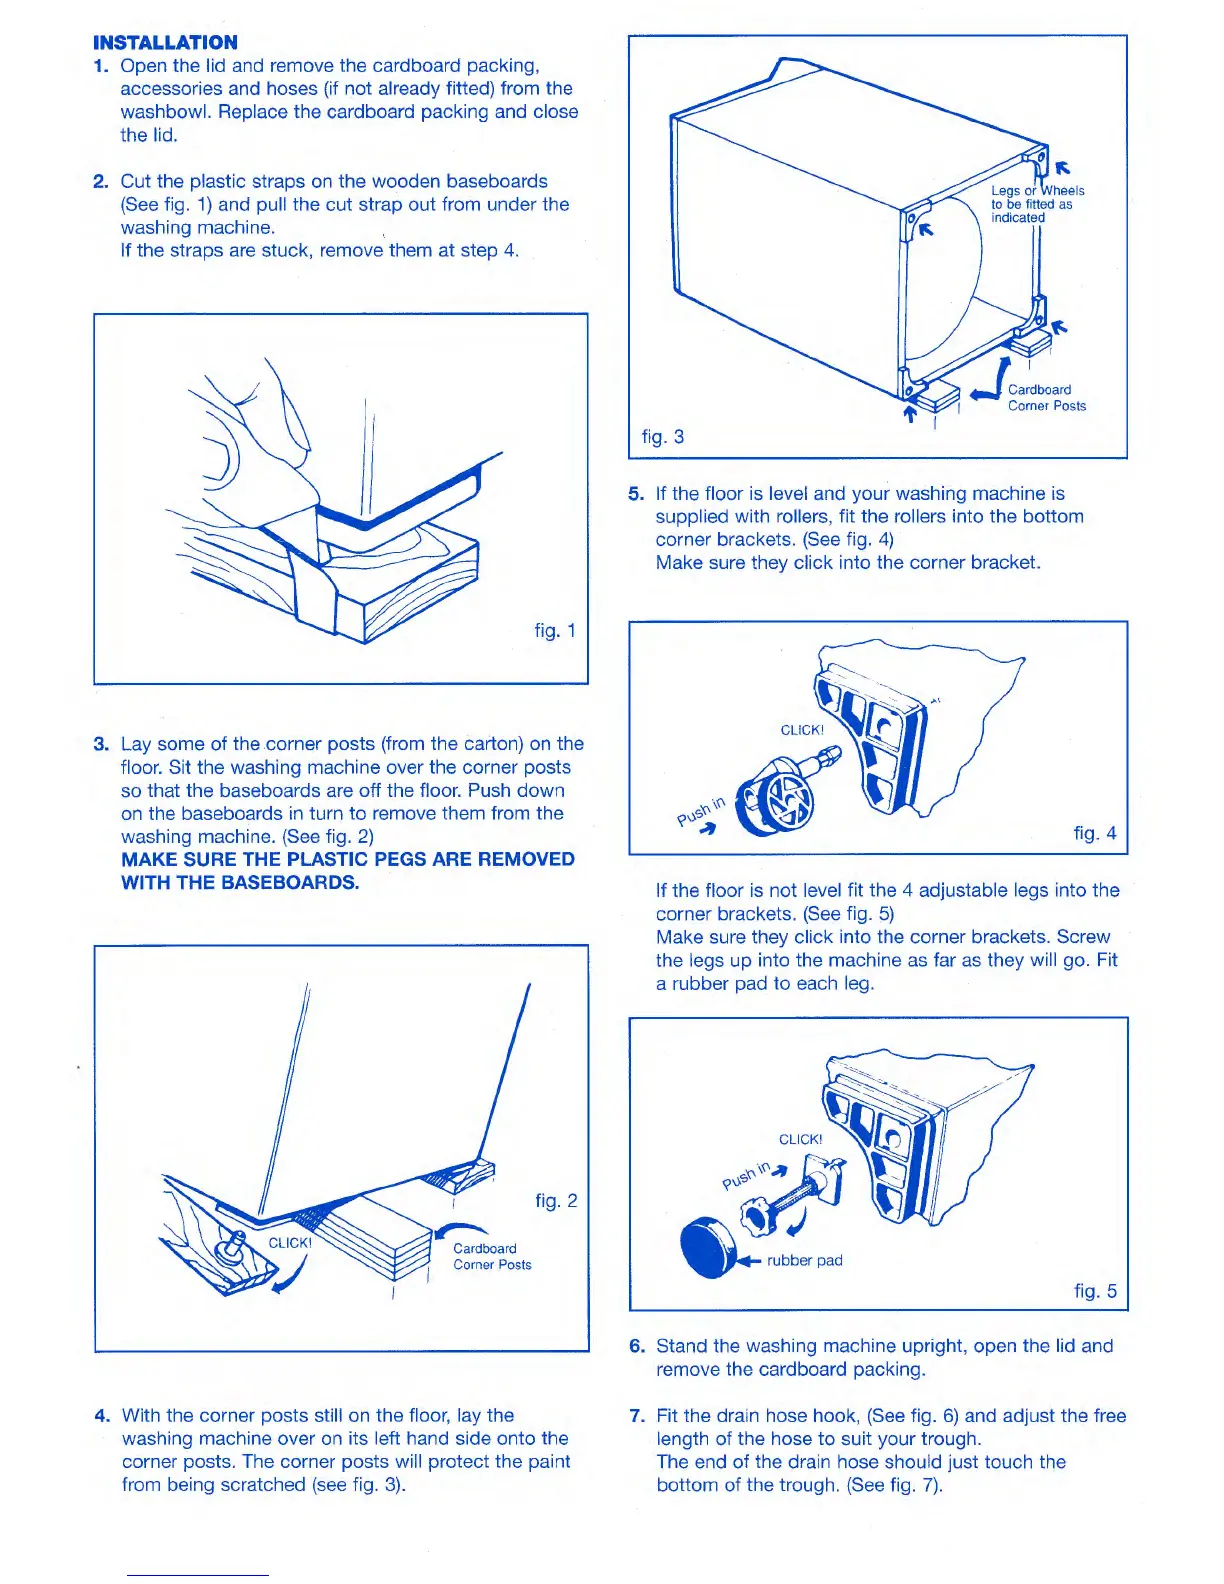
INSTALLATION
1.
Open the lid and remove the cardboard packing,
accessories and hoses (if not already fitted) from the
washbowl. Replace the cardboard packing and close
the lid.
2.
Cut the plastic straps on the wooden baseboards
(See fig. 1) and pull the cut strap out from under the
washing machine.
If the straps are stuck, remove them at step 4.
3.
Lay some of the corner posts (from the carton) on the
floor. Sit the washing machine over the corner posts
so that the baseboards are off the floor. Push down
on the baseboards in turn to remove them from the
washing machine. (See fig. 2)
MAKE SURE THE PLASTIC PEGS ARE REMOVED
WITH THE BASEBOARDS.
4.
With the corner posts still on the floor, lay the
washing machine over on its left hand side onto the
corner posts. The corner posts will protect the paint
from being scratched (see fig. 3).
5.
If the floor is level and your washing machine is
supplied with rollers, fit the rollers into the bottom
corner brackets. (See fig. 4)
Make sure they click into the corner bracket.
If the floor is not level fit the 4 adjustable legs into the
corner brackets. (See fig. 5)
Make sure they click into the corner brackets. Screw
the legs up into the machine as far as they will go. Fit
a rubber pad to each leg.
6.
Stand the washing machine upright, open the lid and
remove the cardboard packing.
7.
Fit the drain hose hook, (See fig. 6) and adjust the free
length of the hose to suit your trough.
The end of the drain hose should just touch the
bottom of the trough. (See fig. 7).