8
You can enter a heading oset from a compatible display unit.
You will have an oset in the pitch/roll output if the unit is not installed on a horizontal plane.
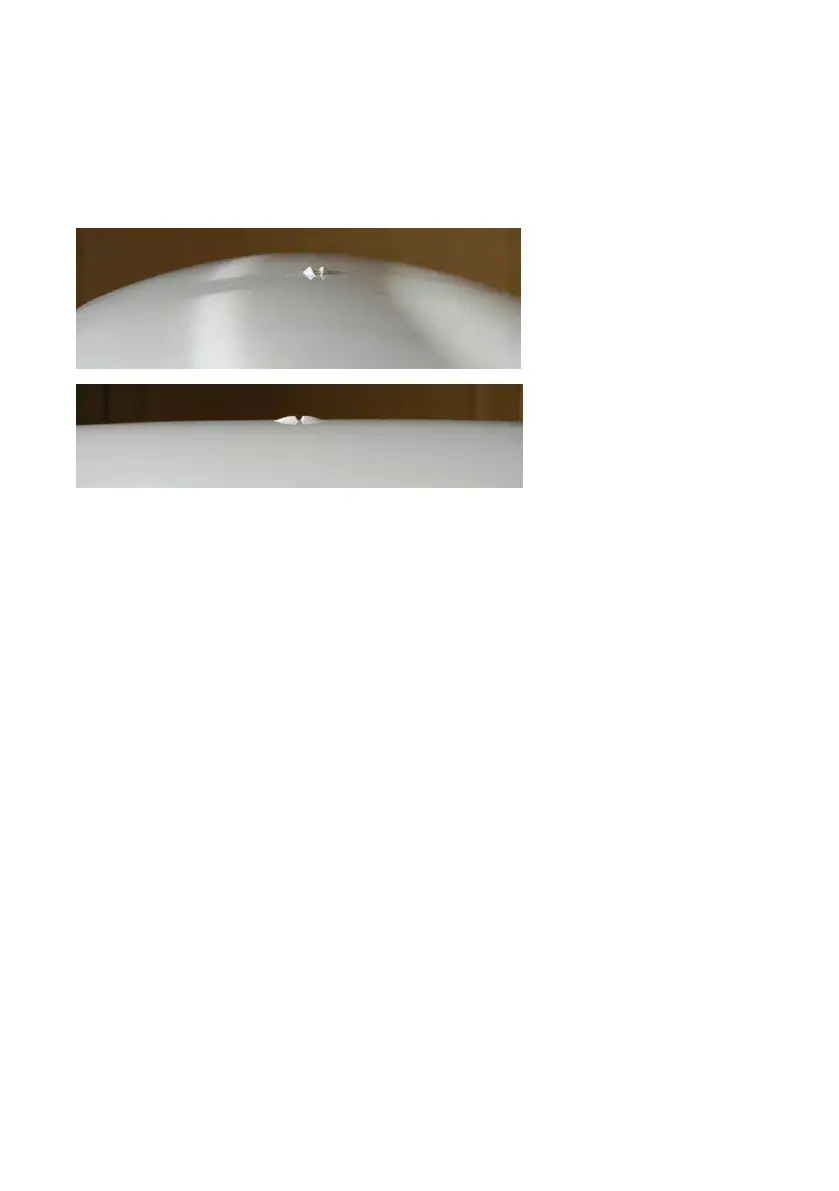
Alignment
The top of the enclosure incorporates sight design features to help you align the enclosure with
respect to the vessel.
Alignment accuracy is
approximately +/- 2°.
Mounting options
The HS75 oers four dierent mounting options:
• Surface mounting options:
• No adapter. HS75 is secured with screws from the underside of the mounting surface. Cable
exits through the mounting surface.
• Using a low prole adapter secured with screws from the top of the mounting surface.
Cable exits through the mounting surface.
• Using a high prole adapter secured with screws from the top of the mounting surface.
Cable exits through the adapter, above the mounting surface.
• Pole mounting
Surface mounting without an adapter
1 Use the supplied mounting template to mark and drill the required holes for the screws and the
cable.
2 Place the HS75 over the mounting holes and insert the mounting screws (M8) through the bottom
of the mounting surface into the HS75.
3 Tighten to a torque of 11 - 13 NM (8 - 10 lbs-ft). The maximum thread depth engagement must be
no more than 12 mm (0.50“).
4 Connect the NMEA 2000
®
drop cable to the HS75.