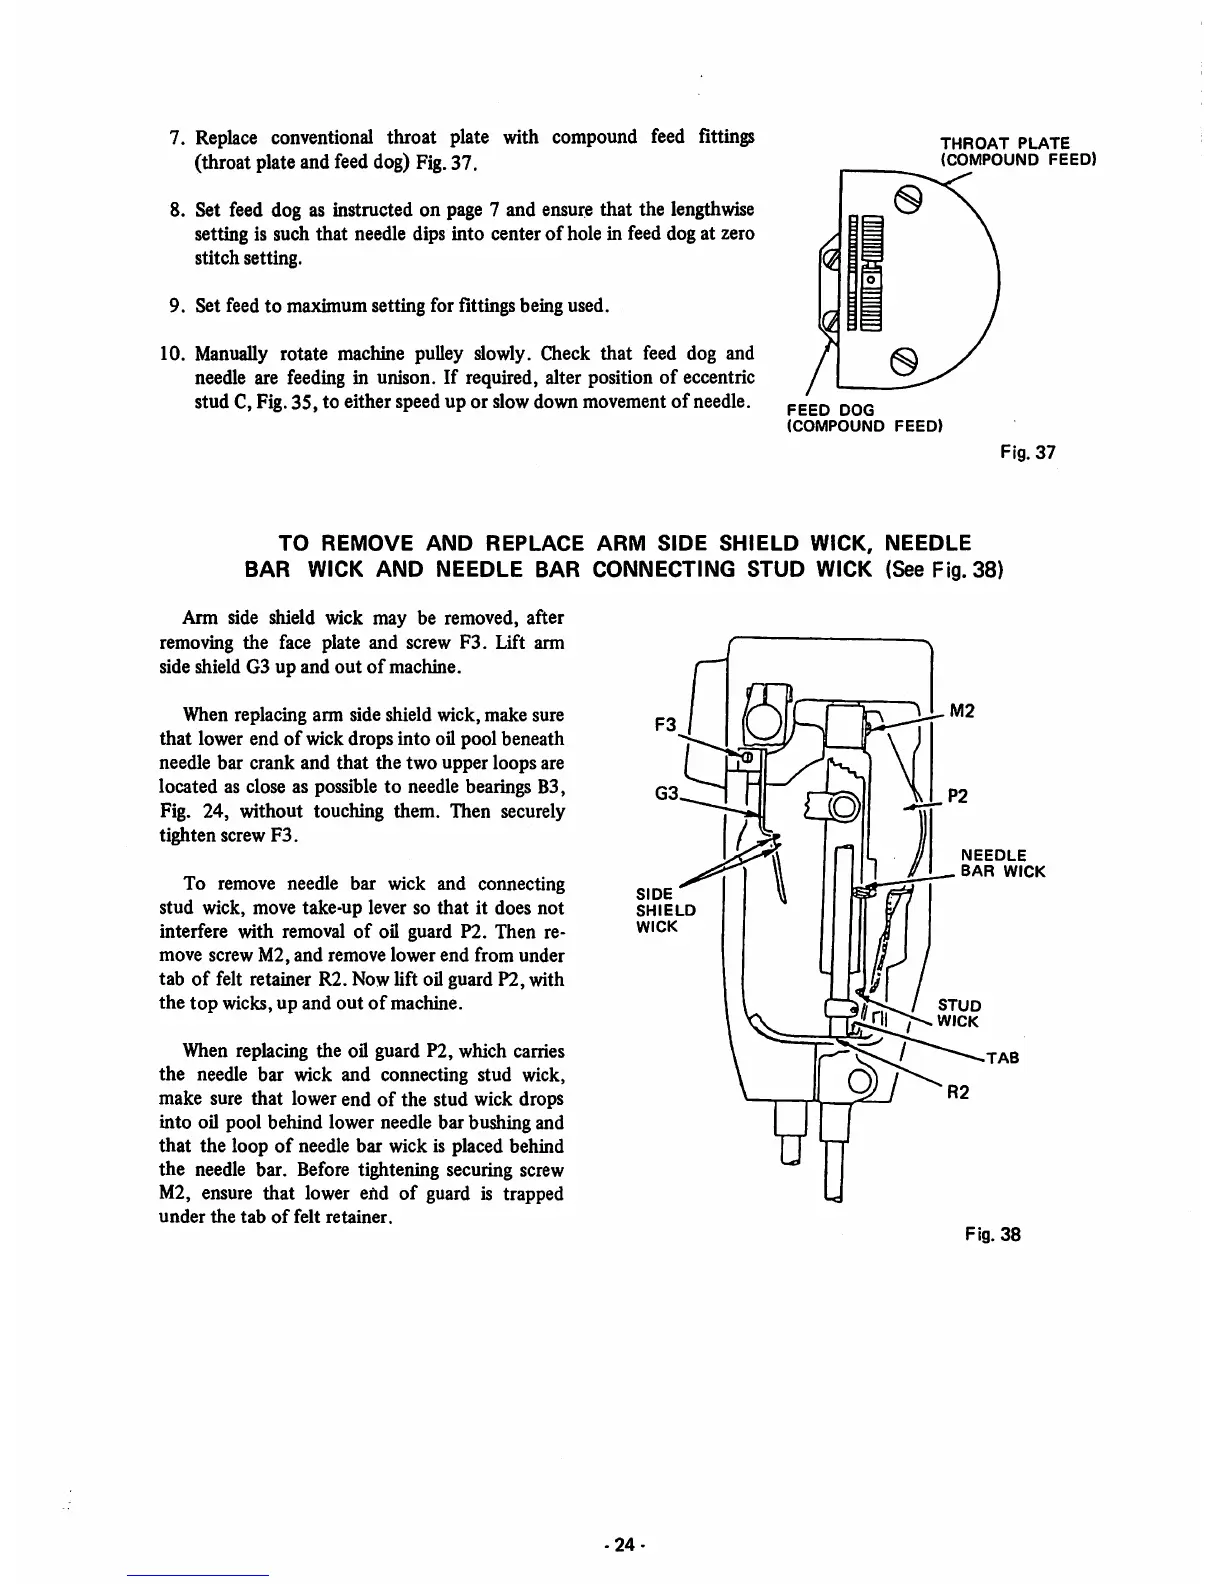
7.
Replace
conventional throat plate with compound feed fittings
(throat plate and feeddog) Fig.37.
8. Set feed dog as instructed on page 7 and ensure that the lengthwise
setting is such that needle dips into center
of
hole in feed dog at zero
stitch setting.
9. Set feed
to
maximum setting for fittings being used.
10. Manually rotate machine pulley slowly. Check that feed dog and
needle are feeding in unison. If required, alter position
of
eccentric
stud C, Fig.35, to either speed up or slow down movement of needle.
THROAT
PLATE
(COMPOUND
FEED)
FEED
DOG
(COMPOUND
FEED)
Fig.
37
TO
REMOVE
AND
REPLACE
ARM
SIDE
SHIELD
WICK,
NEEDLE
BAR WICK AND NEEDLE BAR CONNECTING STUD WICK (See Fig. 38)
Arm side shield wick may be removed, after
removing the face plate and screw F3. Lift arm
side shield G3 up and
out
of
machine.
When replacing arm side shield wick,
make
sure
that
lower end
of
wick drops
into
oil pool beneath
needle bar crank and
that
the two upper loops are
located as close as possible to needle bearings B3,
Fig. 24, without touching them. Then securely
tighten screw
F3.
To remove needle bar wick and connecting
stud
wick, move take-up lever so
that
it does
not
interfere with removal
of
oil guard P2. Then re
move screw M2,
and
remove lower
end
from
under
tab
of
felt retainer R2. Now lift oil guard P2, with
the
top
wicks, up and
out
of
machine.
When replacing the oil guard P2, which carries
the needle bar wick and connecting stud wick,
make sure that lower end
of
the stud wick drops
into oil pool behind lower needle bar bushing and
that
the loop
of
needle
bar
wick is placed behind
the needle bar. Before tightening securing screw
M2, ensure
that
lower end
of
guard is trapped
under
the
tab
of
felt
retainer.
SIDE
SHIELD
WICK
-24-
NEEDLE
BAR
WICK
„ STUD
ni WICK
TAB
Fig.
38