!:l:iFlEaliii
5678910r.t1213ta
ffi
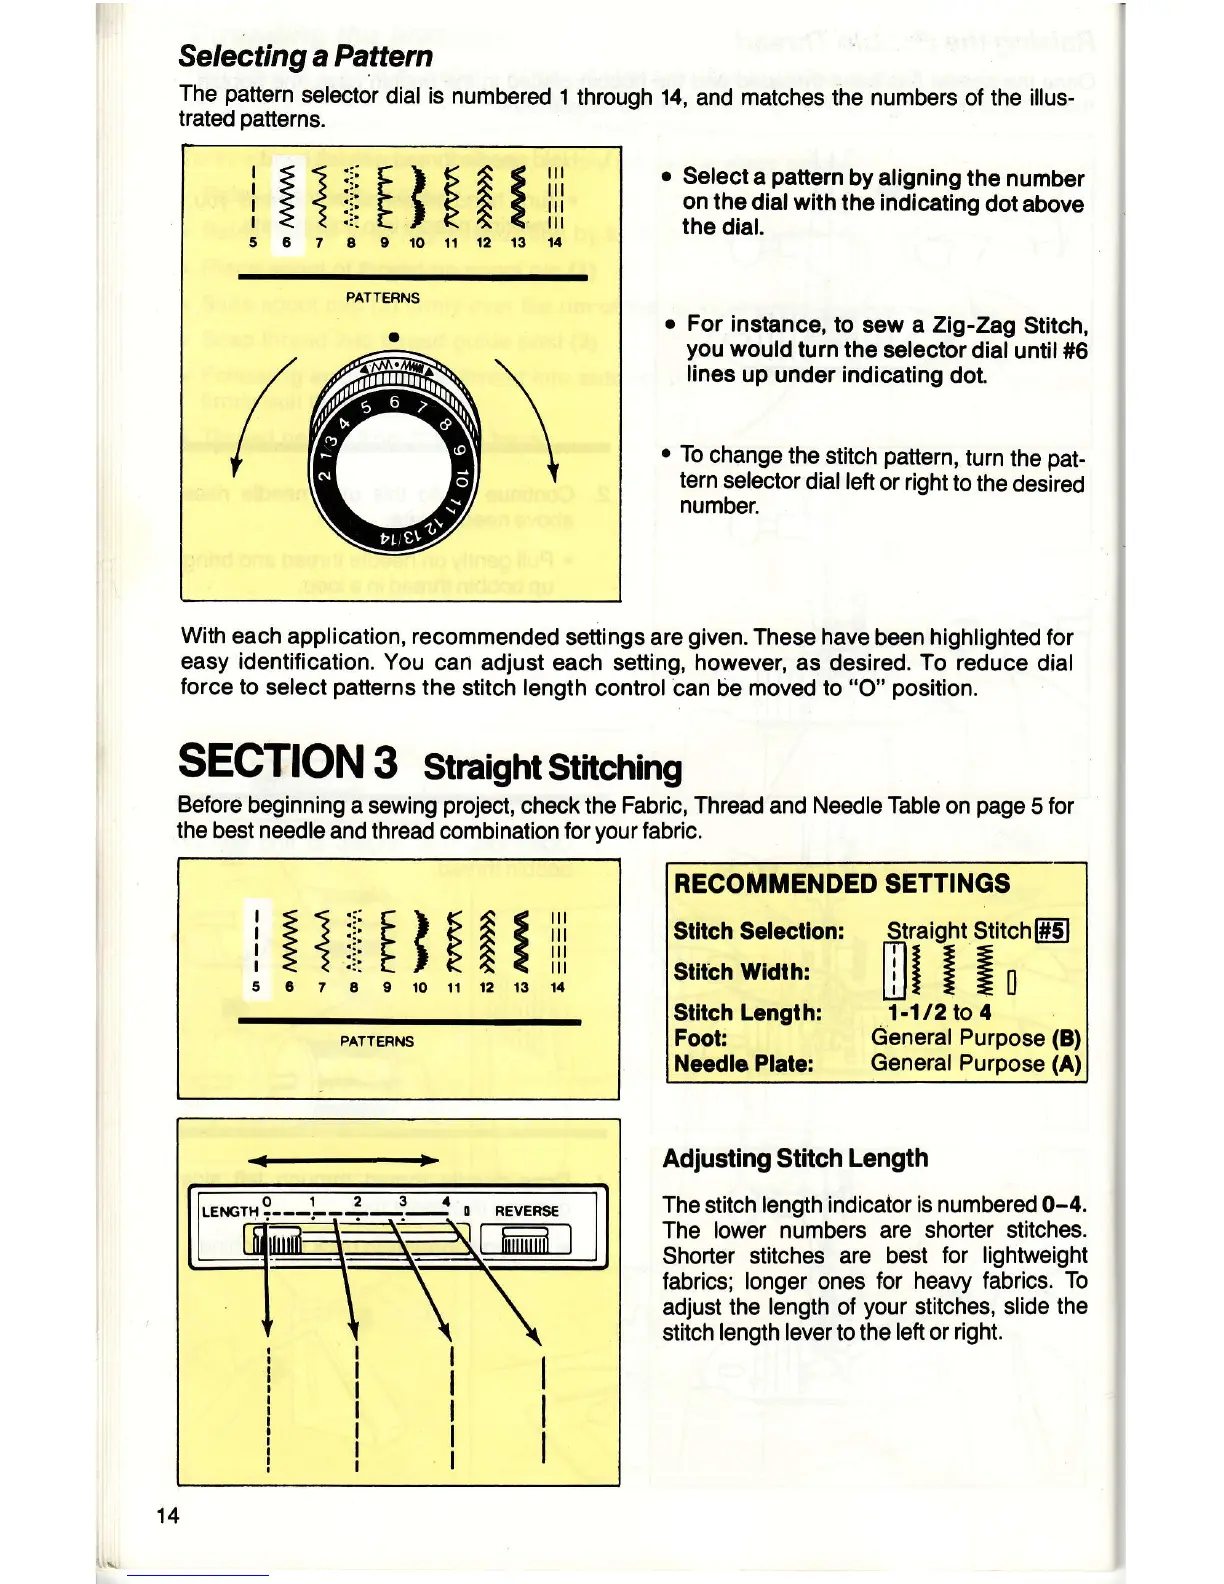
Selecting
a Pattern
The
pattern
selector
dial is numbered
1
trated
patterns.
through 14,
and matches the numbers of the illus-
r
Select
a
pattern
by aligning
the
number
on the
dial with
the indicating
dot above
the
dial.
o
For
instance,
to
sew a Zig-Zag
Stitch,
you
would
turn the
selector dial
until 116
lines
up under indicating
dot.
o
To
change
the stitch
pattern,
turn
the
pat-
tern
selector
dial
left
or
right
to
the
desired
number.
With
each application, recommended
settings are
given.
These have
been
highlighted for
easy identification.
You
can adjust each setting, however, as desired. To reduce
dial
force
to
select
patterns
the
stitch length
control can be
moved to
"O"
position.
SECTION
3
Straight
Stitching
Before
beginning
a sewing
project,
check the
Fabric, Thread
and
Needle Table
on
page
5
for
the best needle
and thread combination for
your
fabric.
RECOIT'MENDED
SETTINGS
Stltch Selectlon:
silrbh
wtdrh:
Stllch
Length:
Foot:
Needle Plate:
Straight StitchffiJ
Lill
lln
1-112lo 4
General Purpose
(B)
General
Purpose (A)
Adjusting Stitch
Length
The stitch length indicator
is numbered 0-4.
The lower numbers are
shorter stitches.
Shorter stitches
are best
for lightweight
fabrics; longer ones for
heavy fabrics.
To
adjust the
length
of
your
stitches, slide
the
stitch
length levertothe
left
or
right.
[i"
I
i:l::iFlFAliil
5C7a0r0ilt21314
PATTEFNS
REVERSE
I nn-im
I
14